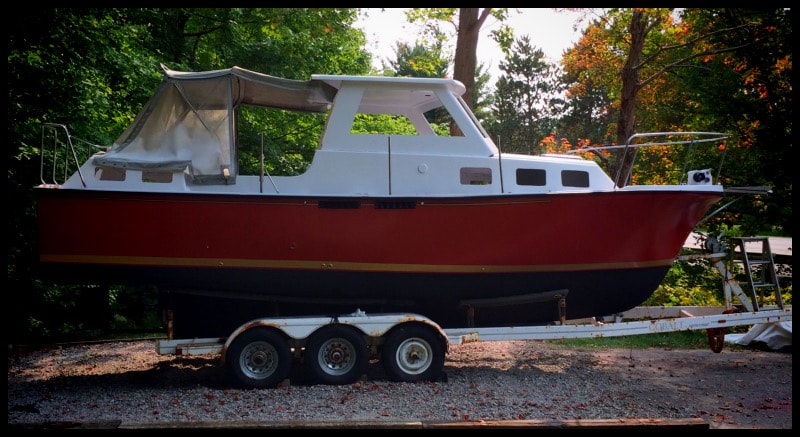
Painting an Albin 27
On a 30 year old boat--paint it and make it yours. You will never regret it and you will smile every time you see your boat. You will turn heads even with a 5-10 ft rule paint job vs a buff job. I too chased the buffed hull endlessly with nothing but a lot of wasted time and effort. It makes sense on certain boats of certain age, but unless your hull, deck, interior is Un-characteristically immaculate, it will look like a 30 year old buffed hull when your done. What you want is a new boat look. Make it the boat you want & it doesn't have to be white or off white. Here are my thoughts on various one-part paint options for DIY boat restoration.
Paint Options
Interlux Brightside. The go-to standard. I did my classic 30ft sailboat with brightside using the roll and tip method and it last 8+ years through all sorts of abuse. As stated it lays down really well, settles to a nice even coat. The only problem with brightside is the cost. It can be almost 2-3x other paint options, which when you're doing a deck and hull or even interior can cost an arm and leg. Only certain colors easily come in quart size so plan ahead.
Rustoleum Marine Topside. I recently switched to Rustoleum marine topside paint for the A27. I find it lays down as good as the brightside at less than 1/2 the cost. My current small pilothouse sailboat was done exclusively with Rustoleum Marine. It looks like a new boat. The only thing I don't like about the Rustoleum marine paint is the coverage. I find it takes several coats and I feel like it takes a lot to get good coverage even with a dedicated primer. I'm switching to straight Rustoleum when I can.
Rustoleum Marine Topside. I recently switched to Rustoleum marine topside paint for the A27. I find it lays down as good as the brightside at less than 1/2 the cost. My current small pilothouse sailboat was done exclusively with Rustoleum Marine. It looks like a new boat. The only thing I don't like about the Rustoleum marine paint is the coverage. I find it takes several coats and I feel like it takes a lot to get good coverage even with a dedicated primer. I'm switching to straight Rustoleum when I can.
Latex Acrylic Paint. I painted the Mustang 22 sailboat with latex exterior paint on the boat interior. The latex held up very well, so much so it made me a believer in using latex on a boat. There's much discussion on this online and people will cry heresy but if you research it's a viable option for a budget DIY. Exterior latex can be as cheap as 1/4 the cost of brightside so don't rule it out. It's also easy to spray with a household airless sprayer and easy to cleanup.
Sherman Williams Auto Enamel Paint. I used on the Mustang 22 sailboat hull in dark blue, also via brush and tip. It held up very well. I painted a white hull dark navy blue and while there were touch ups over time due to scrapes and bumps it was normal wear on a dark hull. The Sherman Williams was about 60% the cost of Interlux Brightside. The only down side is I found, its not as forgiving as the brightside for applying on a hot day. I ended up with a slight orange peel visible at 5ft rule. I don't know that I'd use it again. It also came only in gallons so there's no economical "touchup" quantity to buy and have on hand. I prefer Rustoleum because you can get it in gallons or quarts.
Sherman Williams Urethane Alkyd Enamel. Fall 2017. This was a last minute choice I used for the red hull of the Albin 27. I can't say I'm a big fan. The paint dried on time and super hard, but the resulting orange peel was the worst of any paint I've used so far. I had to cut with Pentetrol Flood and use Sherman Williams flockfoam rollers. Even then the orange peel was ever present.
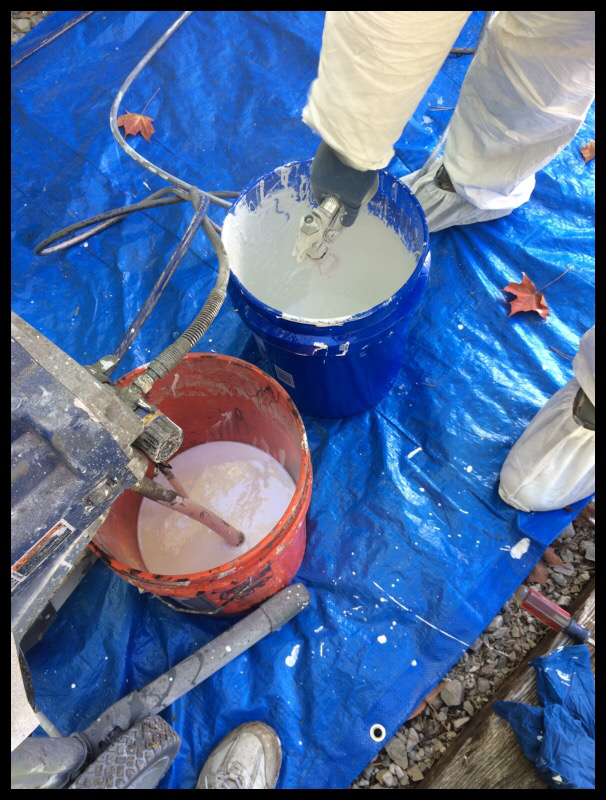
I love Killz, but....I've used a version of Killz as primer with great results. It had an anti mold agent and it worked great. The disadvantage of Killz is its thick primer and it clogged my airless sprayer before I could clean it and that was the end of that. Loose a couple hundred dollar sprayer to thick primer and you will learn a tough lesson. For the Albin 27 I used Zinser Cover Stain which is an oil based primer that is relatively thin out of the can. It can be sprayed with an airless sprayer quite well. When you buy the Cover Stain, be sure to get it from a store that does not hold inventory too long. The internet has lots of stories of this paint sitting on the shelf for extended periods of time and it gets thicker. When you open your can of primer, fresh primer should appear as a thin consistency and you should have no doubt you can spray it. If not return the can you have and go to another big box store searching for a fresh can.
Airless Sprayers. I sprayed the interior of the Mustang 22 sailboat using a household airless sprayer. Fantastic. There is no better way to give a boat a facelift. The boat literally became brand new before my eyes. A sprayer gets into every cranny evenly. Excellent fool proof coverage. Fast & flawless. But your hull has to be bare and everything taped off or removed. For the Albin 27, I used a $300 Graco x7 airless sprayer. I used this same sprayer to remodel my house, spray my deck, paint my brick wall in the driveway, and spray a garage interior.
Sherman Williams Auto Enamel Paint. I used on the Mustang 22 sailboat hull in dark blue, also via brush and tip. It held up very well. I painted a white hull dark navy blue and while there were touch ups over time due to scrapes and bumps it was normal wear on a dark hull. The Sherman Williams was about 60% the cost of Interlux Brightside. The only down side is I found, its not as forgiving as the brightside for applying on a hot day. I ended up with a slight orange peel visible at 5ft rule. I don't know that I'd use it again. It also came only in gallons so there's no economical "touchup" quantity to buy and have on hand. I prefer Rustoleum because you can get it in gallons or quarts.
Sherman Williams Urethane Alkyd Enamel. Fall 2017. This was a last minute choice I used for the red hull of the Albin 27. I can't say I'm a big fan. The paint dried on time and super hard, but the resulting orange peel was the worst of any paint I've used so far. I had to cut with Pentetrol Flood and use Sherman Williams flockfoam rollers. Even then the orange peel was ever present.
I love Killz, but....I've used a version of Killz as primer with great results. It had an anti mold agent and it worked great. The disadvantage of Killz is its thick primer and it clogged my airless sprayer before I could clean it and that was the end of that. Loose a couple hundred dollar sprayer to thick primer and you will learn a tough lesson. For the Albin 27 I used Zinser Cover Stain which is an oil based primer that is relatively thin out of the can. It can be sprayed with an airless sprayer quite well. When you buy the Cover Stain, be sure to get it from a store that does not hold inventory too long. The internet has lots of stories of this paint sitting on the shelf for extended periods of time and it gets thicker. When you open your can of primer, fresh primer should appear as a thin consistency and you should have no doubt you can spray it. If not return the can you have and go to another big box store searching for a fresh can.
Airless Sprayers. I sprayed the interior of the Mustang 22 sailboat using a household airless sprayer. Fantastic. There is no better way to give a boat a facelift. The boat literally became brand new before my eyes. A sprayer gets into every cranny evenly. Excellent fool proof coverage. Fast & flawless. But your hull has to be bare and everything taped off or removed. For the Albin 27, I used a $300 Graco x7 airless sprayer. I used this same sprayer to remodel my house, spray my deck, paint my brick wall in the driveway, and spray a garage interior.
Before you Paint...
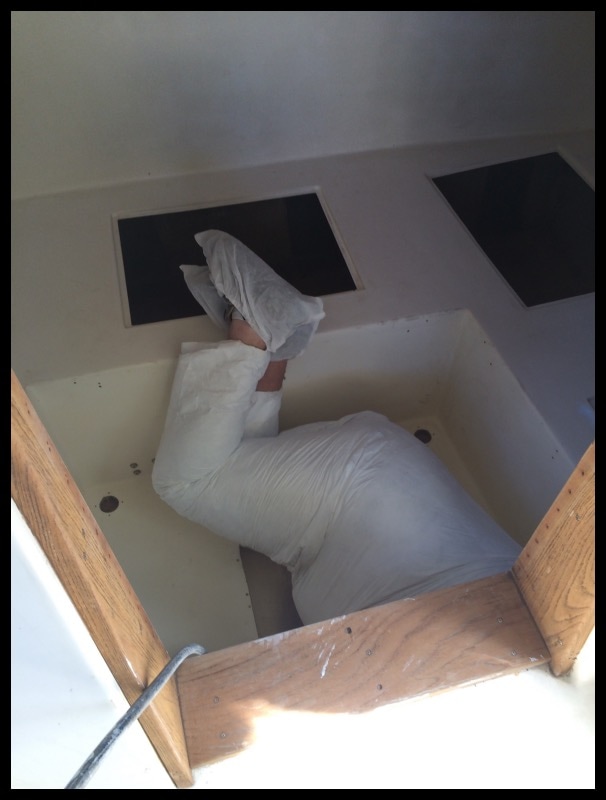
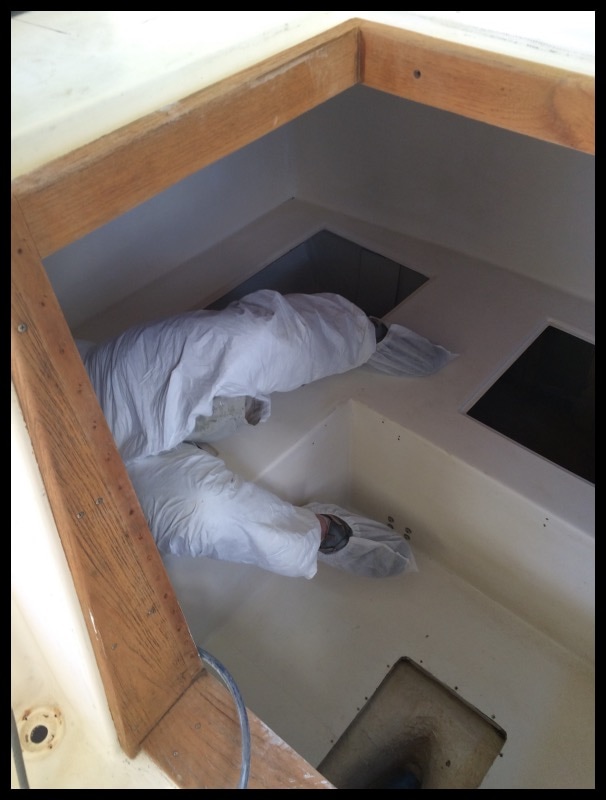
bunch of little projects have to be completed around the boat before it can be pressure washed inside and then sprayed with white paint inside. Then from there, I will start painting the engine room and bilge. The list seems like it never ends and every little project is five more steps just to get it completed:
1. Install ceiling battens
-this will be for the Sintra ceiling panels and headliner
2. Close off aft cabin
-important to have the bulkheads in before paint, but may as well design the drawer system similar to Jay's while it's all apart
3. remove engine mounts. *
- completed this weekend. The aft two mounts were seized. The bolts holding the mounts to the engine bed are not lag bolts but regular threaded bolts. On inspection there looks like threaded metal embedded in the fiberglass engine beds and ur looks aluminum maybe. The engine mounts appear cast aluminum from the destruction I caused with the grinder. Grinder was the only way to get them off after an hour of messing about.
A Note on Thru-hulls
4. Install thru-hulls; just need to seal these in place and may as well do scuppers as well
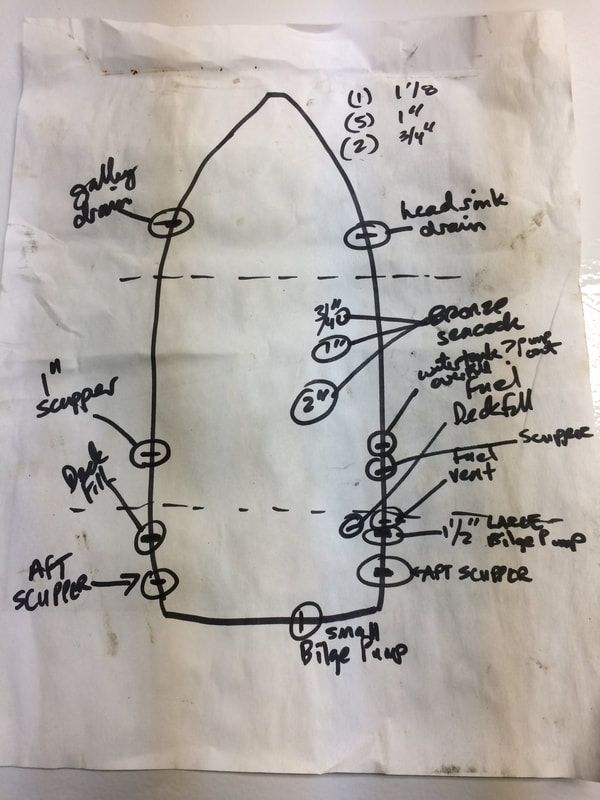
In Most thru-hulls on the Albin 27 are plastic and need to be inspected for both sealant and their continued strength.Some of the plastic thru-hulls and drains have been identified as nylon which are not suitable for below waterline applications. In addition, nylon thru-hulls may deteriorate with 20-30 years of age. How can you tell if your plastic thru-hulls are nylon or cheap plastic? They may be discolored; plastic thru-hulls should appear solid white, not translucent, and not discolored or fading over time. Generally proper plastic thru-hulls with be thicker in construction with "beefier" mushrooms for the outside of the hull. (FYI: Dull black plastic thru-hulls may be Marelon, a type of fiber reinforced plastic that is suitable for below waterline.) In most instances, above the waterline thru-hulls were either 3/4" or 1" thru-hulls in the vicinity of the head, galley, engine compartment, or aft cabin.
From the factory there were only 2-3 below waterline thru-hulls, and these were proper bronze thru-hulls with sea cocks. The below water line thru-hulls were all located in the engine compartment, usually on the starboard side. But you should check every compartment in the aft cabin, forward cabin and the spaces between the engine compartment and the aft cabin for additional thru-hulls added by previous owners.The largest factory installed below water line thru-hull will be 2" and this is the head discharge thru-hull. There may also be a a 1" thru hull for raw water engine cooling, and possibly one additional 3/4" thru-hull for either raw water intake for the head, or maybe an air conditioner cooling pump. The list of thru-hulls looks something like this (but vary boat to boat):
Galley drain- 1" plastic thruhull, port side @1' above waterline
Head sink drain - 1" plastic thruhull, starboard side @1' above waterline
Midship scupper drain- 1" plastic thruhull, starboard side @1' above waterline
Midship scupper drain- 1" plastic thruhull, port side @1' above waterline
Aft scupper drain-1" plastic thruhull, starboard side @1' above waterline
Aft scupper drain-1" plastic thruhull, port side @1' above waterline
Engine room- 3/4" bronze sea cock below waterline, raw water intake head/air conditioner
Engine room- 1" bronze sea cock below waterline, raw water engine cooling
Engine room- 2"" bronze sea cock below waterline, waste pump out
5. check hull-deck joint
- originally planned to skip this, but it makes sense to take a look at it now.
6. Repair cockpit deck& engine hatch
- want to reduce flexing along the center of the engine hatch which I think translates to beefing up the edges of the hatch opening.
7. Install rub strake backing block
-I have a plan for improving the rubbing strake on the aft quarter sides, more to come
8. Mount chain plates *
Backing blocks in place and rigging designed, more to follow under A27 mast thread
9. Fix bow eye backing
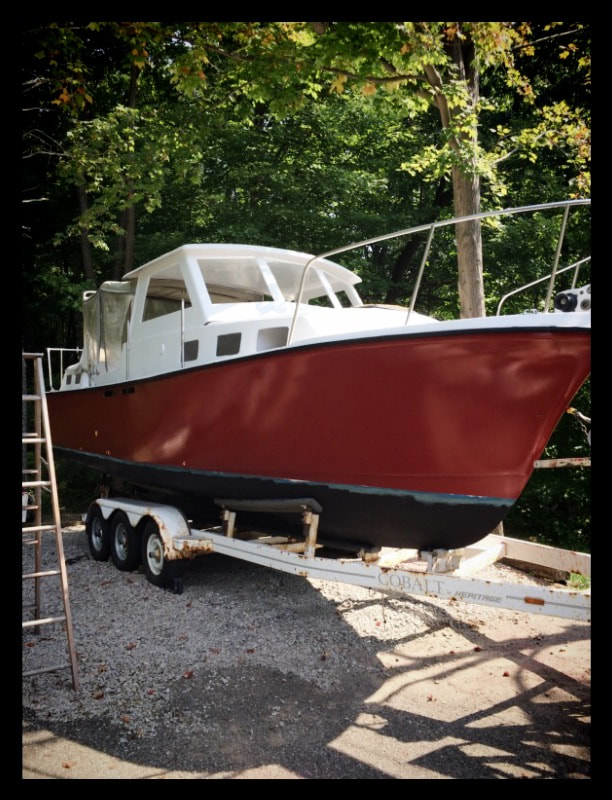
Painting Interior, Deck, and Pilothouse
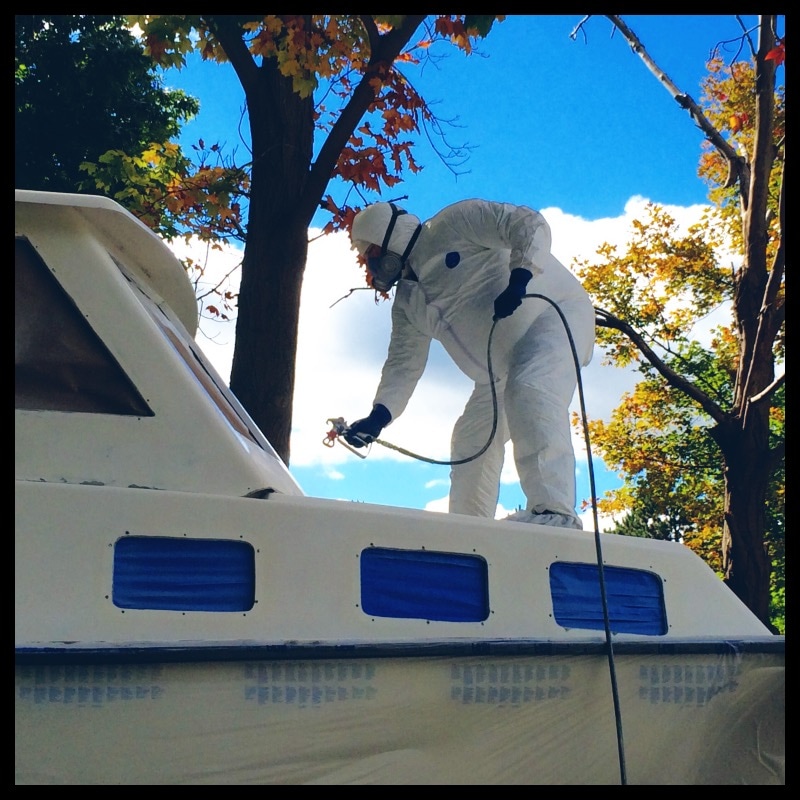
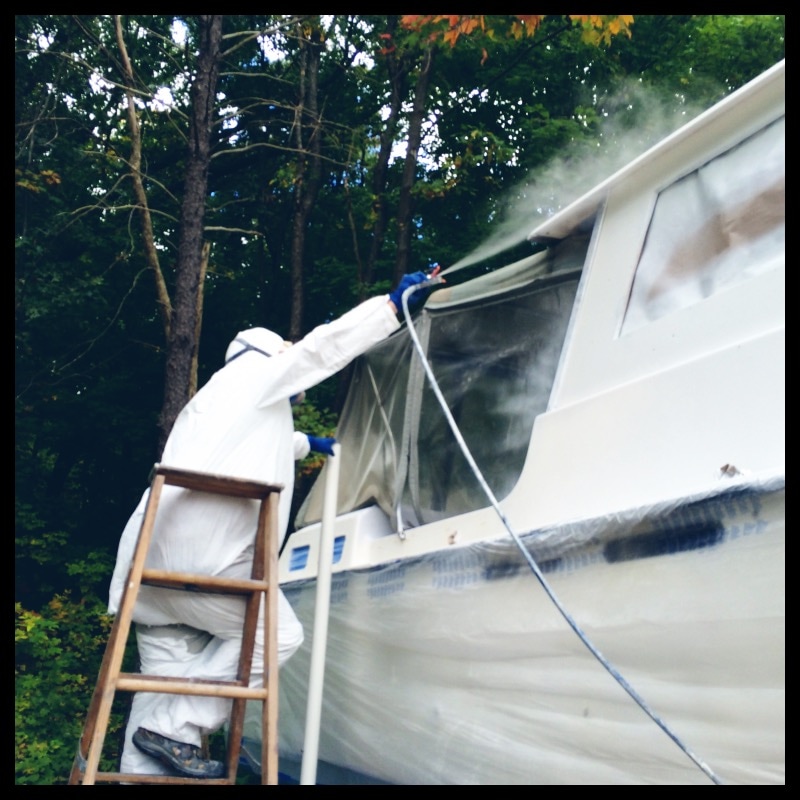
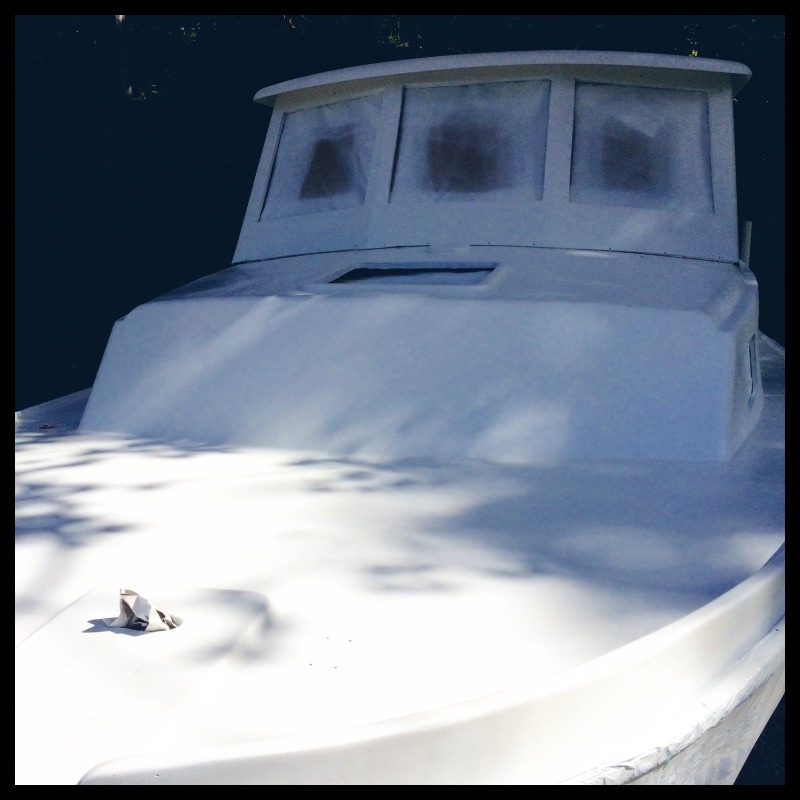
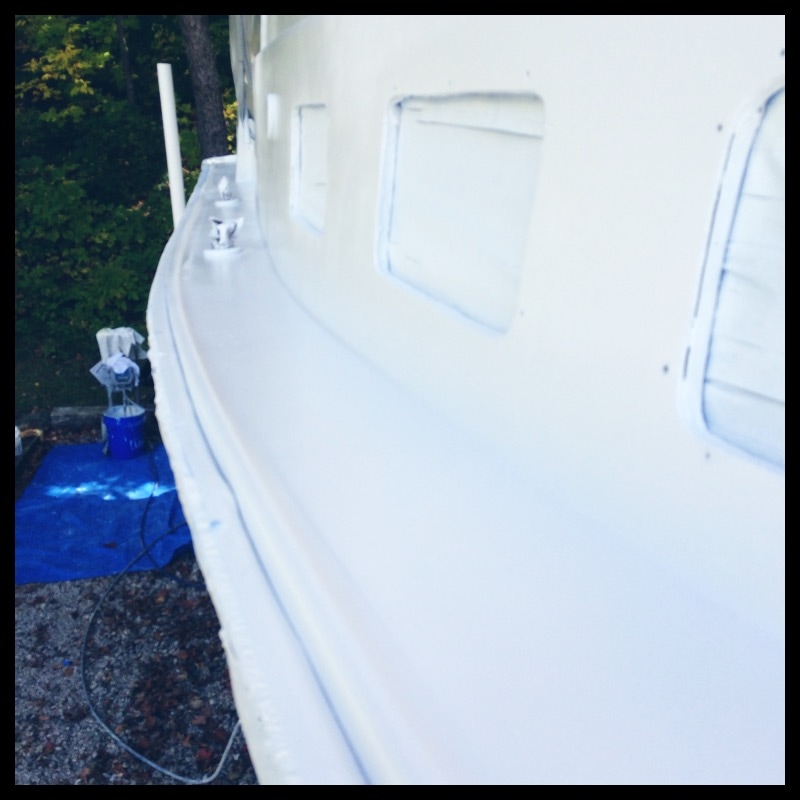
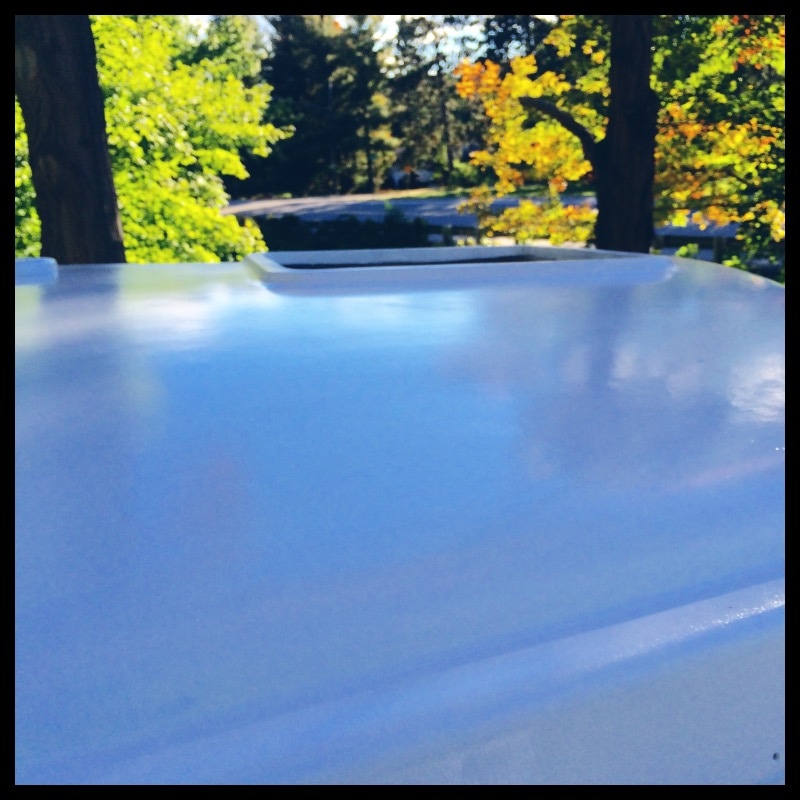
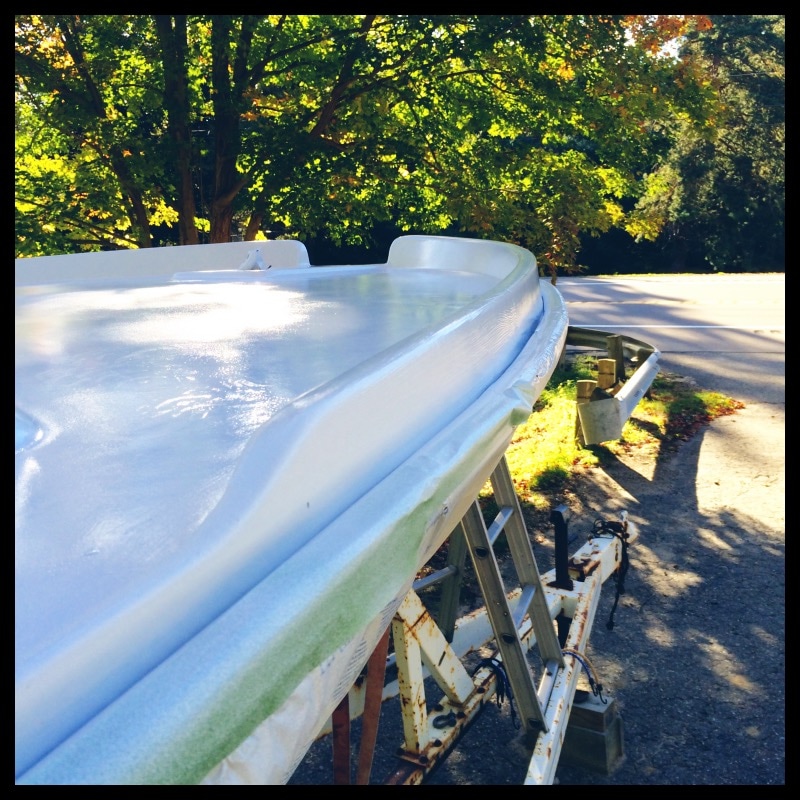
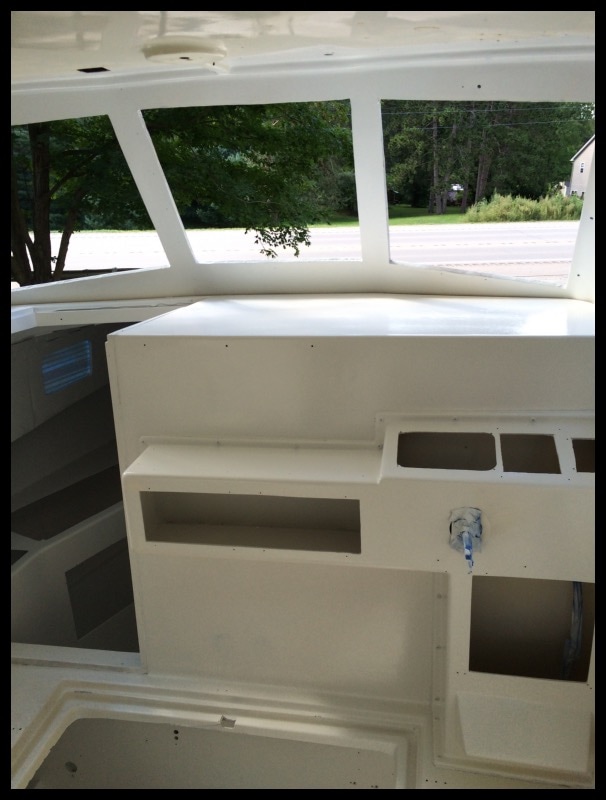
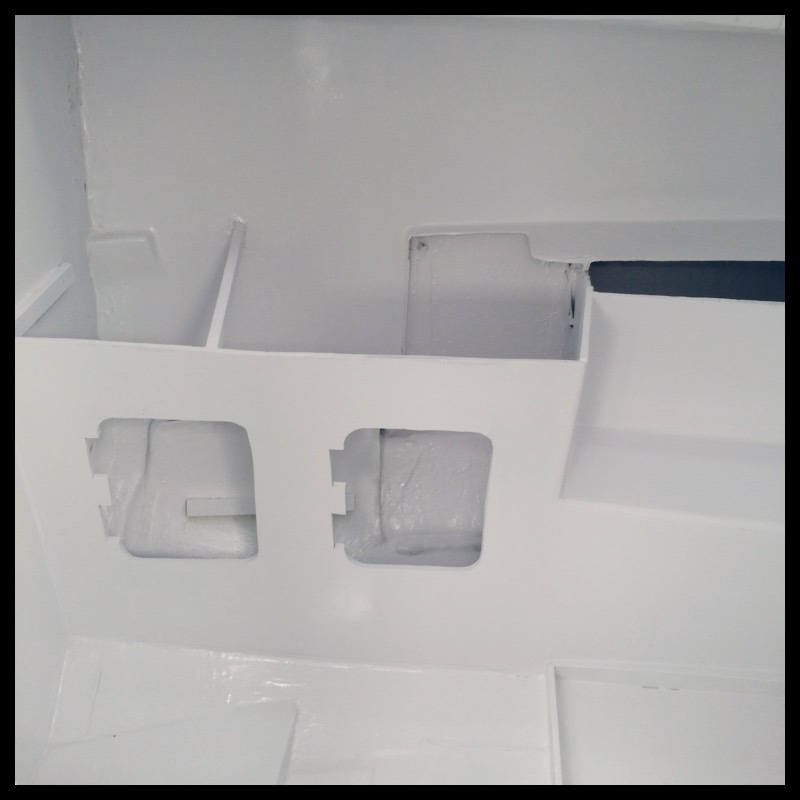
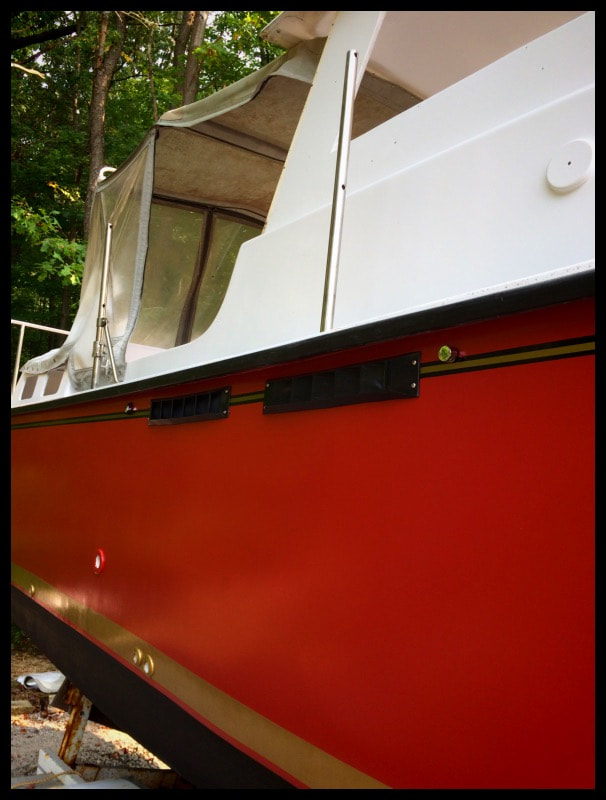
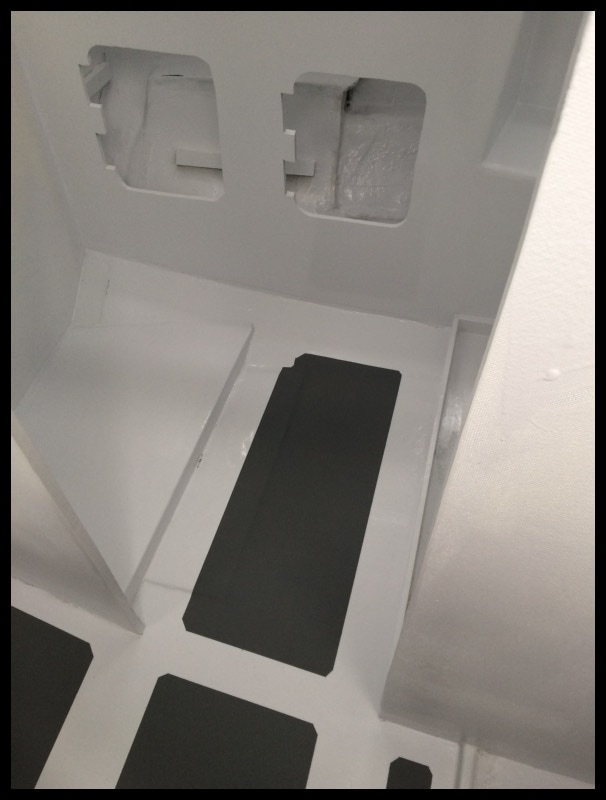
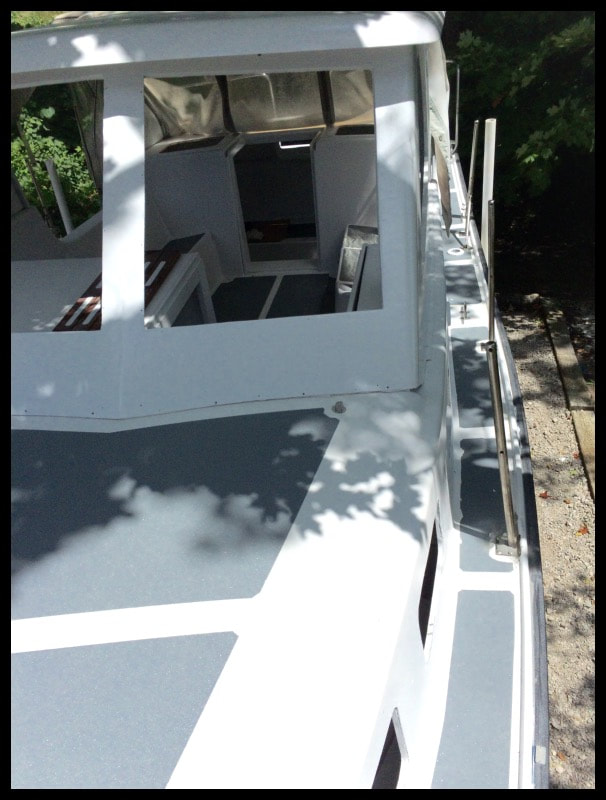
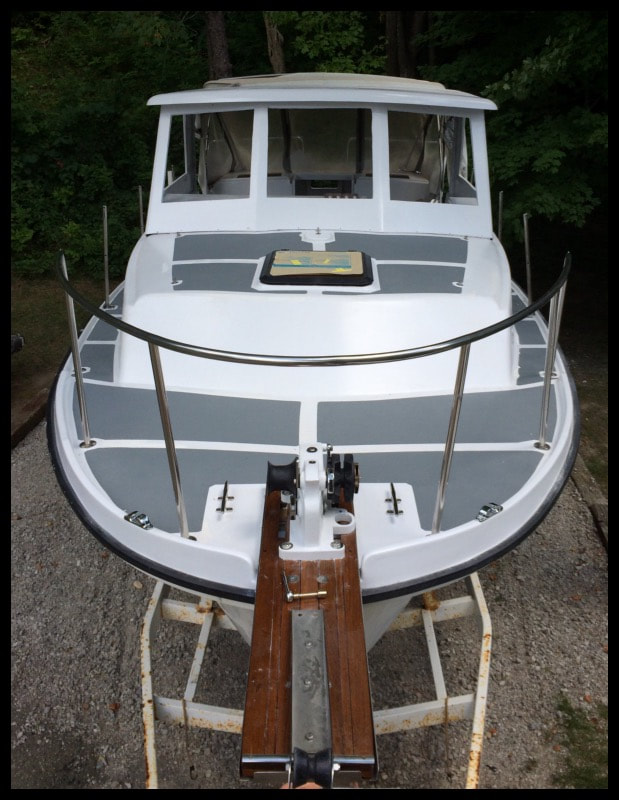
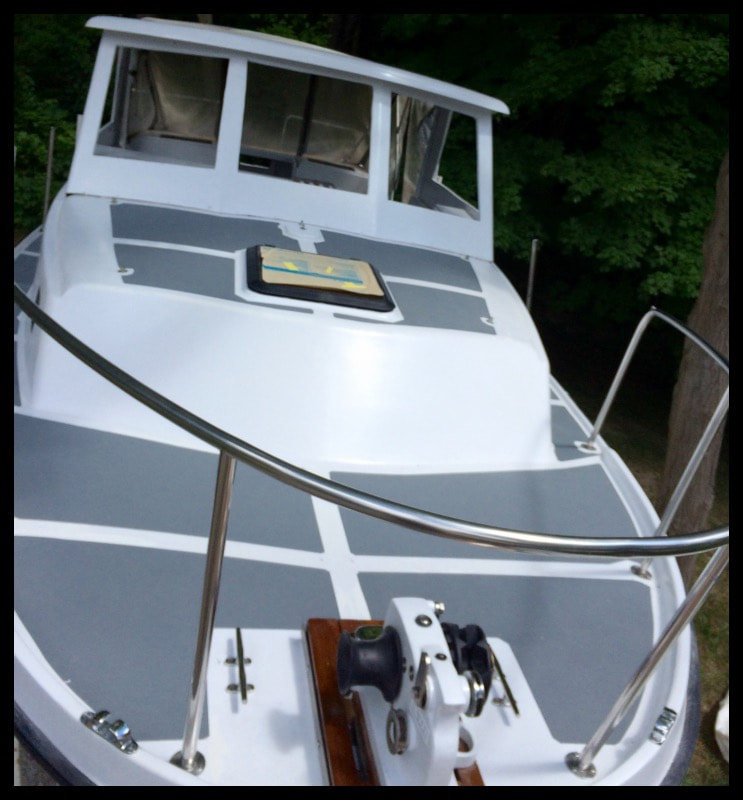
I Painted the deck and pilothouse of my Albin 27 using an airless sprayer (groco x7 with 417 tip). The paint is Rustoleum marine topside sprayed over Zinser Cover Stain primer. The advantage of painting is it allows you to repair all deck gouges, cracks, dings, damaged gelcoat. You can also add raised deck fills, stand outs for running lights, etc. Deck & pilothouse took approximately 2 gallons to spray the primer and approximately one gallon to spray the white cover coat. Improved on my spray technique by messing with pressure setting so no runs. Splatters and mistakes fixed by foam brush while spraying.
More photos of the paint job. Spraying takes about an hour each time. Final coat of paint. The Rustoleum marine topside lays down very well. It flows even on horizontal surfaces in about ten minutes. Light coats work best.
More photos of the paint job. Spraying takes about an hour each time. Final coat of paint. The Rustoleum marine topside lays down very well. It flows even on horizontal surfaces in about ten minutes. Light coats work best.


On my A27 I used Rustoleum marine paint for interior, top sides & deck. I will be switching to Rustoleum enamel to do the hull red or blue. I plan to airless spray the interior with a primer, then the deck and hull.
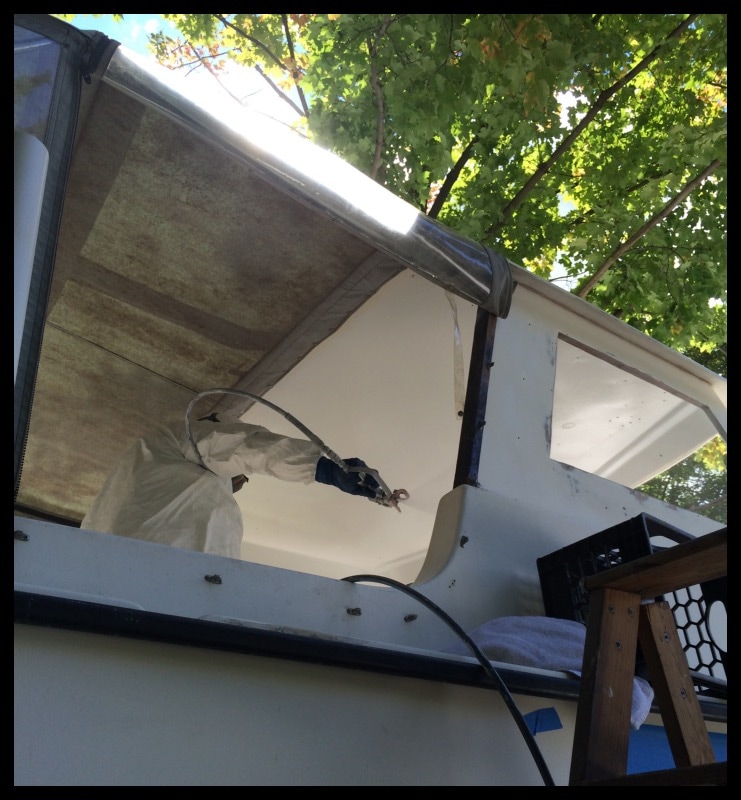
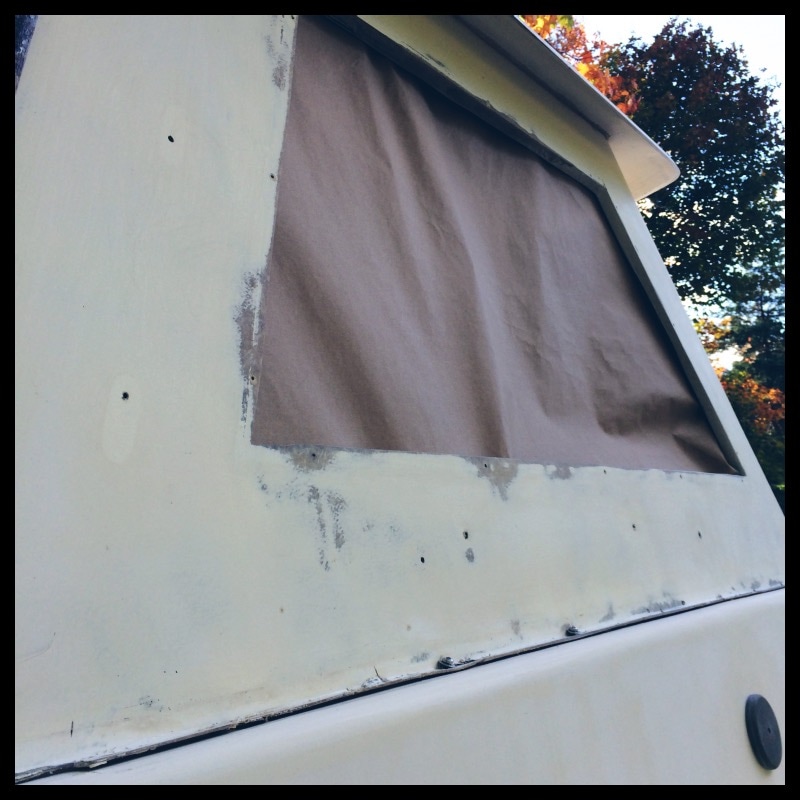
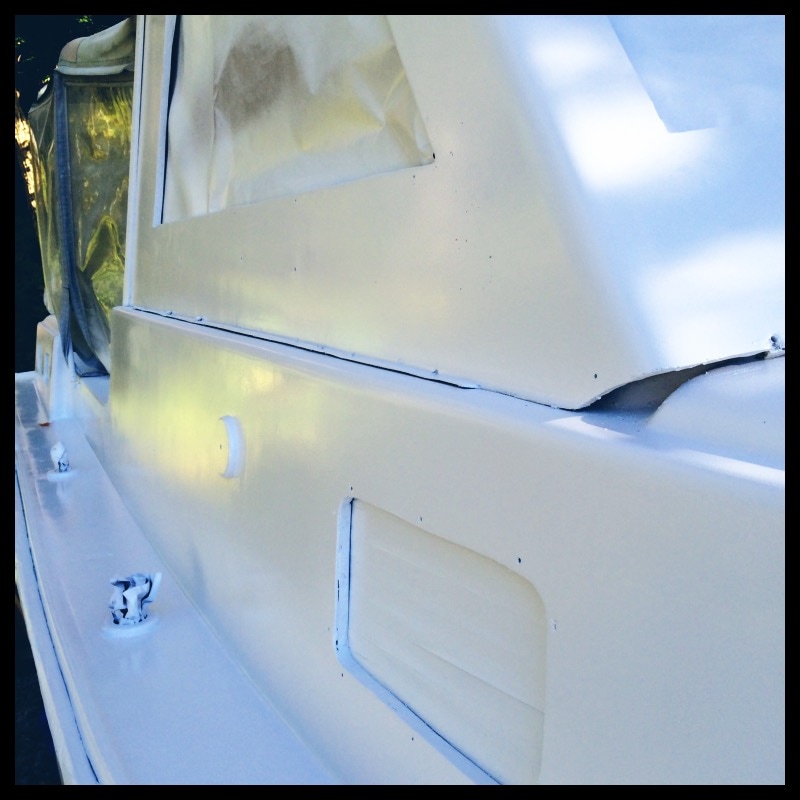
The nice thing about painting is there's not much you can't fix with a little sandpaper and a touch up. The cockpit enclosure will get scrapped next summer when I begin patterns for the hardtop project. I'll be able to blends new and old paint by brush so everything looks seamless. 3m pre taped plastic film 90' X 50" from the rubrail down to prevent overspray. The round coosa board donut on the side of the pilots use is a running light standout. It raises the running lights off the pilothouse surface slightly. The one on the deck is a raised deck fill so you no longer have to worry about water leaking into deck fill for fuel, waste, or water.Tape from the interior all windows to keep out overspray. The Pilothouse is not permanently attached yet as it needs to be moved forward for engine install. Pilothouse to be they-bolted and screwed.
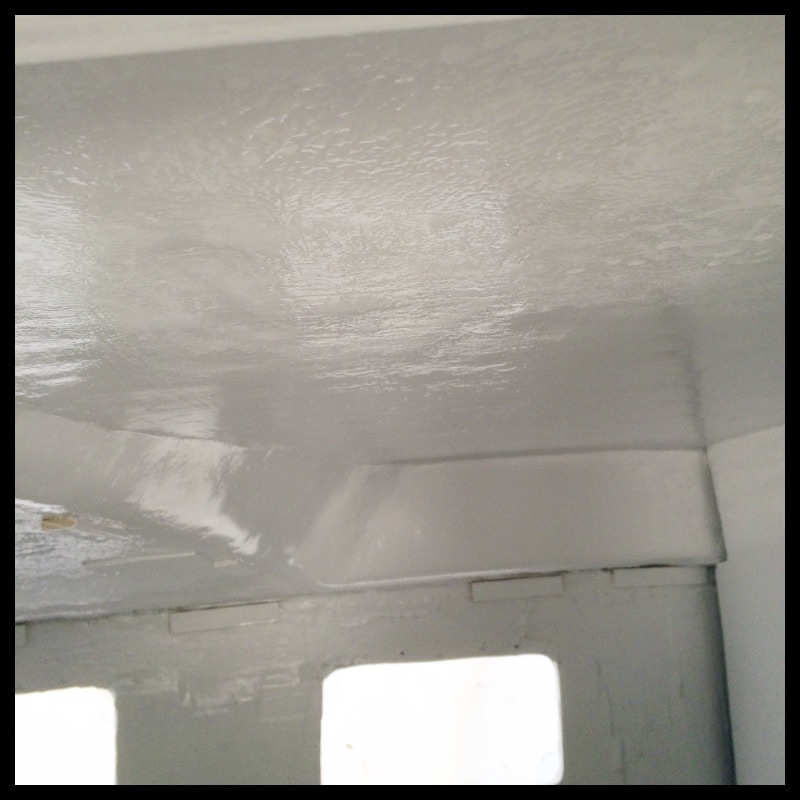


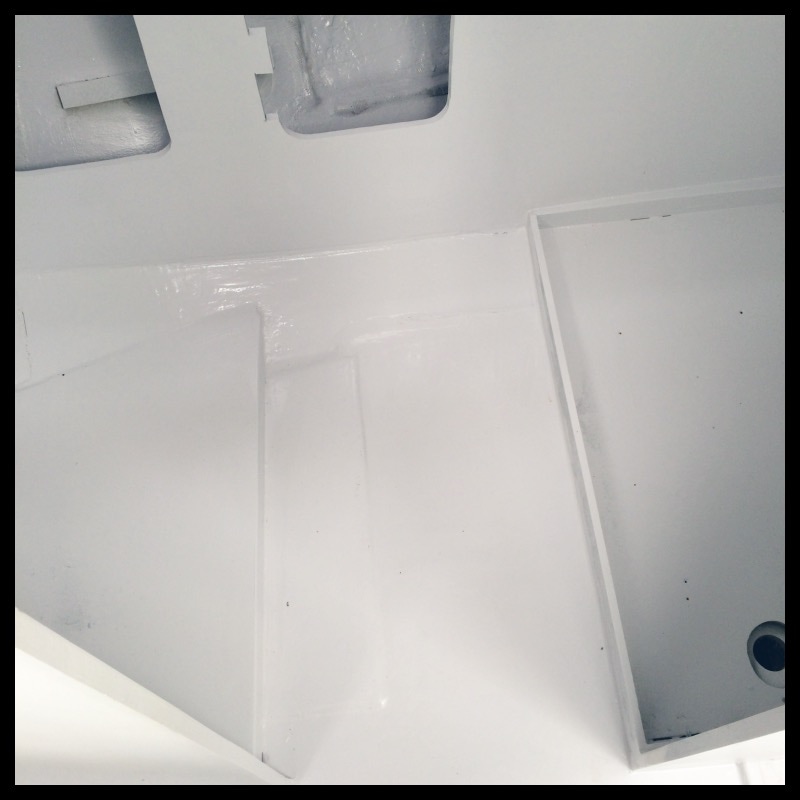
Verdict on the Rustoleum Marine top sides on the interior: An excellent hard slick finish; this paint lays down very well and levels nicely. Except on verticle surfaces.
Tip or using Airless Sprayer: It appears that due to the confined spaces the issue with the Graco x7 is distance/speed/pressure and maybe the tip. It puts out too much paint causing some drips and "curtaining"--but only on some verticle surfaces. I suspect my pressure was a little high and the gun was big for such a small boat. I have a semi-commercial setup really geared toward massive house projects. So it is what it is. With prior experimentation ( which I failed to do) I bet this could be easy adjusted to one shot perfection. The solution for me now: a quick sand with 320-400 grit and then roll and tip a second coat on verticles. Really no trouble. This is ok since there a few touch up spots where the gun couldn't quite go anyway. I would recommend this procedure again as the finish in all the nooks and crannies and flat surfaces is beautiful. I like it so much I will be spraying deck before
Tip or using Airless Sprayer: It appears that due to the confined spaces the issue with the Graco x7 is distance/speed/pressure and maybe the tip. It puts out too much paint causing some drips and "curtaining"--but only on some verticle surfaces. I suspect my pressure was a little high and the gun was big for such a small boat. I have a semi-commercial setup really geared toward massive house projects. So it is what it is. With prior experimentation ( which I failed to do) I bet this could be easy adjusted to one shot perfection. The solution for me now: a quick sand with 320-400 grit and then roll and tip a second coat on verticles. Really no trouble. This is ok since there a few touch up spots where the gun couldn't quite go anyway. I would recommend this procedure again as the finish in all the nooks and crannies and flat surfaces is beautiful. I like it so much I will be spraying deck before
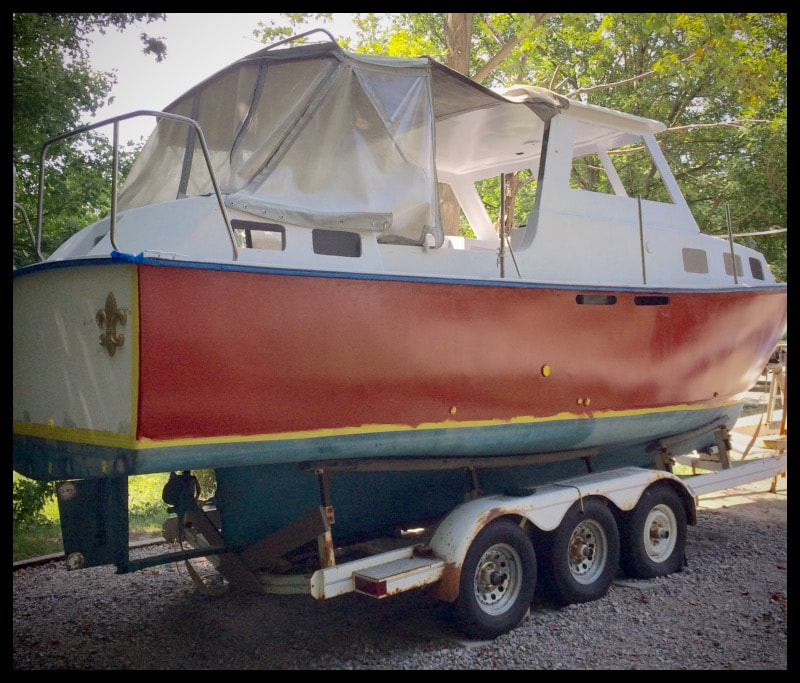
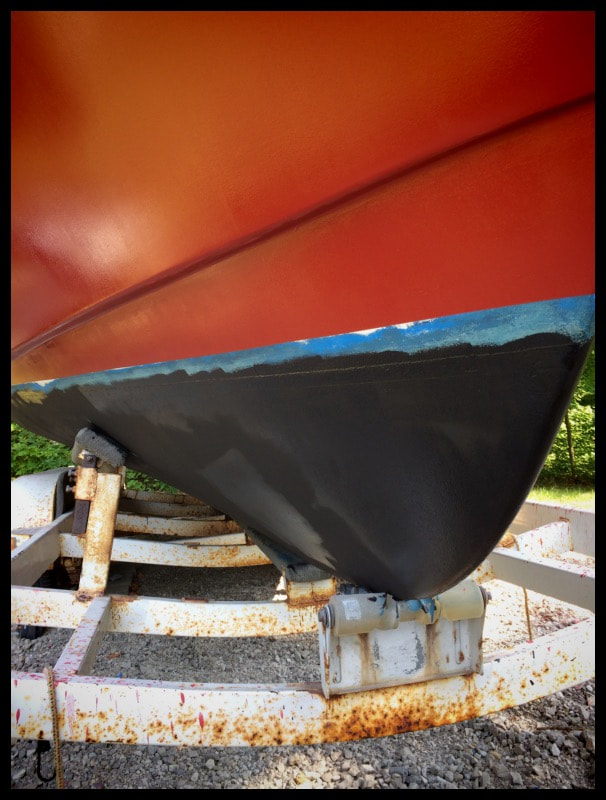
Painting Hull and Bottom
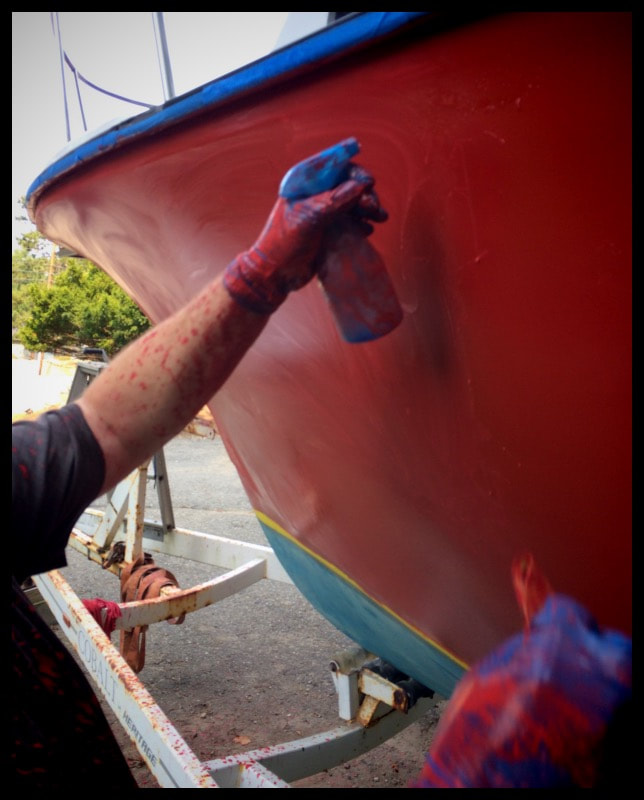
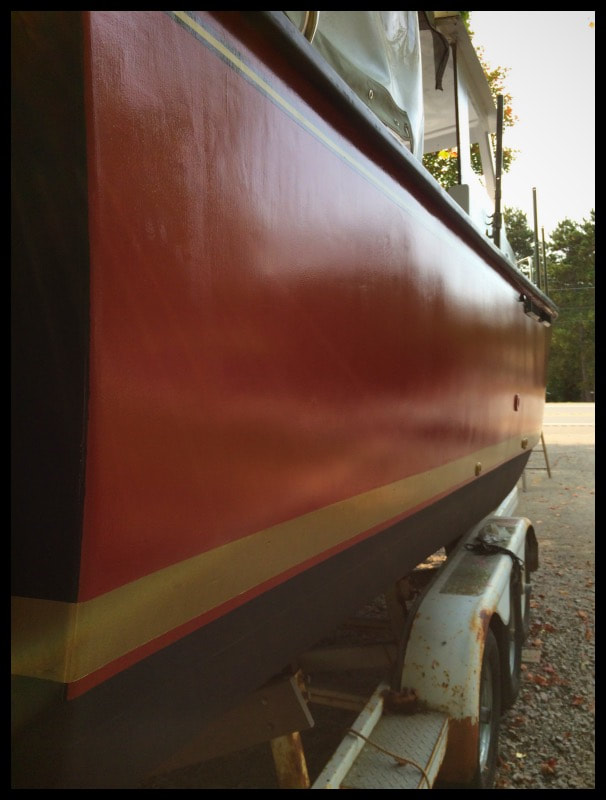
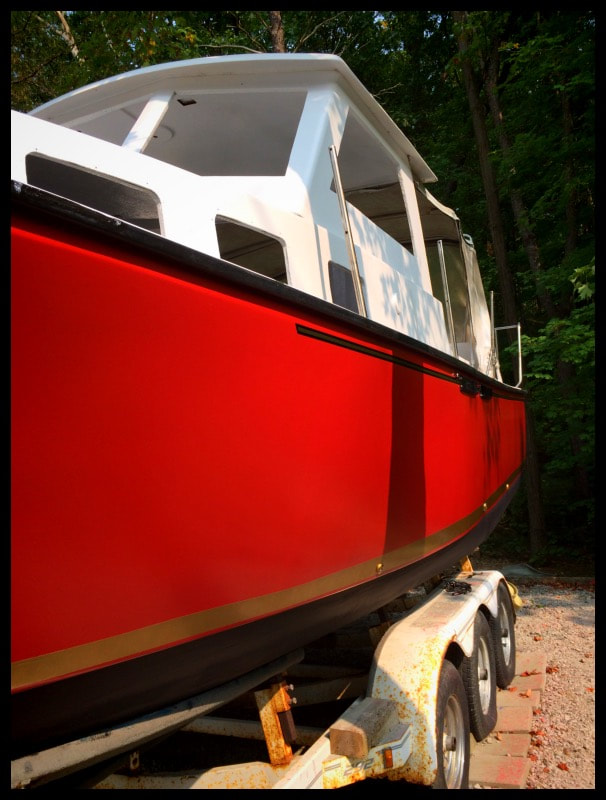
The hull was painted using Sherman Williams Industrial Urethane Alkyd Enamel. It was a spur of the moment decision that would come back to haunt me. After several experiences with the Rustoleum, I decided that paint was just too difficult to use in outside situations where the humidity fluctuated during the summer months. Rustoleum can dry quickly one day and then take a week or more to get hard in the next. I also felt like I needed a paint that would dry harder, especially on the hull. Somehow I landed on Sherman Williams Industrial Urethane Alkyd Enamel. The paint reportedly dried fast and hard and the finish was supposed to glossy and tough.
I had already chosen to paint the boat hull a deep red, Rustoleum Regal Red to be exact. So I had Sherman Williams color match their Urethane enamel to Regal Red. My reasoning was because I wanted to be able to buy touch-up enamel paint where ever I might be cruising, and I figured I'd always find the Rustoleum, but have the benefits of the much stronger urethane finish underneath. It took three tired to get the color matched. I chose red for the sides of the hull and black for the transom.
I had already chosen to paint the boat hull a deep red, Rustoleum Regal Red to be exact. So I had Sherman Williams color match their Urethane enamel to Regal Red. My reasoning was because I wanted to be able to buy touch-up enamel paint where ever I might be cruising, and I figured I'd always find the Rustoleum, but have the benefits of the much stronger urethane finish underneath. It took three tired to get the color matched. I chose red for the sides of the hull and black for the transom.

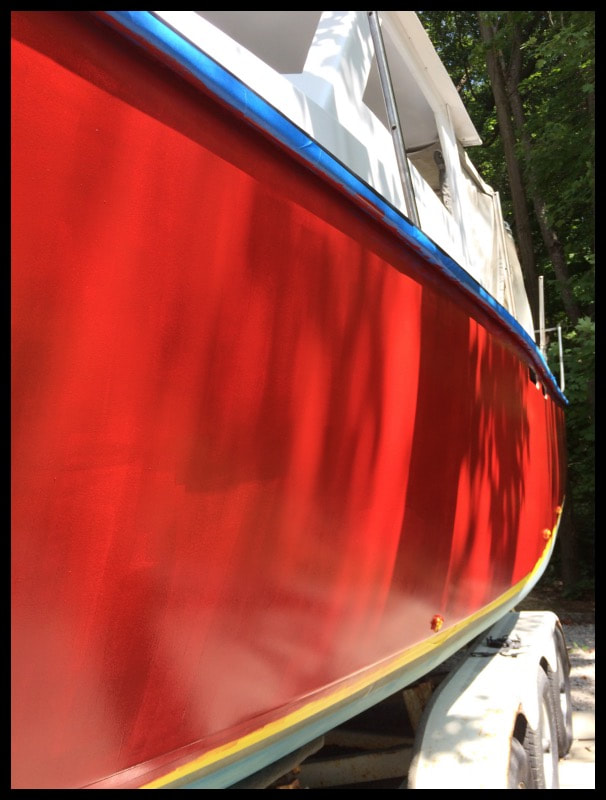
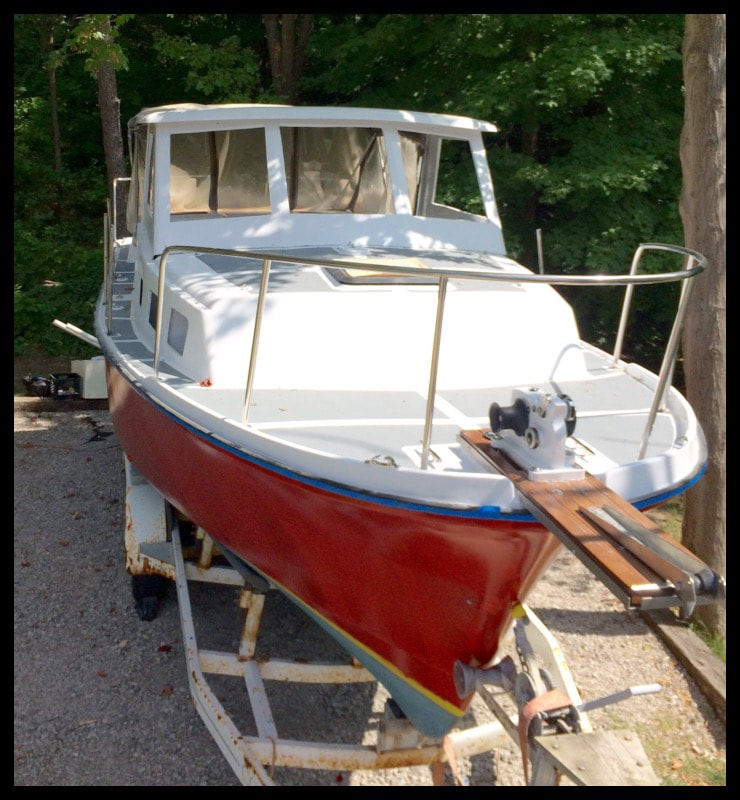
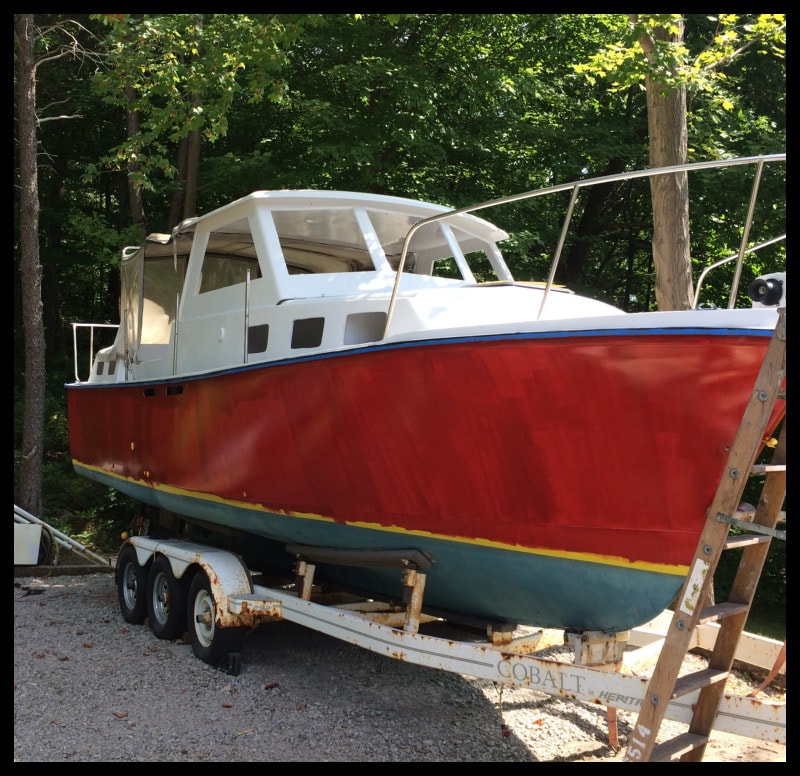

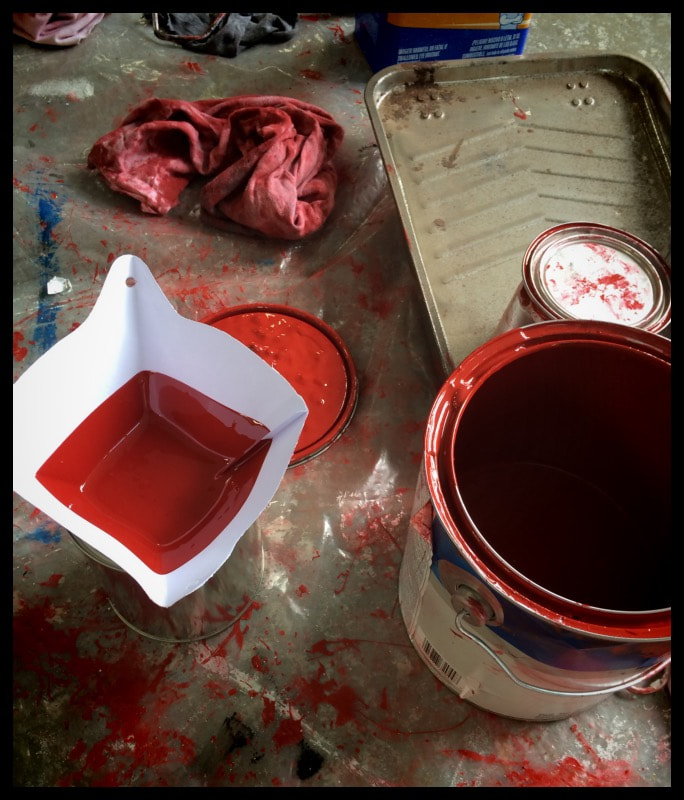
After several coats of the Sherman Williams Urethane Enamel, there was good news and bad news. The good news was that the paint ended up very hard and dried everyday like I hoped. The color was deep and majestic. Regal. But the bad news was the finish turned out totally unacceptable. The amount of orange peel was horrific. From the very first coat I realized I made a terrible mistake choosing this paint. The color and coverage was excellent, but the paint simply would not flow or lay down. I immediately thinned the first paint for the first coat using 5% mineral spirits, then I upped that to 10%. No luck. I then switched to Xylon 5-10% for further coats, and still the paint wouldn't flow properly. The whole time I kept noticing small globs of I-don't-know-what appearing in the paint. They looked like boogers, sticky and snotty. I checked the roller (and ultra fine 4" foam roller from Lowes) and the paint pan. Finally I came to the conclusion that the paint had particulate matter in the can, even before mixing.

Meanwhile, the black paint for the transom laid down perfectly, on first coat was extremely glossy, and no goobers. I could work with the black. It flowed so much better than the mixed red, giving an almost gloss appearance by brush straight out of the can. Three red coats in, I called Sherman Williams and based on their advice I tried 2-5% Penetrol as way to get the paint to flow. And just for good measure, I switched to a "flockfoam roller" that was much softer. Suddenly Success! (I attribute much of the initial orange peel to the Lowes foam rollers).
The red paint flowed much better, although the goobers didn't go away. I had Sherman Williams check the tinting formula, and then I checked all the paint cans for lot numbers, determining two red cans were similar and one was a different batch--but they all exhibited the same problem. I resolved that the red paint must have an inherent problem, and decided to make the best of it by straining it in the future. But before I could repaint, I needed to fix two weekends worth of mistakes.This meant I had to take down the red orange peel as much as possible, and then re-apply a final red paint coat that would give me the finish I wanted. I wet sanded the entire hull with my apprentice- 150 grit to 400 grit, twice.
The red paint flowed much better, although the goobers didn't go away. I had Sherman Williams check the tinting formula, and then I checked all the paint cans for lot numbers, determining two red cans were similar and one was a different batch--but they all exhibited the same problem. I resolved that the red paint must have an inherent problem, and decided to make the best of it by straining it in the future. But before I could repaint, I needed to fix two weekends worth of mistakes.This meant I had to take down the red orange peel as much as possible, and then re-apply a final red paint coat that would give me the finish I wanted. I wet sanded the entire hull with my apprentice- 150 grit to 400 grit, twice.

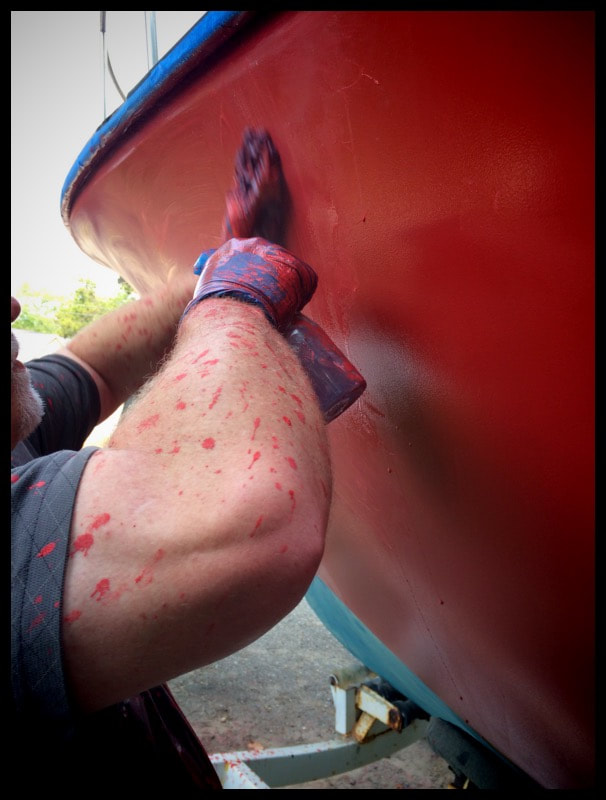
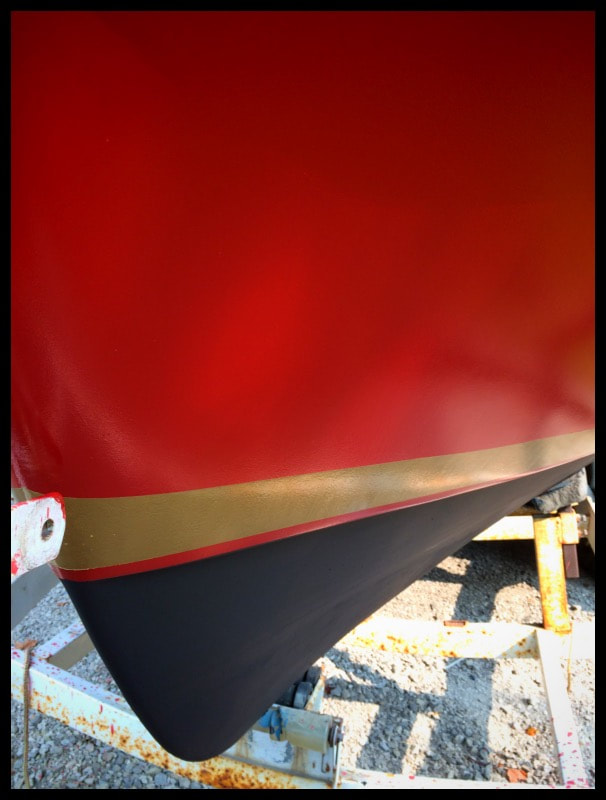
For the final red coat on the hull I pulled out all the stops. First, I strained the red paint, effectively eliminating the problems of goobers. Next I mixed in 10% Penetrol to ensure good flow. Lastly I applied an even coat using a Sherman Williams flock foam roller. I ended up with the best finish yet: glossy with orange peel visible at about 3 feet.


Then to prove I wasn't done learning my lessons yet, I ran out of flock foam rollers and tried the exact same procedure using the black paint on the transom. Because I had run out of my new favorite rollers, I switched to a Sherman Williams black foam roller, which left more terrible orange peel on the transom. One step up and two steps back. This painting job was ultimately frustrating and exhausting.
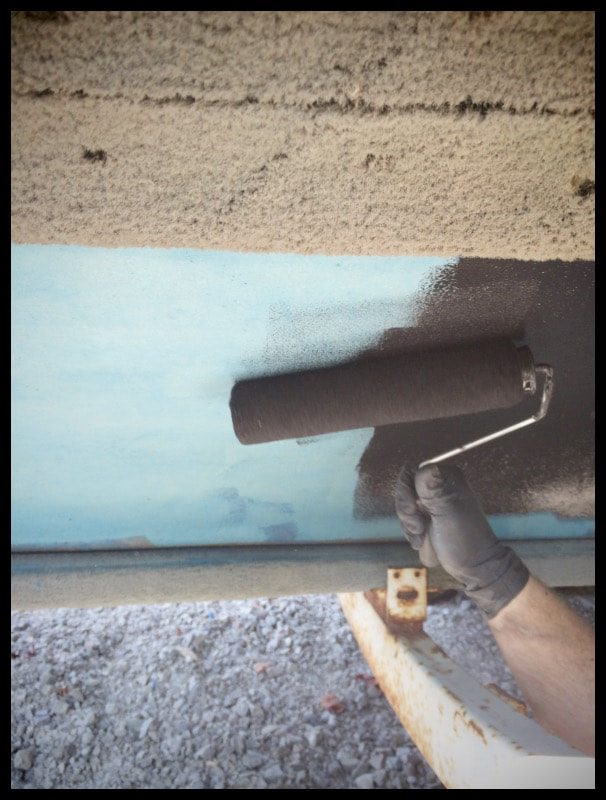
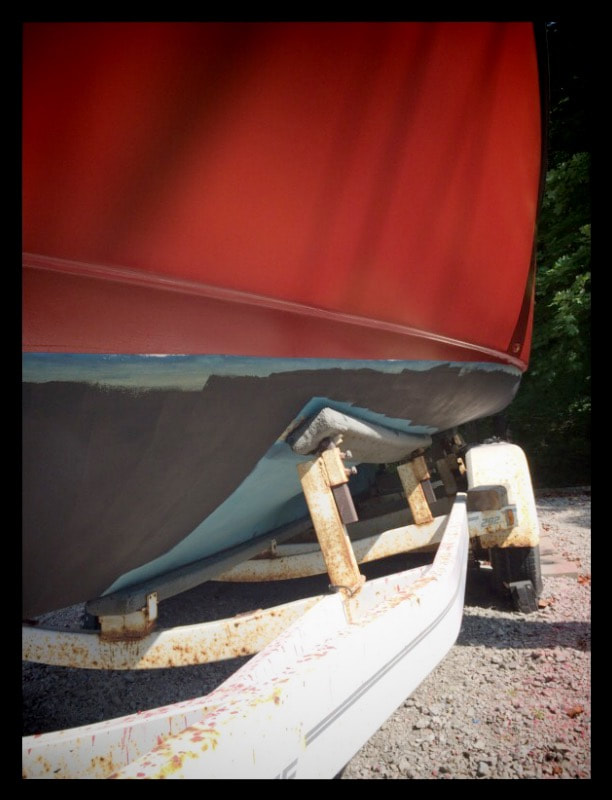
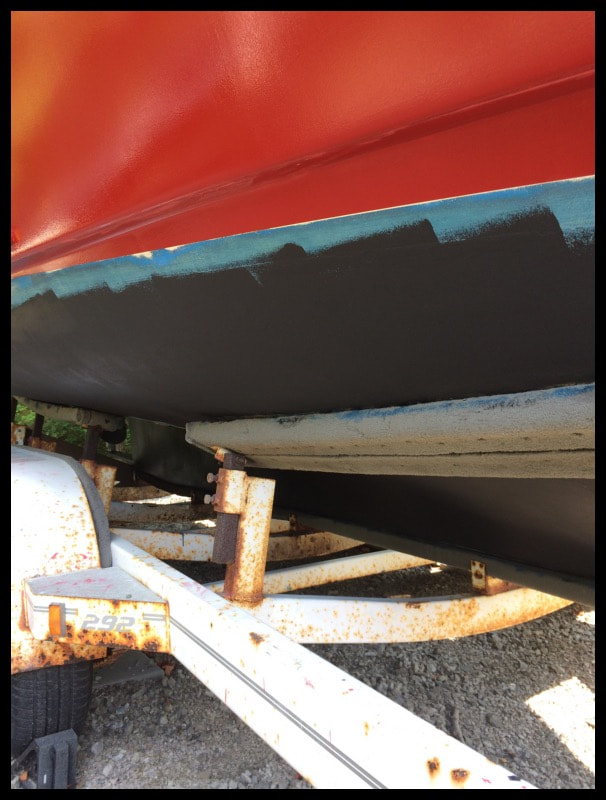
I decided to wait a week and let everything fully cure before I did any more damage. At a minimum I would have to re-sand the transom, re-paint using the correct roller, as I tried to the transom finish to at least match the red sides of the hull. In the meantime, my apprentice and I started on a new bottom coat. The bottom job consisted of one gallon of Total Boat Black Anti-fouling Ablative paint. Amazon special at $89/gallon.

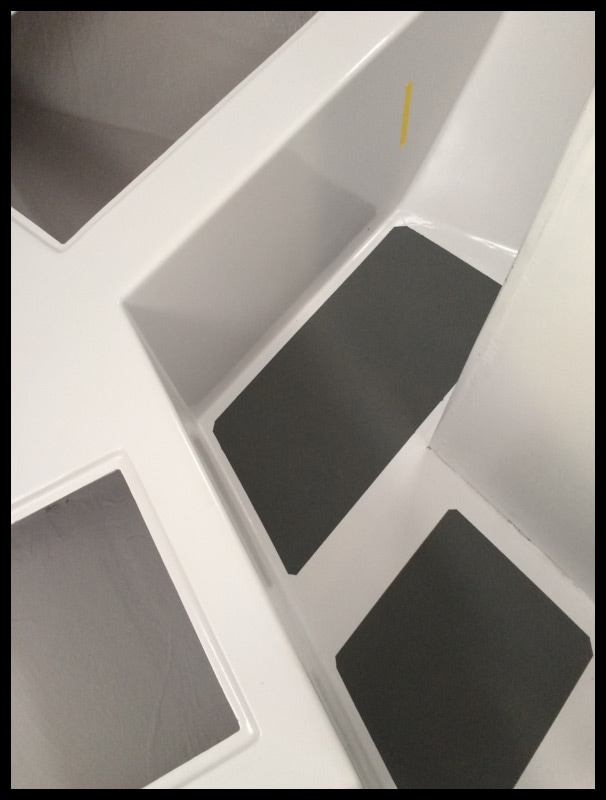
Non-skid Treatment
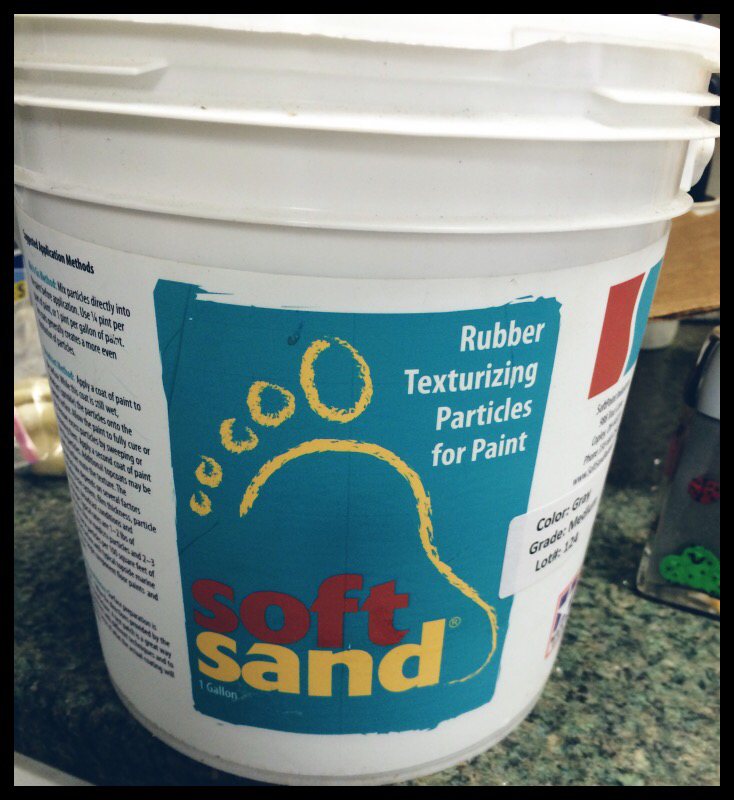
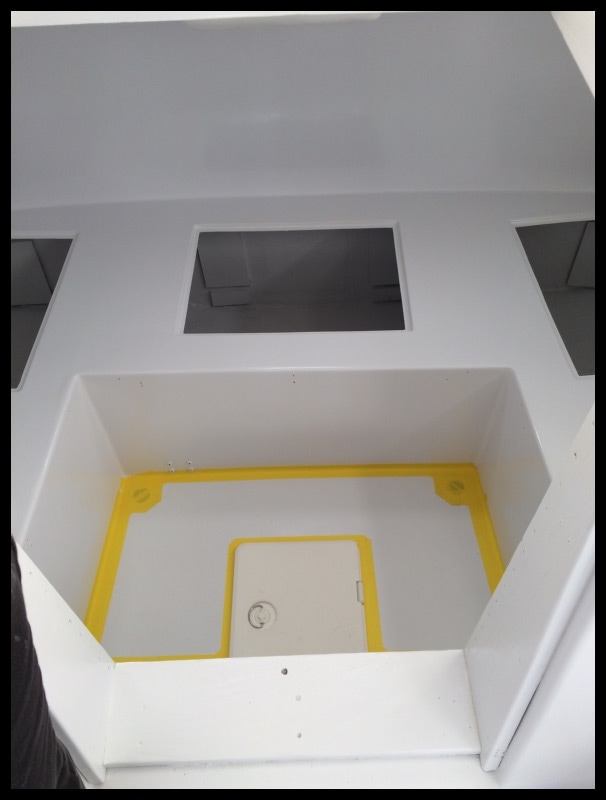
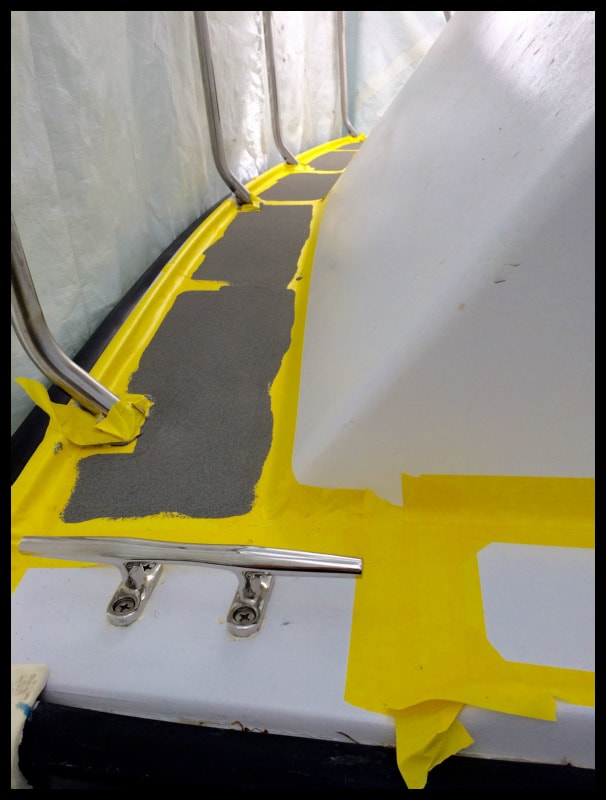
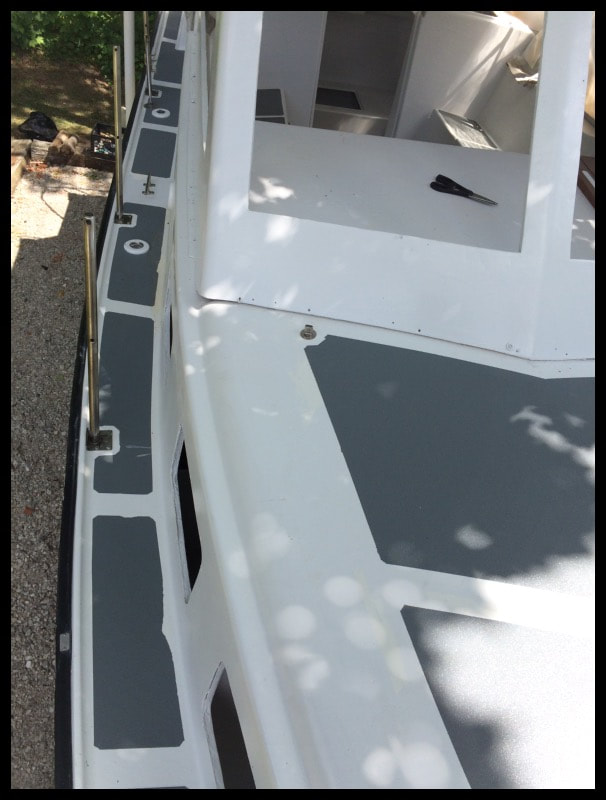
Proposed non-skid pattern. The tentative plan is to do the non-skid using a product called SoftSand which I used on my Compac Pilothouse. You paint your contrasting color then sand then paint again. Thinking about Rustoleum marine battleship gray since the boats colors are a deep red, white pilothouse/deck, and black accents. I'll be doing a test on the cockpit hatch doors to see how everything works and to make sure the colors not too dark.


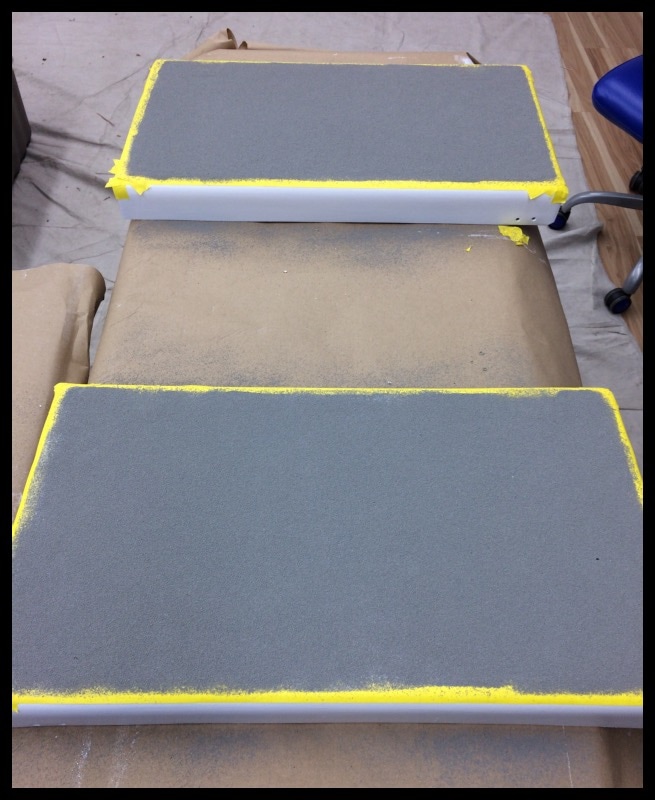

Here's a test run on the A27 engine hatches: After cleaning the hatches down to bare fiberglass I coated them with the Rustoleum marine paint. I used a non-skid product called SoftSand which is a fine rubber like bead. I've used this before on the inside of a motorcycle sidecar tub and most recently on the pilothouse sailboat decks. It's got a nice texture and I find its courser than the Interlux Nonskid product I used years ago on my 30 ft sailboat. You lay down one coat of contrasting paint and then sprinkle the SoftSand. I've experimented with a variety of sifters and shakers, from a pepper shaker, to a powder sugar broadcaster. By adding extra mesh to the broadcaster I can cover a good area evenly.
Once the paint dries you sweep up the excess SoftSand and re-use. Then final coat of paint.
Once the paint dries you sweep up the excess SoftSand and re-use. Then final coat of paint.
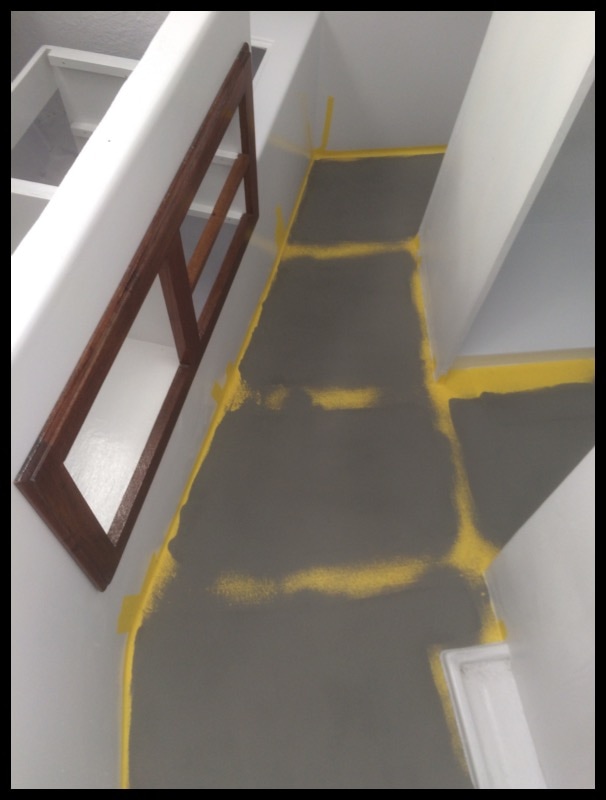

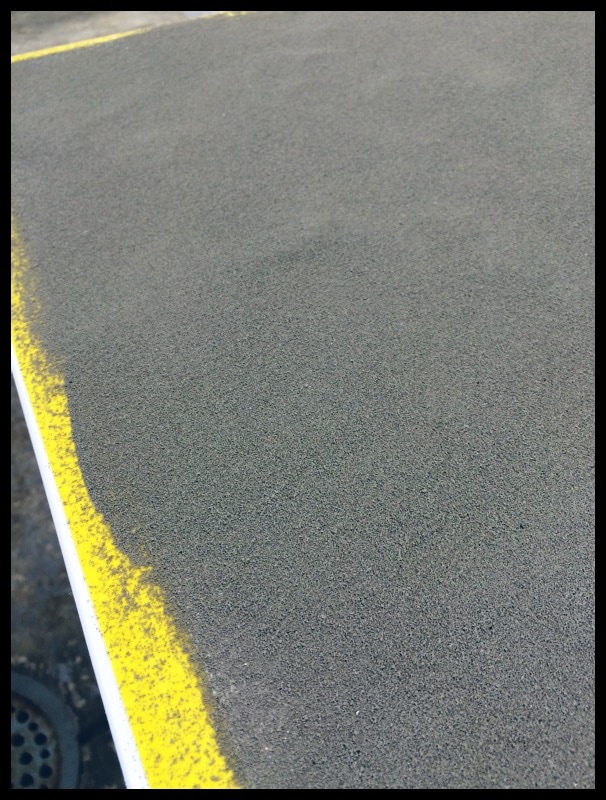
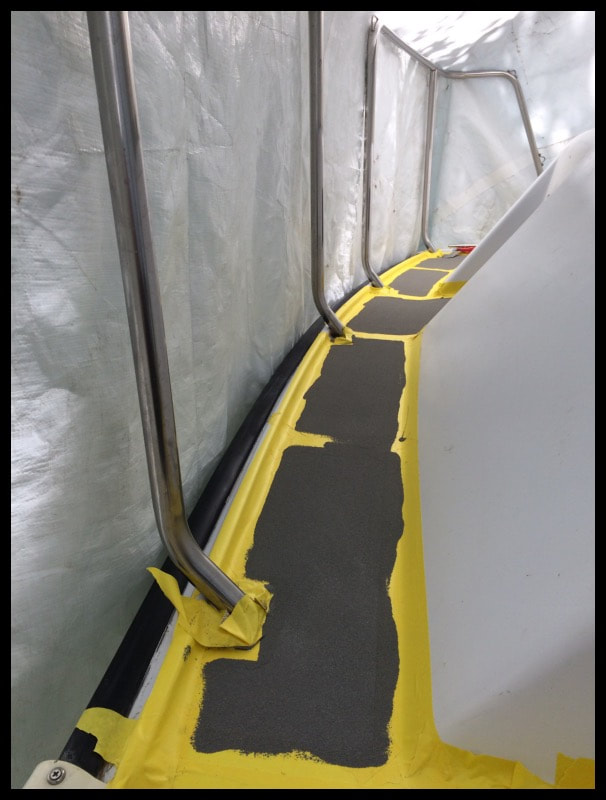
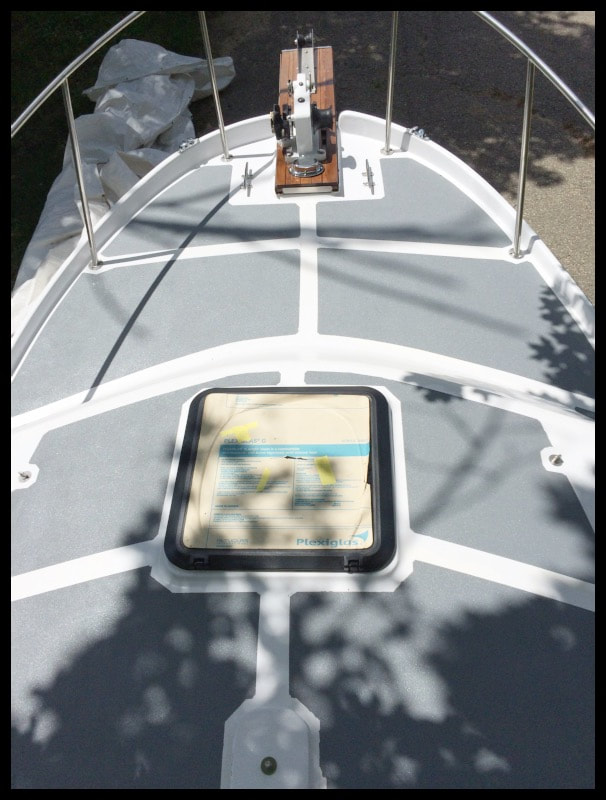
The more I use SoftSand, the more I seem to have perfected the application process. Basically, I start by using 3m yellow trim tape in either 1" or 2" widths. I tape of the area I want for the non-skid. Its at this point you have make sure your non-skid pattern is straight and everything is as it should be. I then apply one coat of Battleship Gray Rustoleum Marine topsides to the white surface using a 2-3" roller using a 3/8" nap or less for a smooth to semi-smooth surface. Then I fill my home built particle broadcaster with SoftSand. The broadcaster is basically a flour sifter, with two additional screens of mesh added at perpendicular angles to each other. The mesh was purchased from McMaster Carr. If you have the right mesh, you can load the broadcaster with SoftSand and not much will fall out without shaking. After shaking a complete coating on the painted surface, I continue shaking so there's actually a thin layer of SoftSand completely covering the surface. Then I let it dry. Approximately 24-48 hours later, I check the surface and it should be dry to the touch. You should be able to move the excess SoftSand around and nothing sticks. I sweep up the excess SofSand with a small pan and broom and recycle it into the SoftSand bucket. Then I lightly vacuum the surface to remove any more loose pieces of SoftSand. Finally I apply 1-2 more coats of paint on the surface using a clean roller. The color should be even and the SoftSand particulate completely encapsulated in paint.
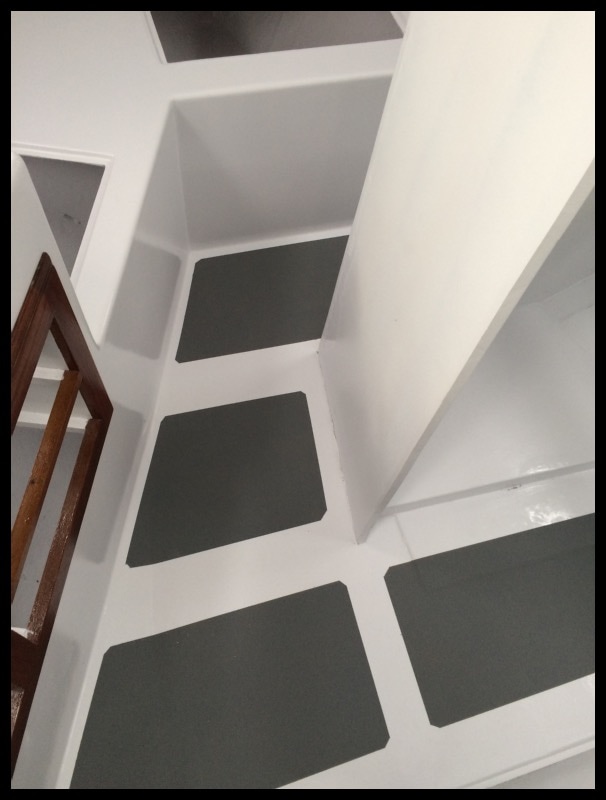
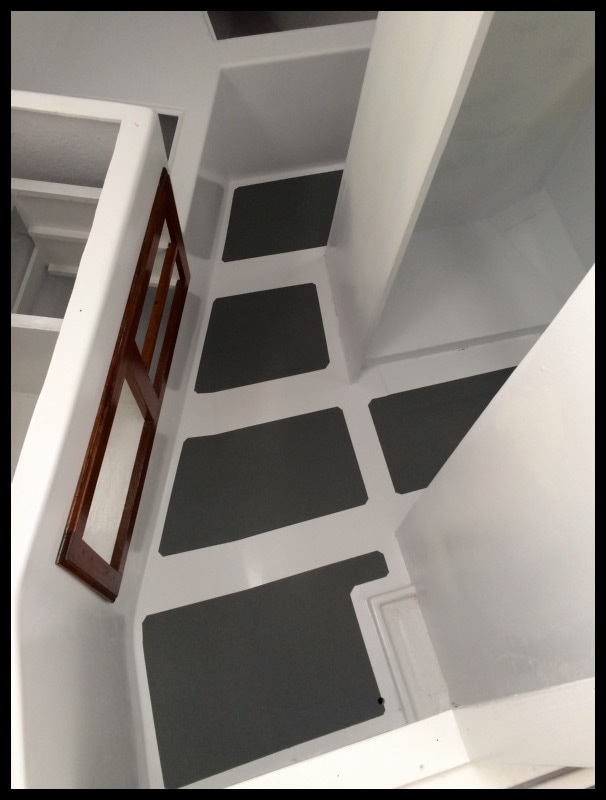

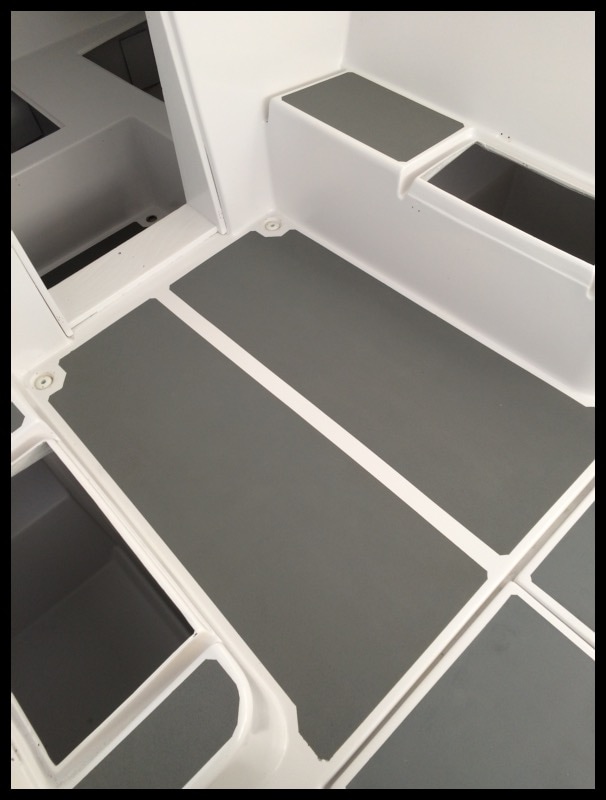
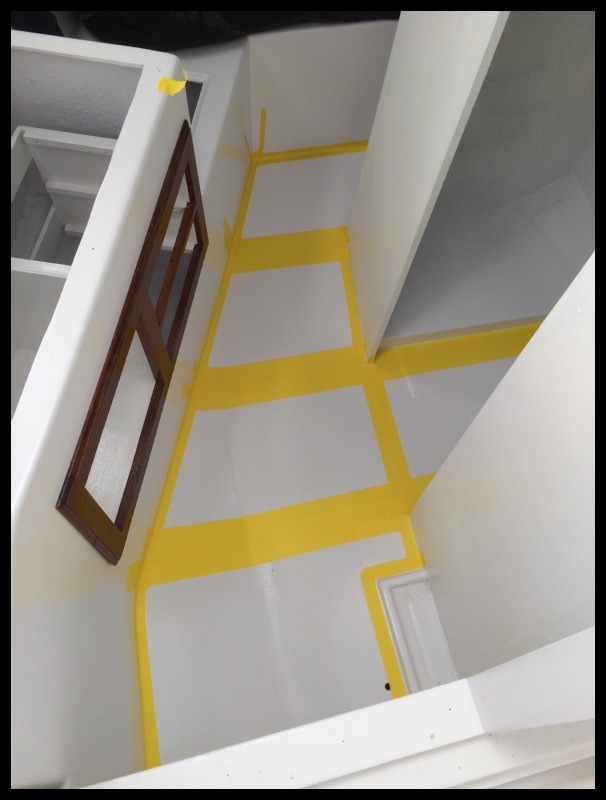
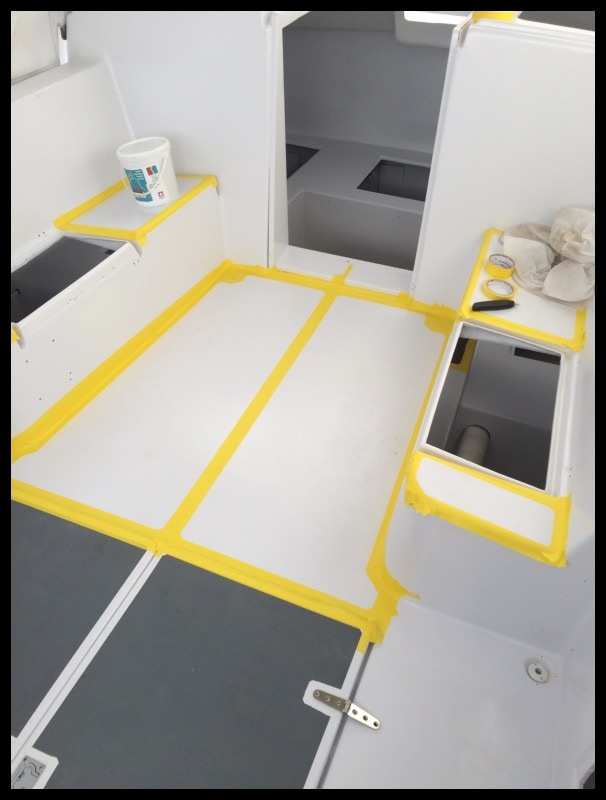
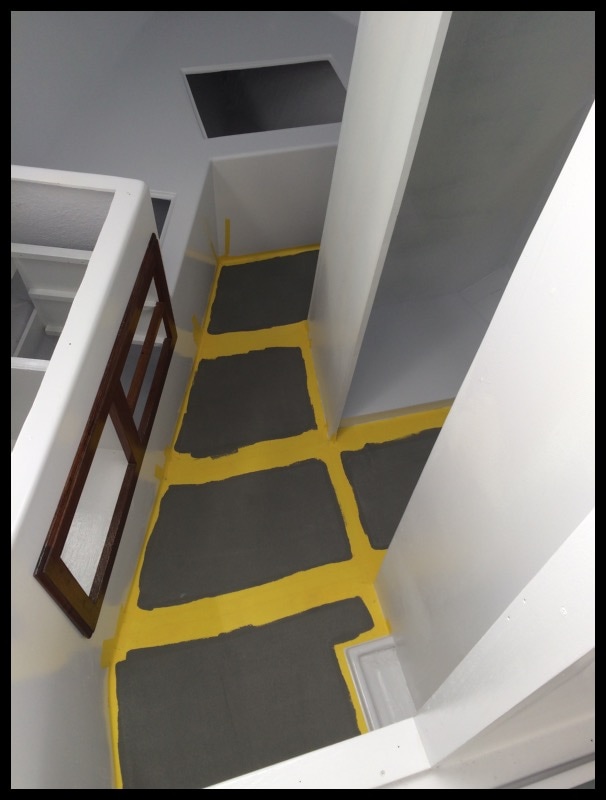
Once you start applying paint and non-skid, you only get one chance to get this right, A key consideration is how much of the contrasting color you want to be seen. For example, if you base color is white, and you plan to have gray non-skid, how much white do you want showing? Too little white, and the non-skid area may appear as a gray floor. Too much white, and the gray looks more like non-skid tape or accents applied to the floor. As a general rule, because I wanted the gray no-skid to appear as pathes (almost like rugs) laid on the white floor, I set them approximately 4-6" apart. I used 1" tape to cut in around all deck fittings or bulkheads.
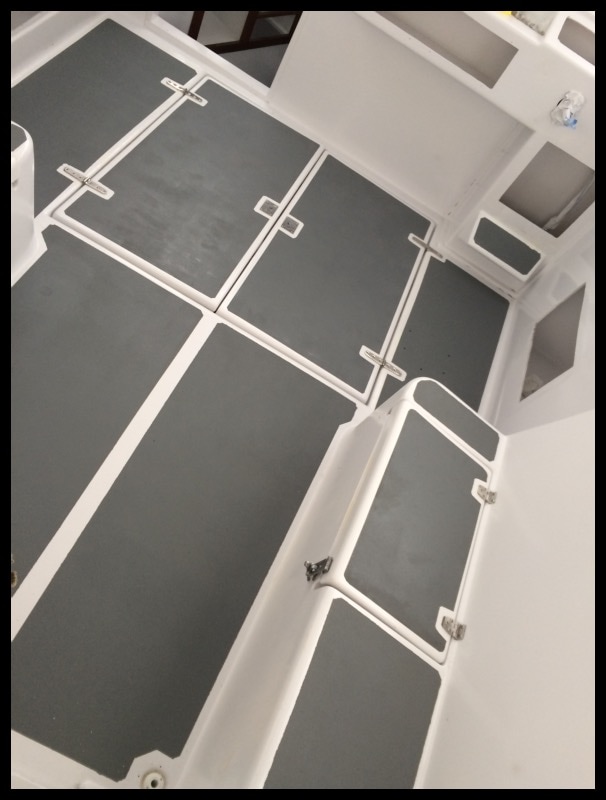

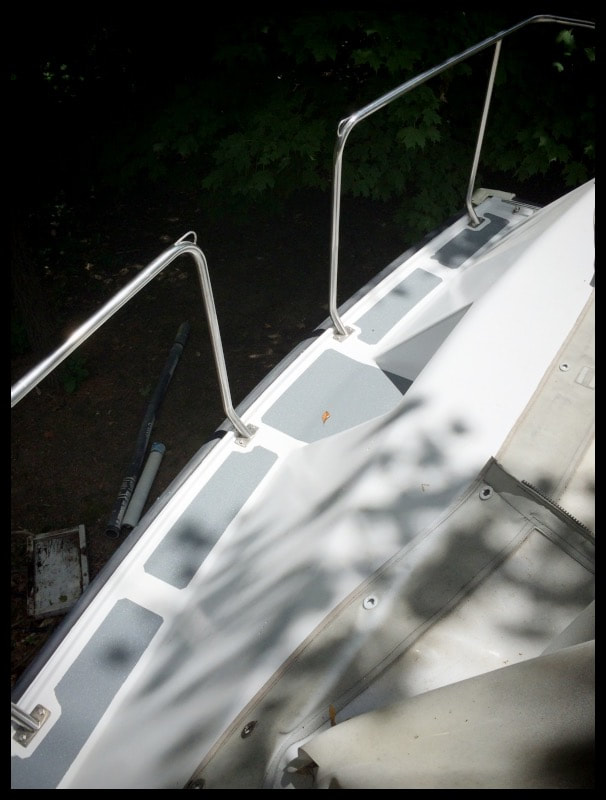
The non-skid for the deck is the same SoftSand used in the interior of the boat: Gray medium grit, done in the broadcast method. Although I started with 1 gallon of material, I eventually had to buy and addition 3 pints of sand to complete everything. By far the longest step in this project was laying out the tape and masking everything off to get a uniform pattern that complimented the design of the boat. I could have gone with larger areas of gray, but ultimately decided to go with a a more "tread pattern" look, allowing white deck to show through at key points to give a more modern look.

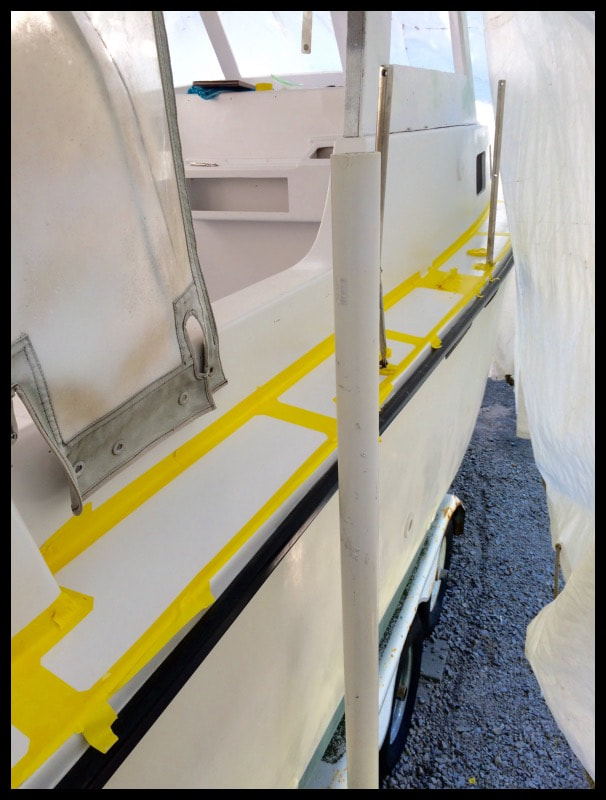
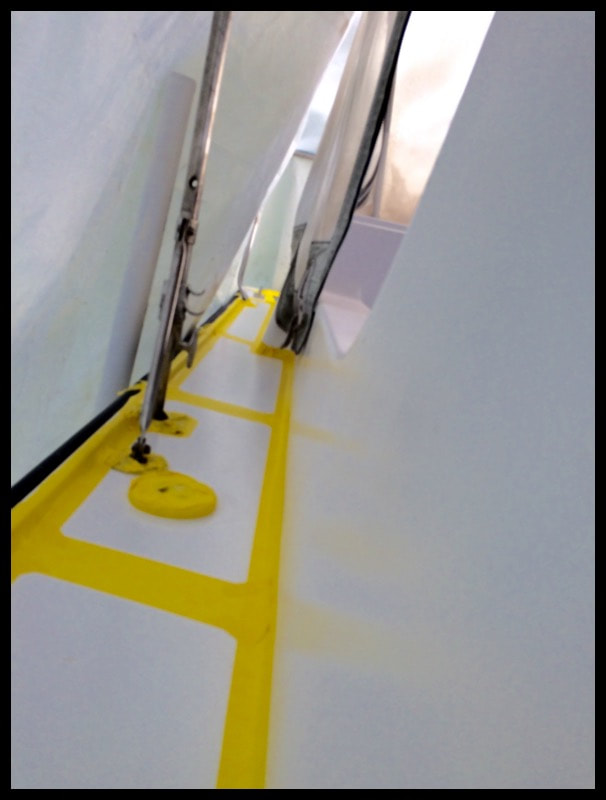
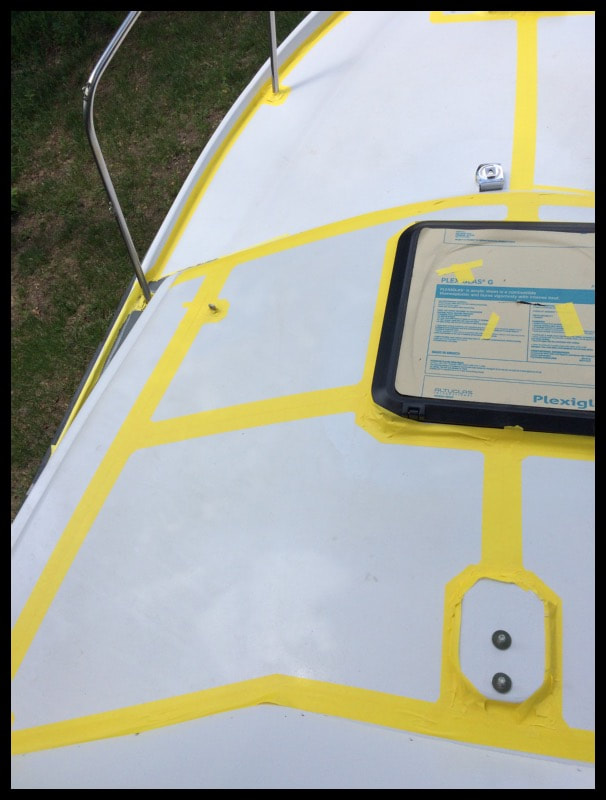

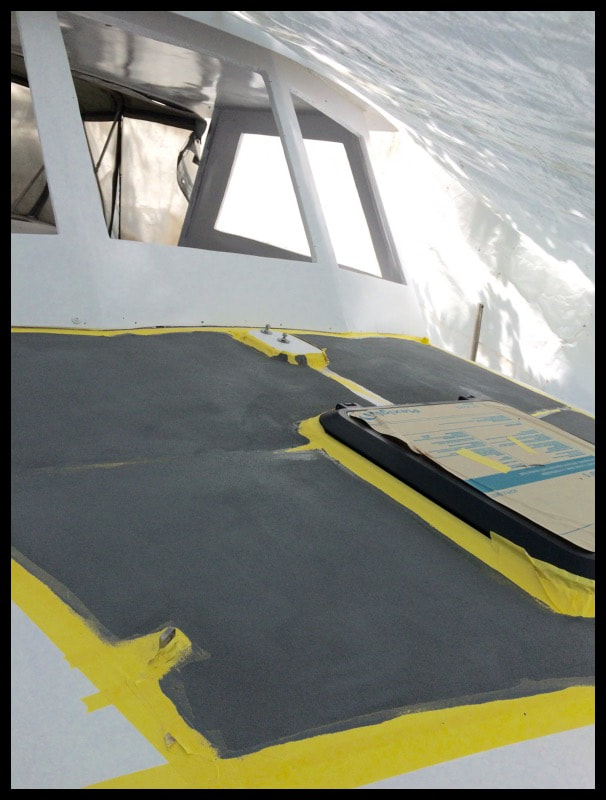
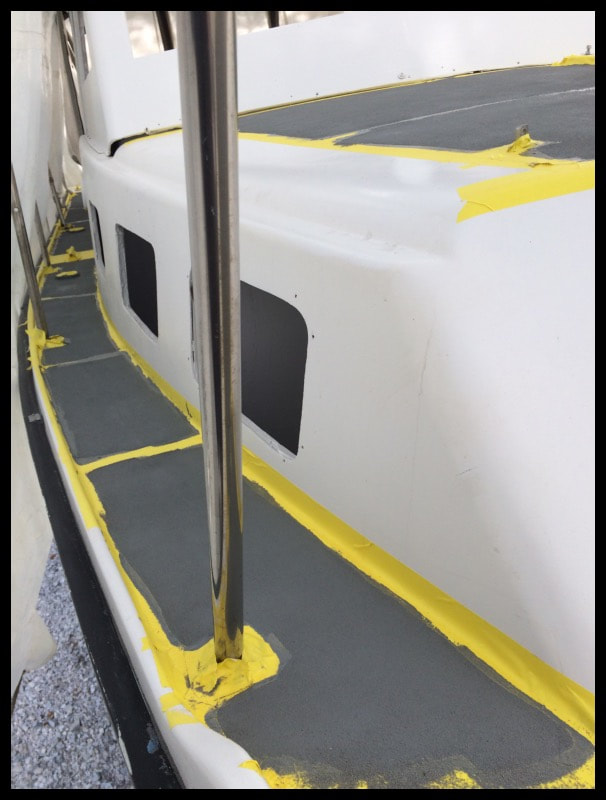
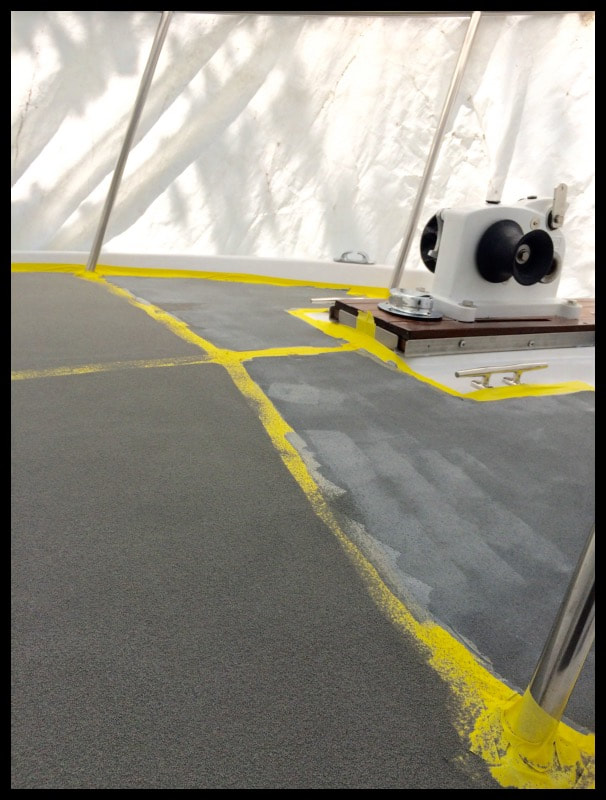
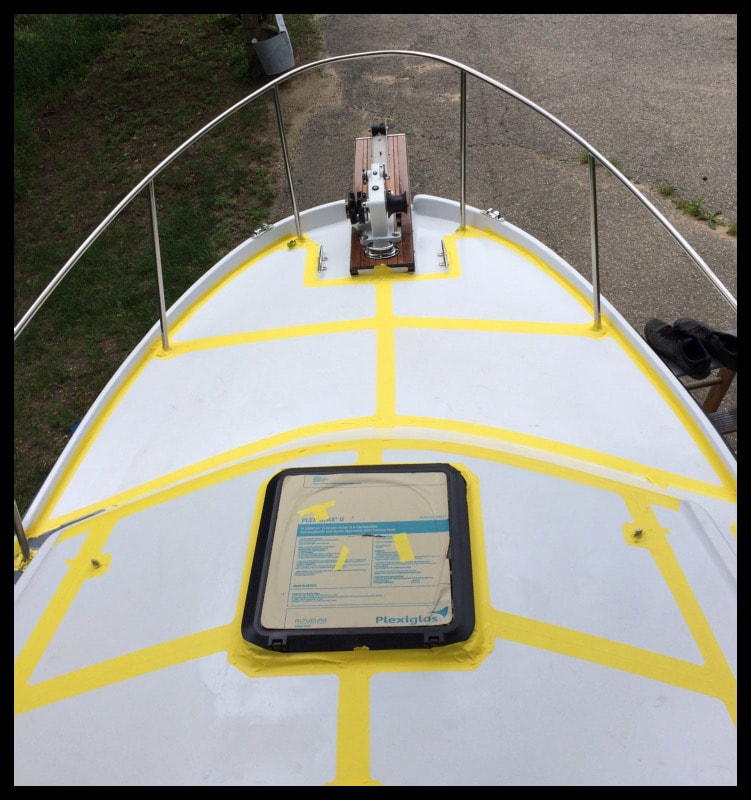
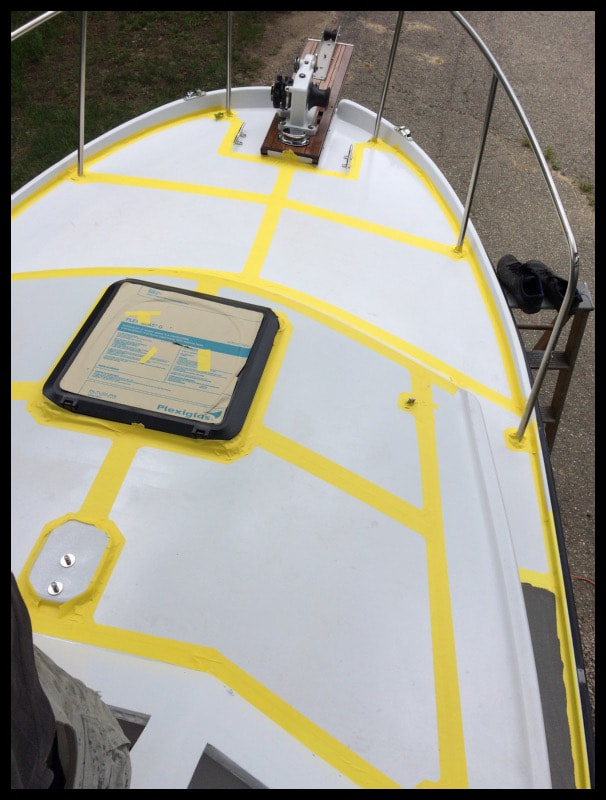
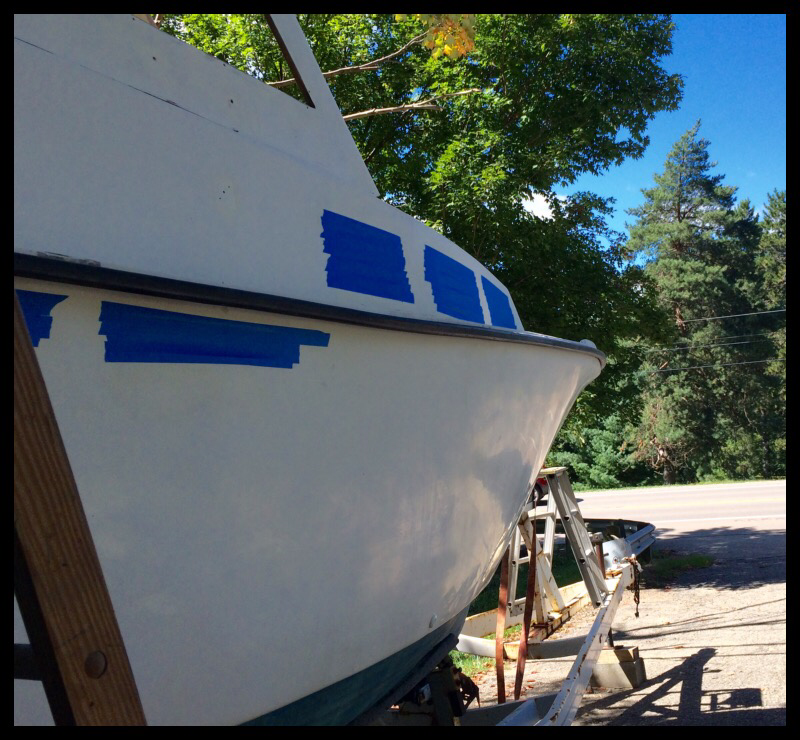
Masking the deck for non-skid took longer than expected, and very tedious. The original non-skid was molded into the deck gelcoat, but was virtually impossible to see. So I opted for a non-skid pattern that was similar to the one I employed on the Dyer Ultra-light Dighy project. Masking followed these parameters: 1" wide tape on all edges facing the toerail and cabin tops; 2x2" wide tape for the individual channels between non-skid areas, front to aft. Then all corners cut 45 degrees, no give a more rounded appearance.
I used yellow 3m autobody masking tape, because I found it gave me the best clean edge when painting. However, this tape did lit some of the white deck paint upon removal. This appears to be a direct result of my inconsistent deck prep, prior to spray painting. When I prepped the deck, I sanded, vacuumed and wiped down with acetone. But I don't think I was 100% consistent. Some areas around the toe rail and the forward cabin top had paint pulled up when the tape was removed. In addition, I think I left the tape on too long. Because I'm largely working on the boat outside, it took approximately 2-3 weeks to complete the deck non-skid. In that time, the yellow tape also pulled up small portions of the non-skid edges. No-worries, the nice thing about painting is mistakes can always be fixed. I still recommend the SoftSand non-skid, and deck painting; I just can't stress enough how good prep and temperature control is needed.
I used yellow 3m autobody masking tape, because I found it gave me the best clean edge when painting. However, this tape did lit some of the white deck paint upon removal. This appears to be a direct result of my inconsistent deck prep, prior to spray painting. When I prepped the deck, I sanded, vacuumed and wiped down with acetone. But I don't think I was 100% consistent. Some areas around the toe rail and the forward cabin top had paint pulled up when the tape was removed. In addition, I think I left the tape on too long. Because I'm largely working on the boat outside, it took approximately 2-3 weeks to complete the deck non-skid. In that time, the yellow tape also pulled up small portions of the non-skid edges. No-worries, the nice thing about painting is mistakes can always be fixed. I still recommend the SoftSand non-skid, and deck painting; I just can't stress enough how good prep and temperature control is needed.


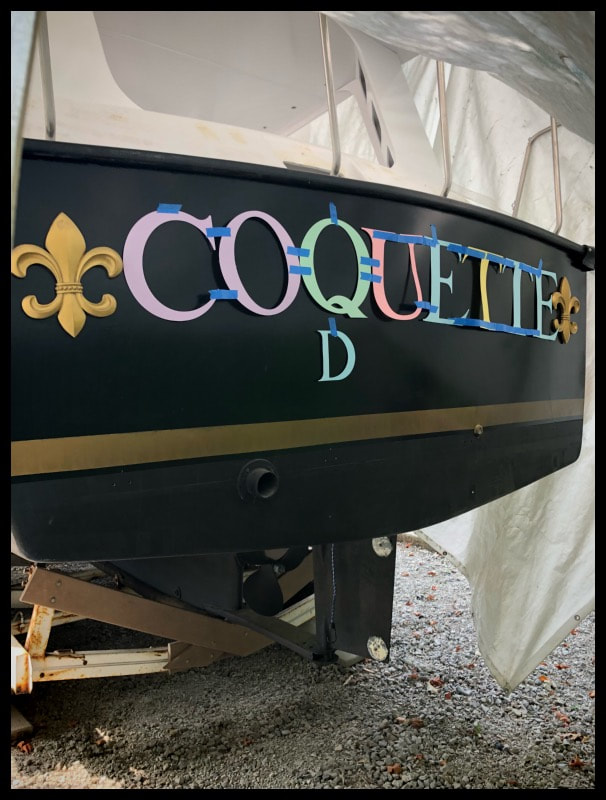
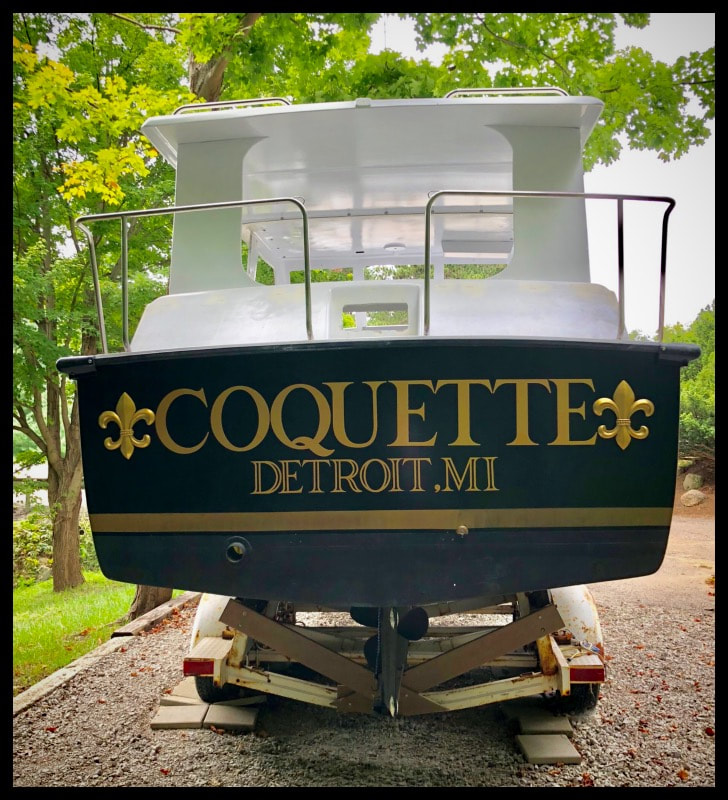
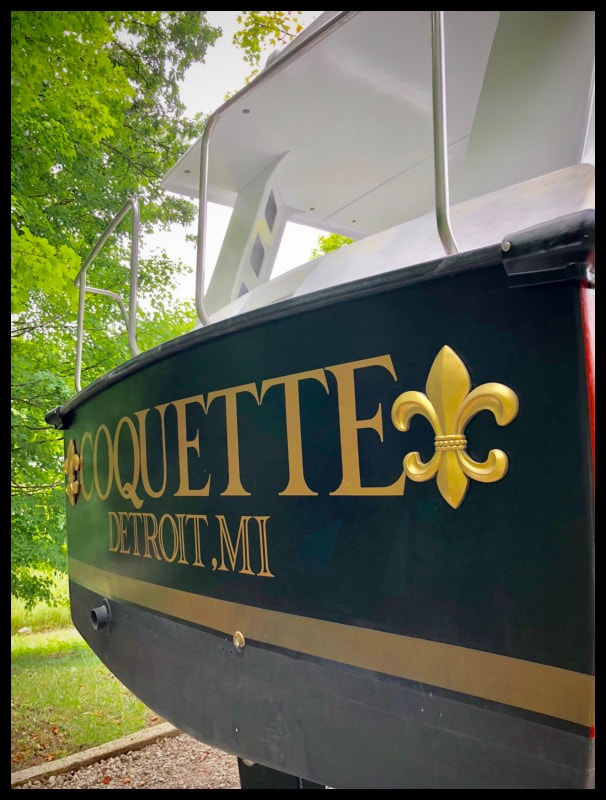
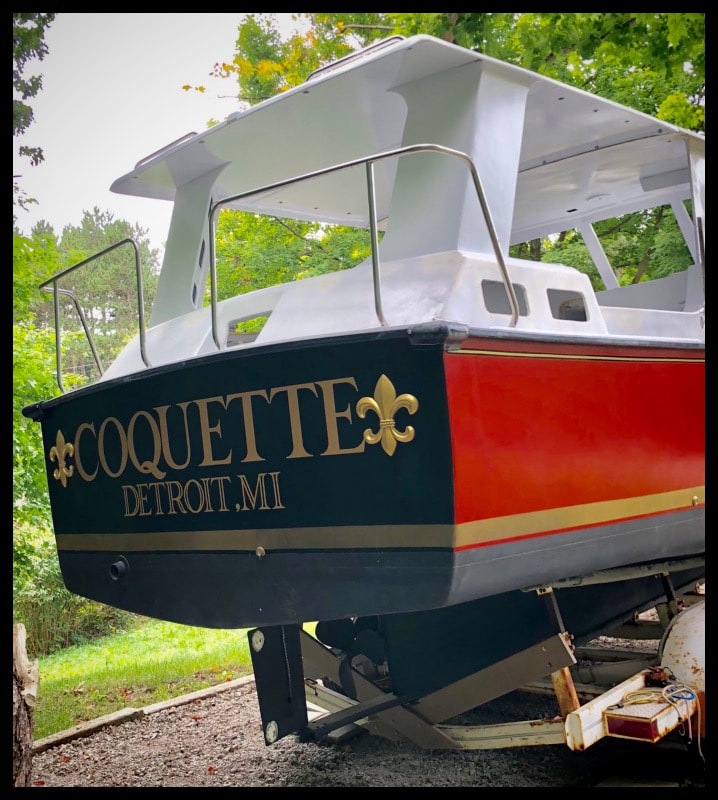
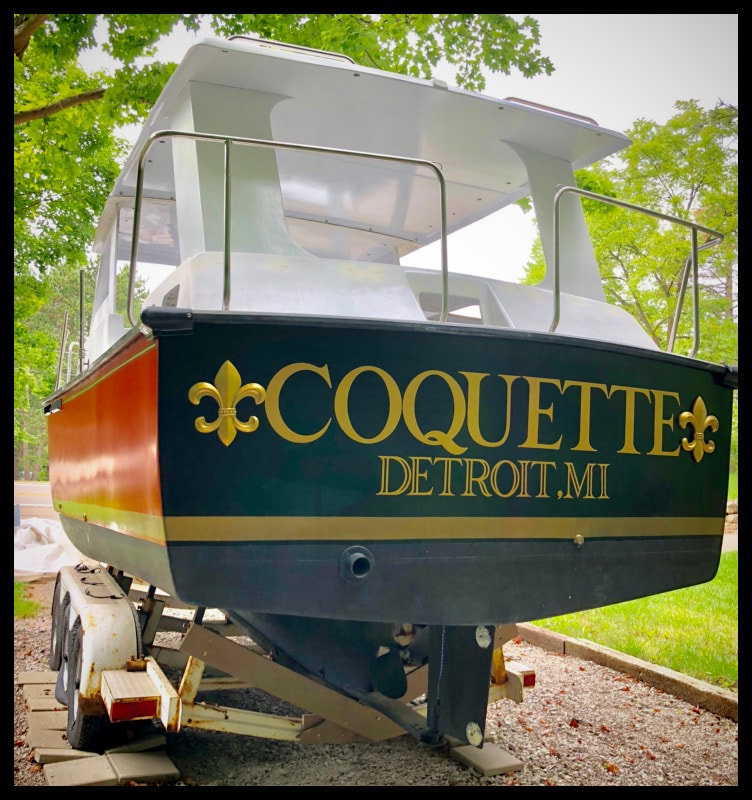
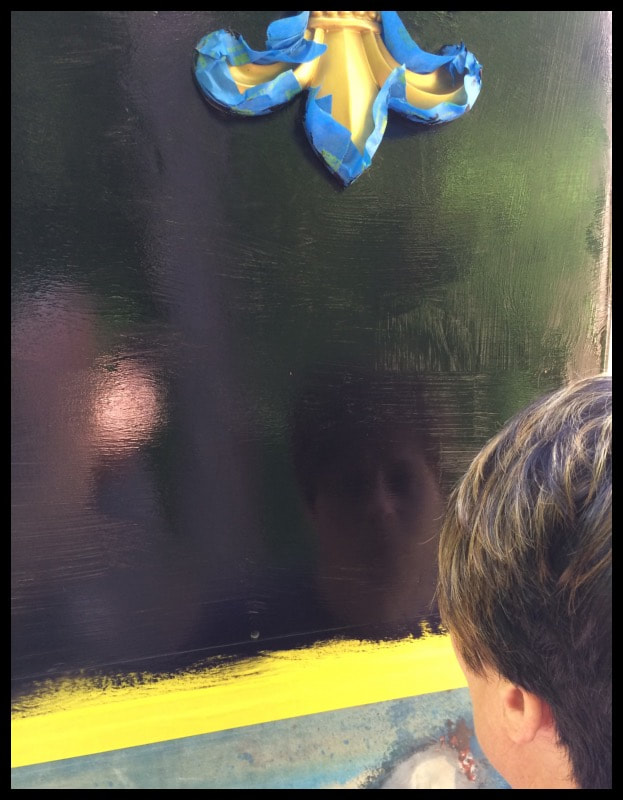
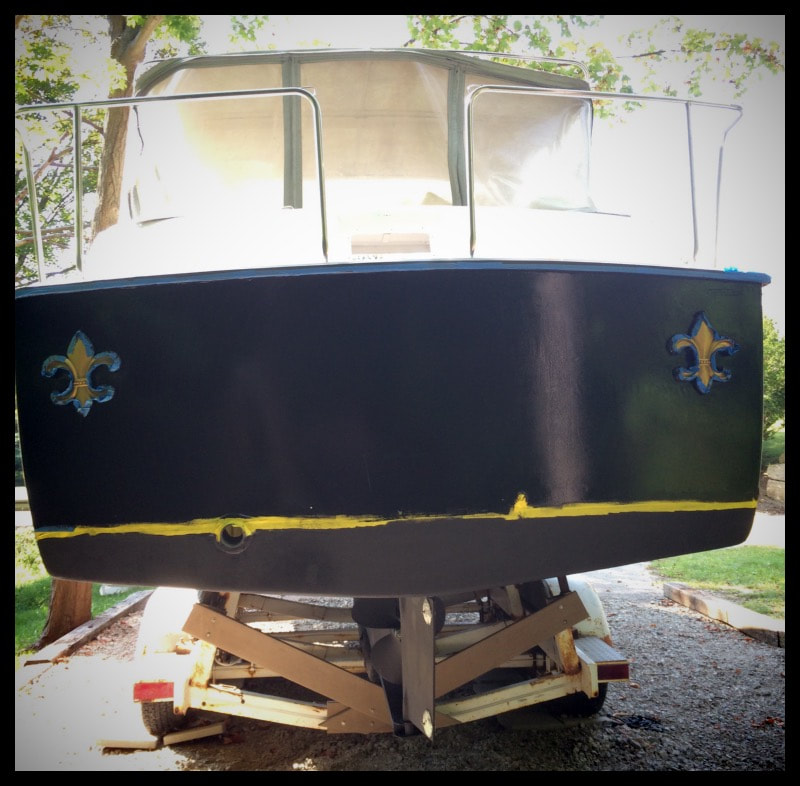
DIY Sign Boards and Boat Name
Here's how I did the boat graphics and the sign boards using a old Cricut Machine. The Cricut machine is most often used for scrap booking, and you can find older models (costing less than $100) at garage sales or on Ebay. The sign boards will be mounted on the sides of the pilothouse. The boat will be named "Coquette". Makes sense since I spend all my time thinking of and working on this damn boat. And most days I don't feel like she gives me much love in return.

First I ordered a roll of exterior heavy grade vinyl decal from Amazon in gold color. You can get it 12" wide and approximately 20-50 ft long. Don't forget the double sided tape that used to peel off the lettering. And also don;t forget a 24" plastic feed mat that's used to feed the vinyl into the Cricut Machine. Note: The Cricut can do max 24" long and 12" high. So if your letters are bigger than 12" high will, you can cut one letter at a time and then assemble them with the double sided tape for install.


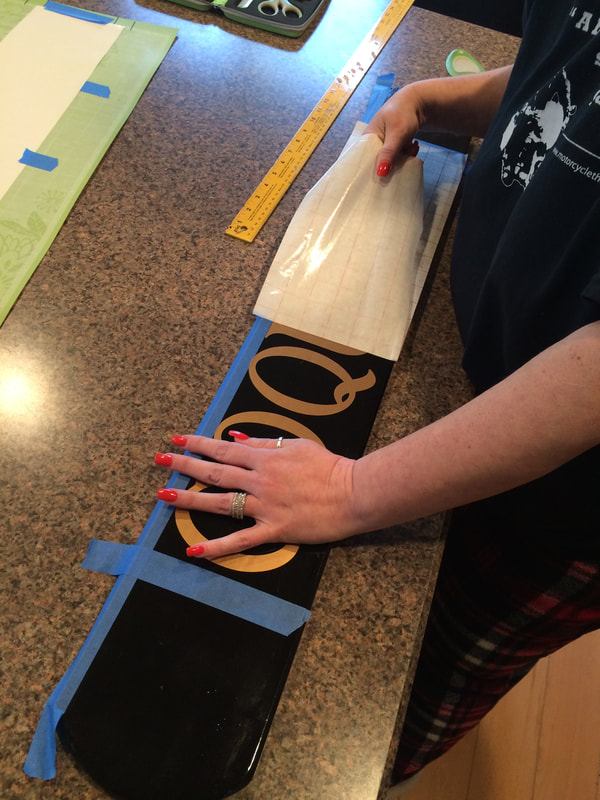


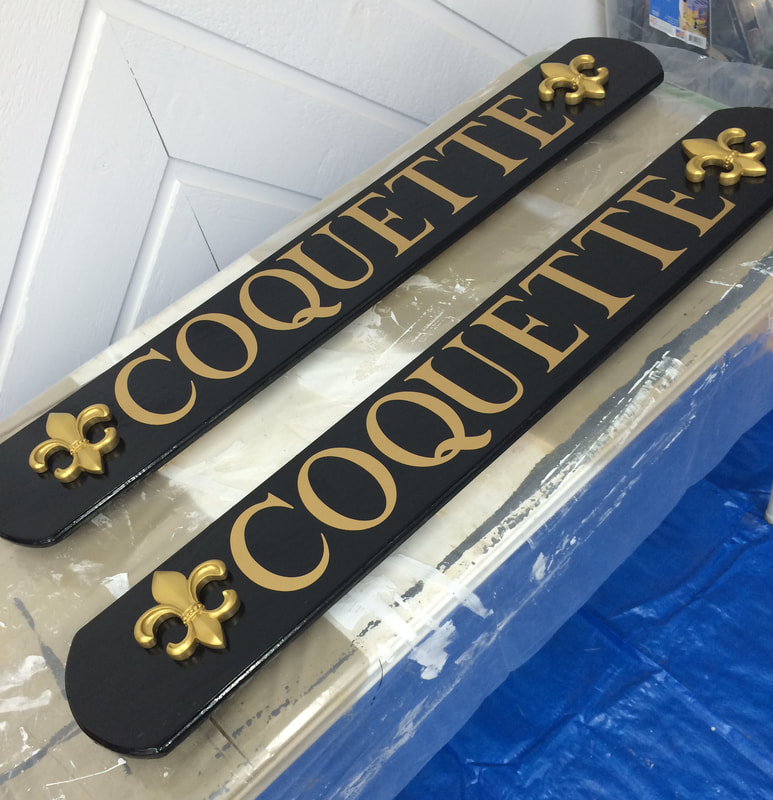
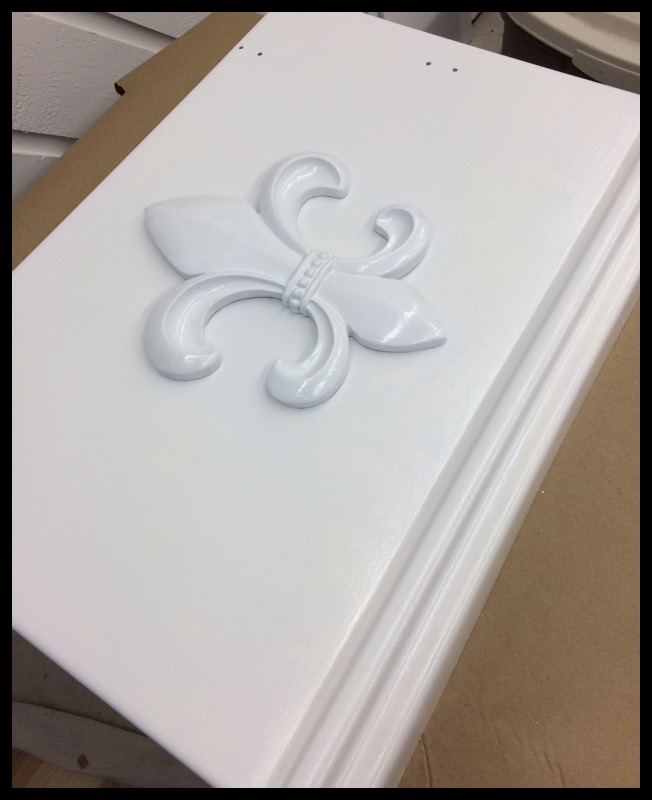
I made my boards out of whatever hardwood I had lying around. They're approximately 3/8" thick. I used a 1/4" rabbit bit to route the corners, then coated the wood in epoxy, sand, re-coated with Rustoleum paint. After cutting the vinyl letters, I also added some details like the raised wood fleur-de-lis. I re-coated the boards again with exterior polyurethane and will mount when the windows go back in. The stern graphics are just a larger version. I experimented with several sizes letters to figure out what looked best. I wanted the biggest graphics possible, and I also wanted top add more raised fleur-de-lis keeping with the French name and theme.