Albin 27 Ports & Hatches

You have to start somewhere, and the first step in my restoration was to remove all the trim wood in the boat. Very quickly I realized I would need to also remove the headliner that covered the interior of the forward and aft cabin. This would expose the underside of the all the deck fittings, reveal any water leaks, and generally show the condition of the hull. This would also help explain the overall construction of the boat and its general seaworthiness.
Factory Portholes & Replacement Options
Winter 2016: The Albin 27 factory portholes are all Beckson #714 (front cabin). and #512 (aft cabin). LZN714 is the part number for the replacement black tinted lens. I researched extensively trying to find a replacement porthole brand, but was unsuccessful. I ended up buying replacement parts for my Beckson portholes and getting everything back to proper working order. Basically four new lens' and new gaskets all around, and two new screens. It was a couple hundred dollars well spent. FYI: new Beckson portholes run about $140-160/porthole if you search marine discount sites. Replacement parts can quickly out price a new porthole, so keep that in mind. In addition, if you're ordering a lot of new portholes or parts, Beckson will give a discount over the phone of 10-20% for loyal customers. Very good customer service.
The Beckson porthole, being plastic, is not the most robust porthole on the market, but it is light weight, simple, serviceable and quite good. Costwise, its a good value option. Especially since there's six 714 portholes up front and five 514 portholes aft. When properly installed and with properly working gaskets and parts, its waterproof and bluewater capable. They do age in sunlight, and they can be damaged by over tightening due to failed gaskets. But they can be repaired easily.
New Found Metals makes a stainless porthole that looks like a direct replacement for the 714. But these portholes are 4-5x the cost of the Beckson at about $600/unit. With ten portholes to replace that makes them cost prohibative. Before I would spend that kind of money on new portholes, I'd invest in better pilothouse windows using custom aluminum extruded windows, which costs about $1500 for a complete set for the pilothouse. On amazon, I have seen Chinese plastic Beckson knock-offs approximately the same dimensions as the 714.They cost about $60. But these portholes are clearly not of the same quality and I would not trust them. Nor do they have the same features.
Aft Cabin Portholes
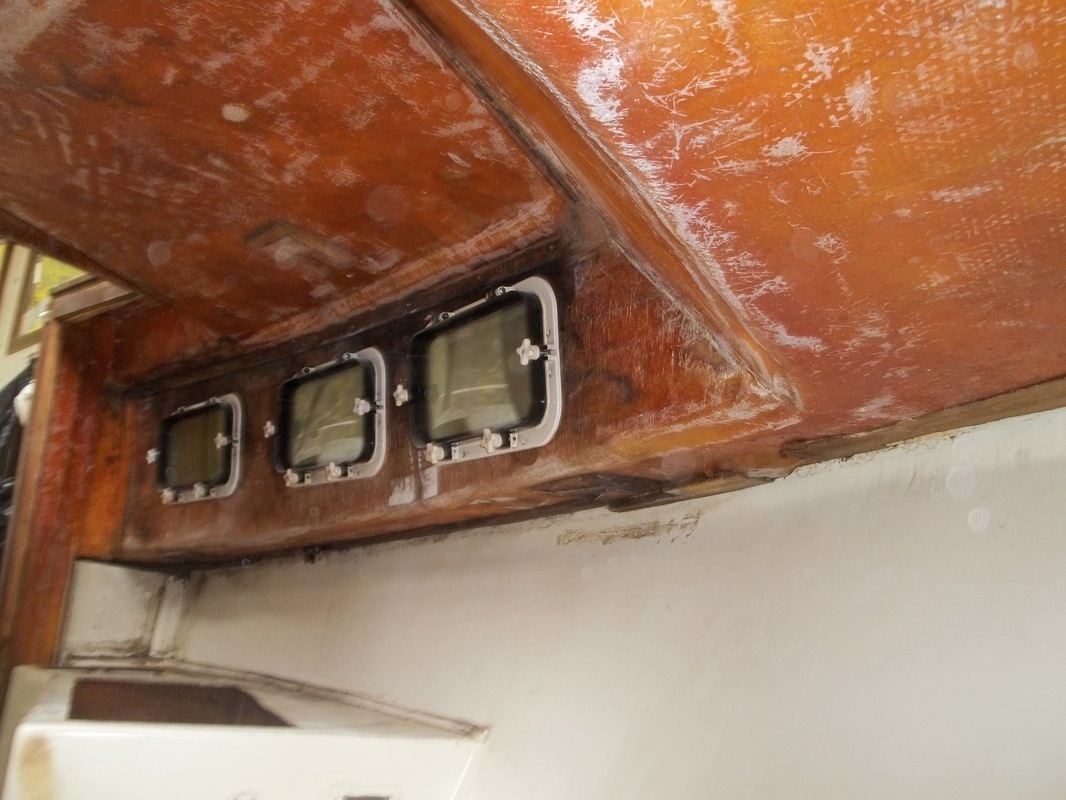

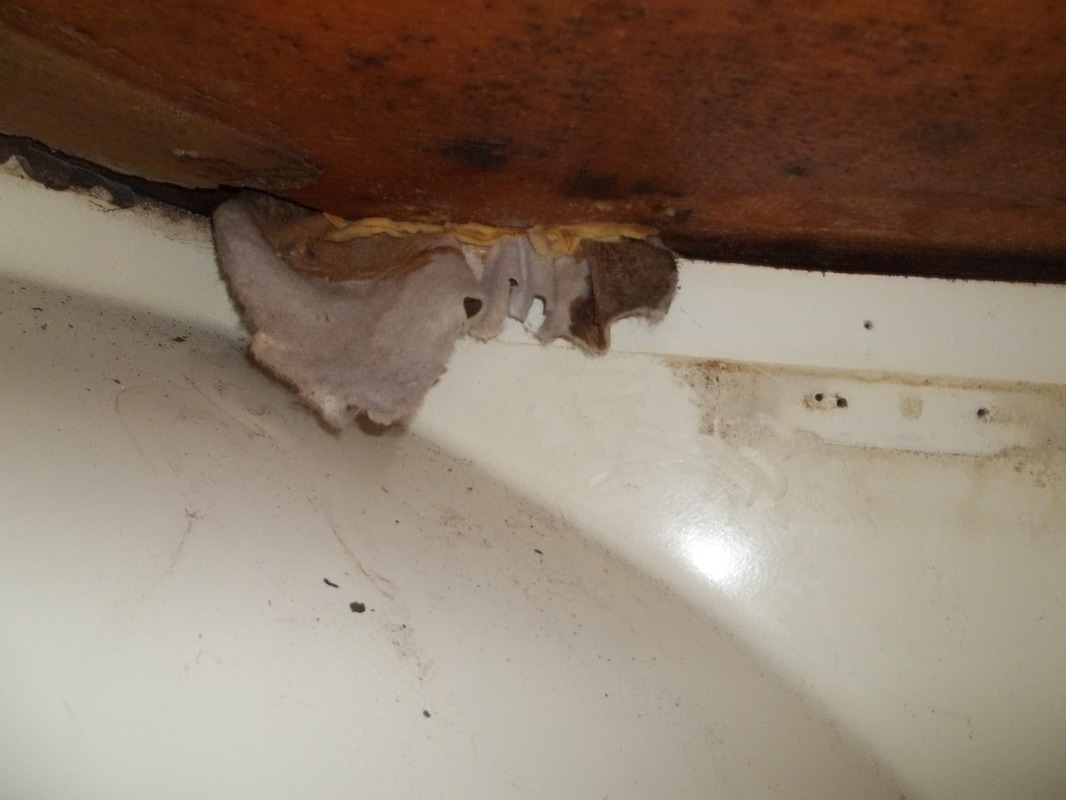
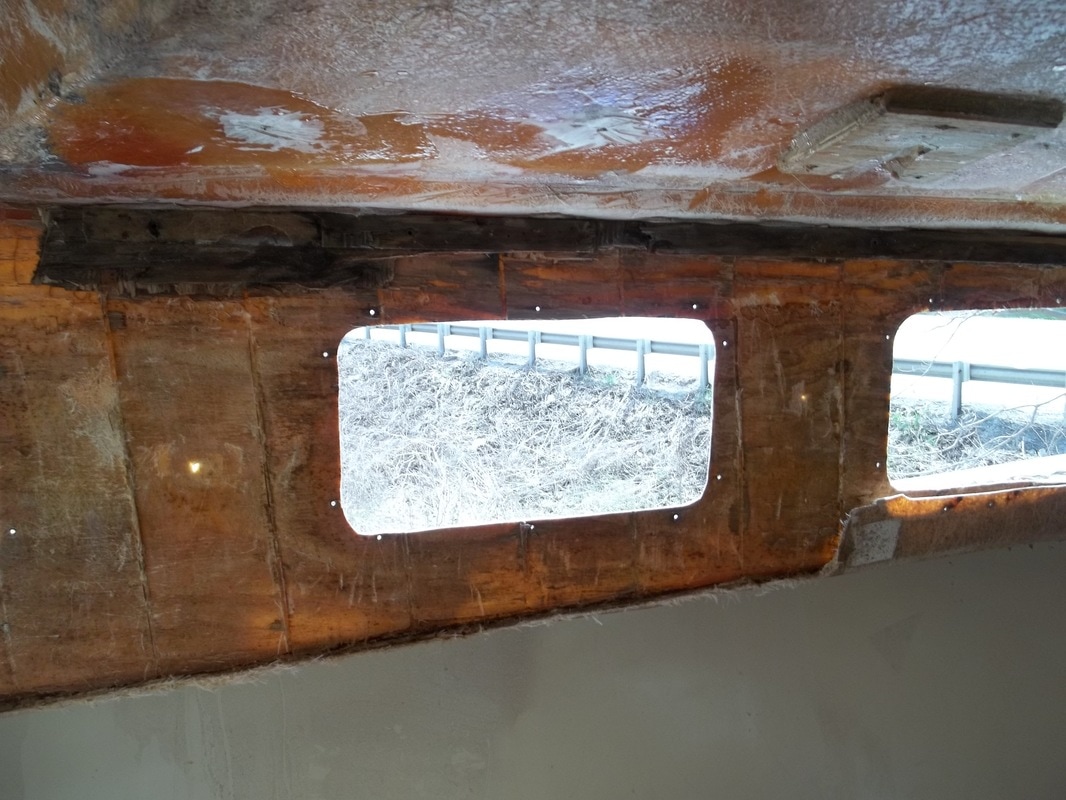
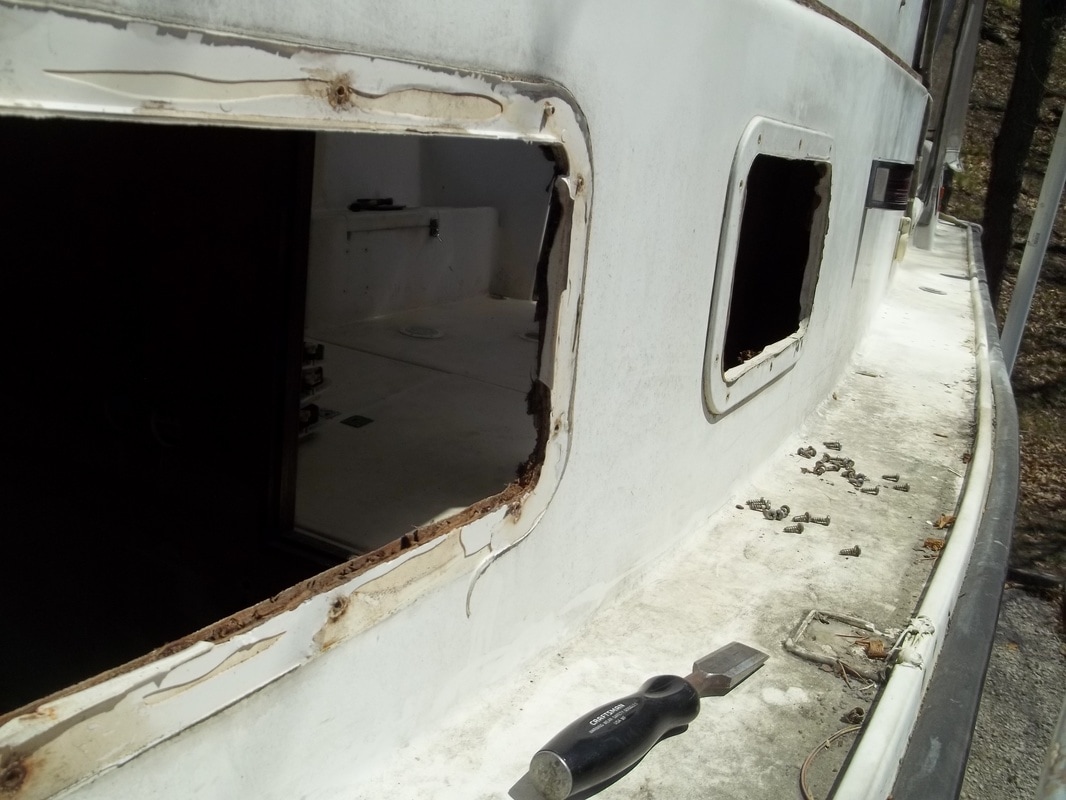
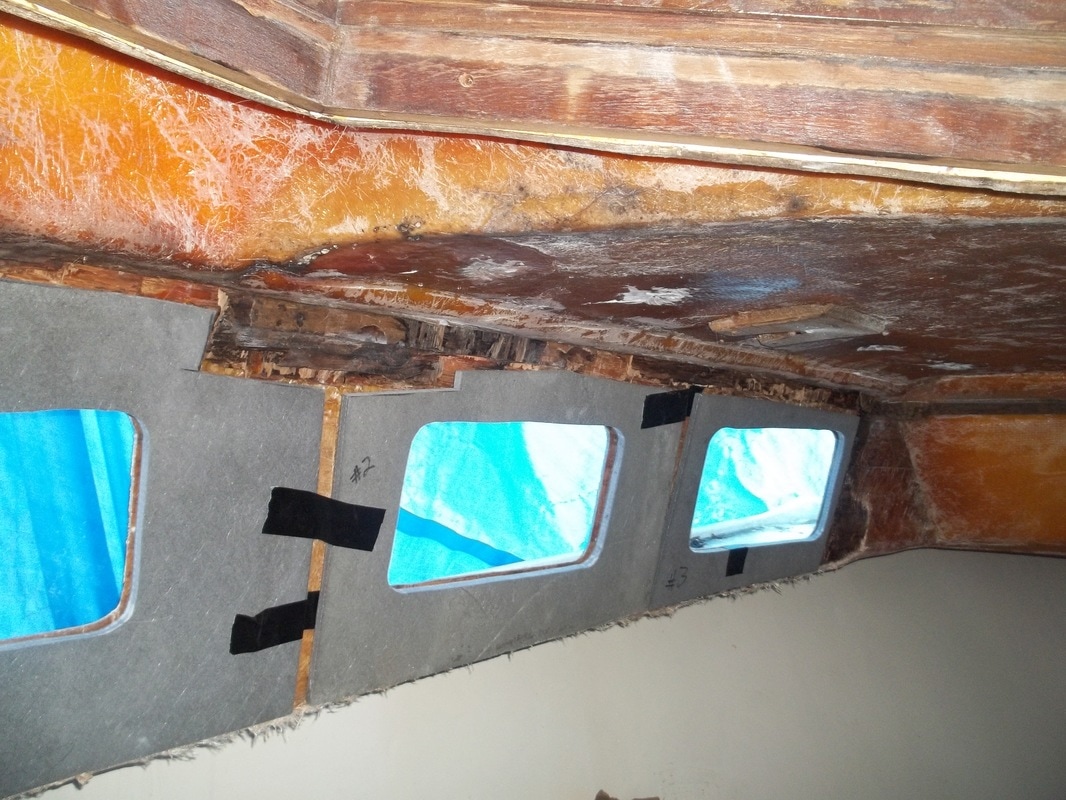
In the aft cabin, what a mess. Portals were obviously leaking in a few places. The upper part of the cabin top sides is plywood, not entire glassed, and so there is water damage. Headliner in the fwd cabin was the worst!. Difficult to remove at the aft bulkhead and the anchor locker. I never spent so long working on two stuborn pieces caught between the fwd anchor locker bulkhead and the top deck. But finally it was done. have similar delamination at the cabin sides where the ports are by the galley. I may use your penetrating epoxy fix, Warren. I also studied the lines of the fwd cabin. In actuality, there's not too many complex curves, so flat panel pvc or the wainscoating should work well. The trim will be the trick, finding something that covers my mistakes.
Couple things I found behind the bulkheads and the headliner, which other owners may want to know:
-mold and extensive moisture due to the headliner foam
-extensive mud dobber an wasp nests, behind aft head bulkhead, handing locker, and aft A/C panel
-most deck fittings are through bolted, but Albin glassed over the nuts and bolts, and appears no backing plates
-extensive moisture and rot at the aft bulkhead by the sink, which also at the A/C master panel
-rot at the countertop, by aft bulkhead
-various wire runs screwed into the fiberglass top deck from below (what were they thinking)
-no backing plate on the anchor platform/bow pulpit, or the front tow eye hook, or the cleats??!
-sides of cabin only glassed 1/2 way up, and showing delamination if not rot from port moisture, this is a structural item that appears to be due to way they made the boat, and I would think needs to checked or fixed in each boat.
If they had just glassed everything, it would have solved soo many problems
What am I thinking at this point..? I'm thinking about trying CPES and putting penetrating expoxy in a few key areas and see what happens. Failing that I will remove the plywood and do soemthing similar to what you did. I am also debating grinding off all the fiberglass on the thru-bolts etc, so I can re-bed everything once and for all, and have access for the future. Seems like the only prudent option.
The Portholes are Rotted
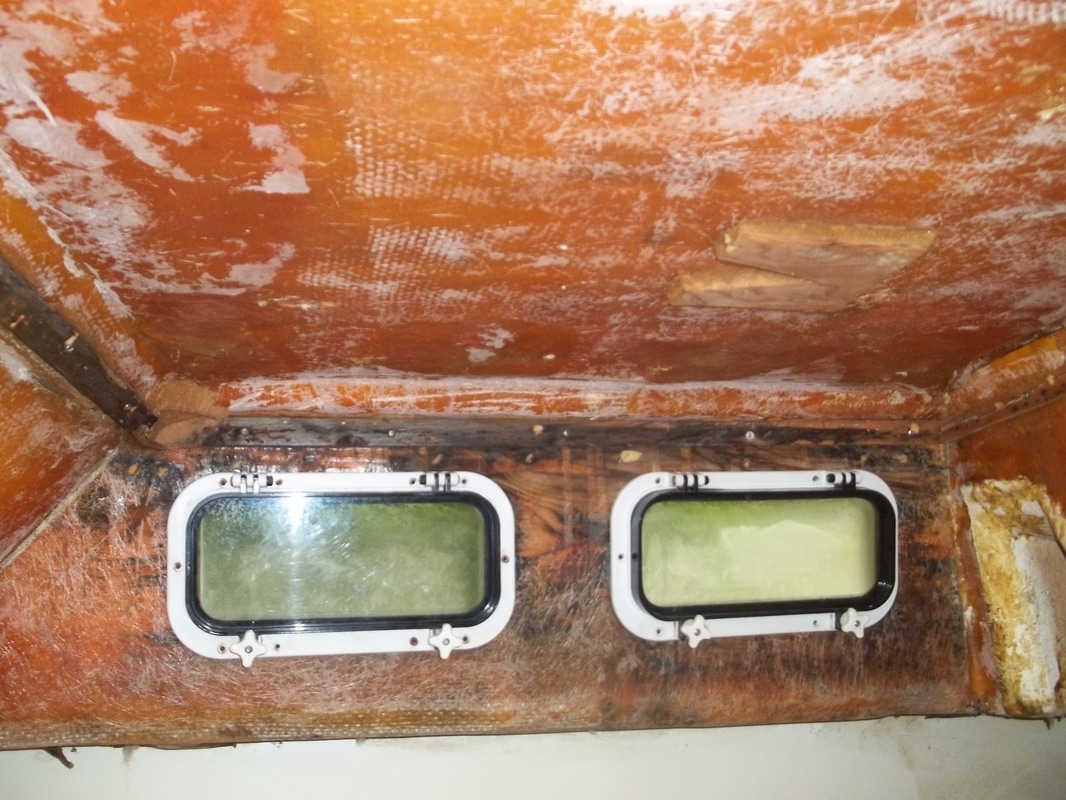
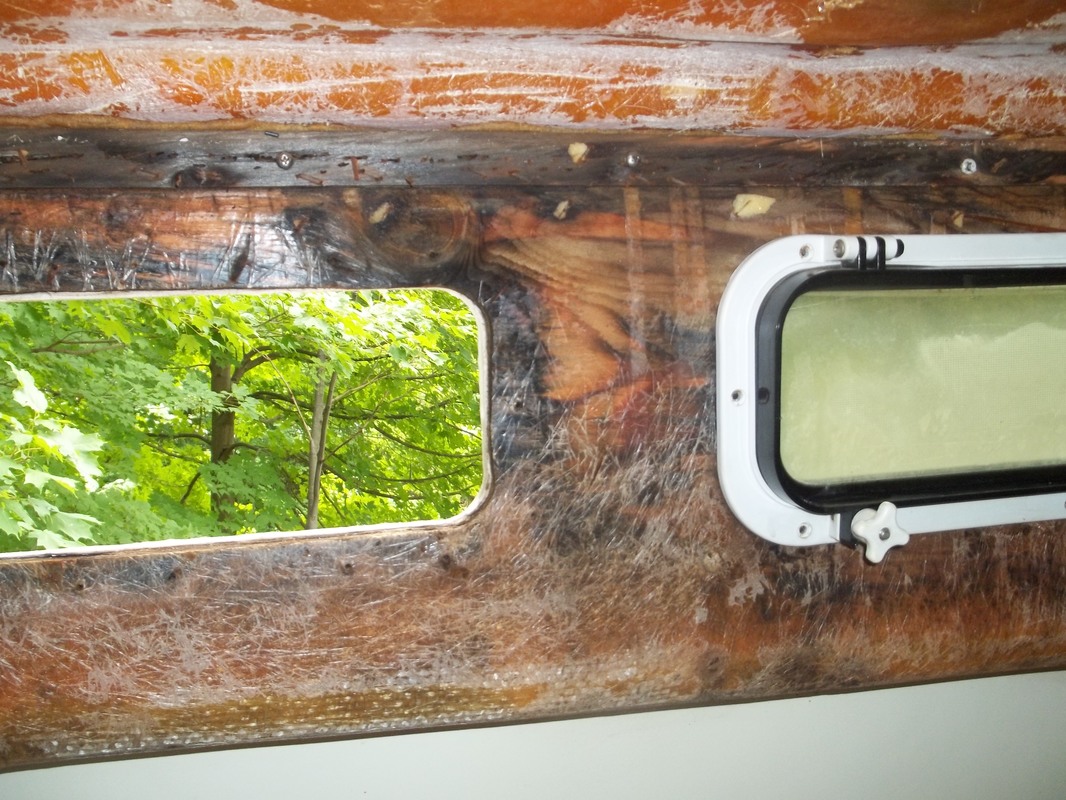
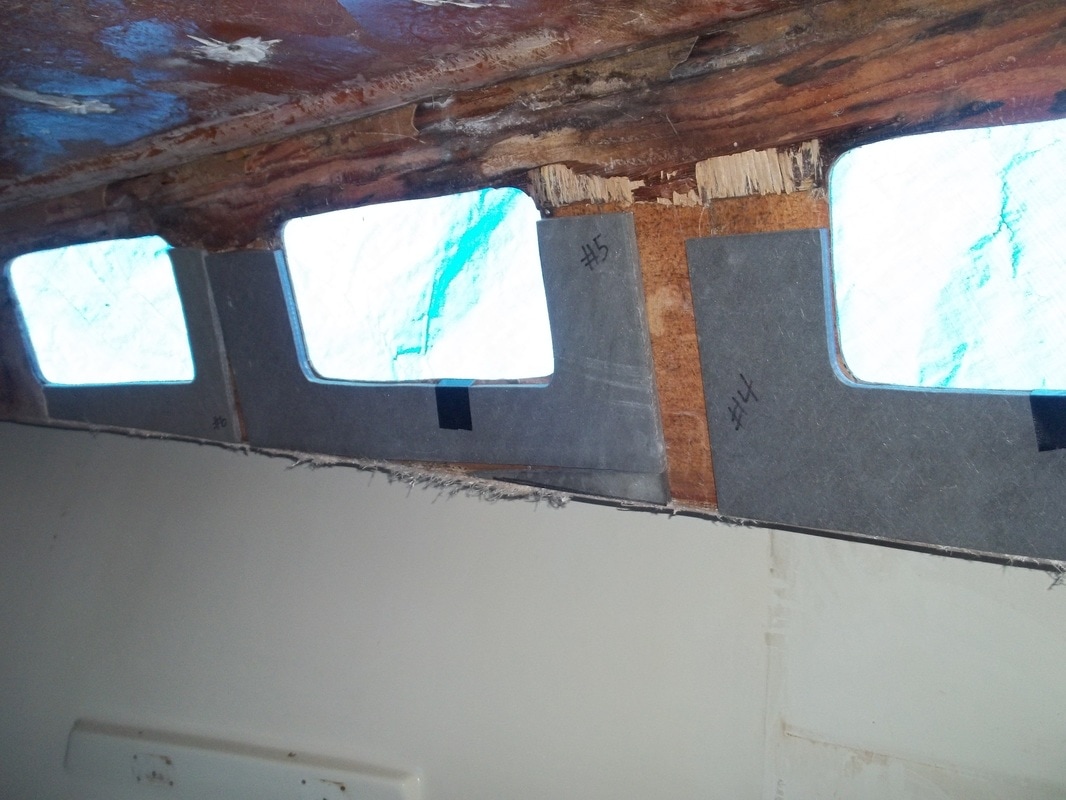
I started on my windows last weekend. The aft cabin came along fine. I was able to remove a tiny amount of rotted wood around 1-2 ports where there was water damage, and then fill with thickened epoxy. I also re-glassed the aft cabin windows to make up for the poor factory glass job. Its now rock solid. The fwd cabin is another story. Probing determined that there was extensive dry rot of the plywood core around virtually all windows, so I removed all the scrapps of wood down to glass and will make up some new plywood coring and glass that around the windows just like you did. The factory half-glass job was completely unacceptable. Half-glassed? Maybe, but for sure half-assed! The window leakage, headliner condition, cabin top damage should be the number one thing a prospective new owner checks during a survey. What size thickness did you use for your plywood? I looked at some 1/4" plywood I have I think it may be too thin. I'm think of 1/2" coosa board, and then I can attach and just glass over.
I plan to lay in new core then re-glass the the interior, and that should solve the problem of week and leaky windows. I'm going to thru-bolt the Beckson ports. I was originally thinking of butyl tape, and I have some on hand for deck fittings, but I can see you're point about the thin outer and inner fiberglass skins for counter sinking. In addition, since I'm using the pvc beadboard as a headliner, I need to get that up under the Beckson port inner ring also. I'm thinking about 3M4200. I think caulking the port rings and thru-bolts would make this a one time repair. By the time it fails, it will be someone elses problem.
In addition, I've been thinking about the outer trim ring for the Beckson ports. All my trim rings are in good condition. The only problem is they are drilled for screws, not for thru-bolting. That is, the inner port does not line up with the outer trim ring holes for thru-bolting. Making some new trim rings is a great option, but for the materials and effort, what about this solution: fill the screw holes of the outer trim ring with epoxy, sand smooth, paint the trim rings (since I'm painting exterior of the boat anyway), and then re-drill thru-bolt holes that match the inner ports. Basically reusing the trim pieces? New undrilled trim rings from Beckson PTR-512w(aft cabin) and PTR-714w (fwd cabin) are $22 and $23 each respectively that's $250 just for trim ring?! I'm not liking this. Makes me consider just screwing them back in to avoid the cost of the trim rings.
In addition, I've been thinking about the outer trim ring for the Beckson ports. All my trim rings are in good condition. The only problem is they are drilled for screws, not for thru-bolting. That is, the inner port does not line up with the outer trim ring holes for thru-bolting. Making some new trim rings is a great option, but for the materials and effort, what about this solution: fill the screw holes of the outer trim ring with epoxy, sand smooth, paint the trim rings (since I'm painting exterior of the boat anyway), and then re-drill thru-bolt holes that match the inner ports. Basically reusing the trim pieces? New undrilled trim rings from Beckson PTR-512w(aft cabin) and PTR-714w (fwd cabin) are $22 and $23 each respectively that's $250 just for trim ring?! I'm not liking this. Makes me consider just screwing them back in to avoid the cost of the trim rings.
How to Touch Up Beckson Porthole Trim Rings
After determining that new port trim rings would be $250 to replace, I decided to try an experiment. I sanded down the old trim rings to clean them up, then filled the screw holes with thickened epoxy. Sanded again. I'm now experimenting with painting them. I did one ring with the Rustoleum marine paint I am using for the interior/exterior topsides. Looks good, but I may switch from a brush to foam to get a smoother finish. If that paint doesn't work, I may try a Krylon plastic paint. Trim rings appeared to be made of pvc (?)
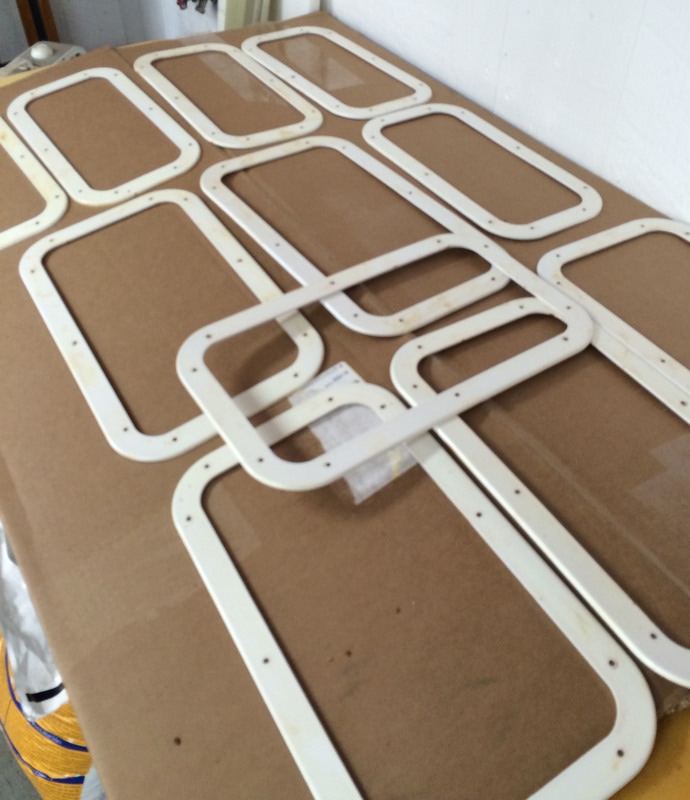

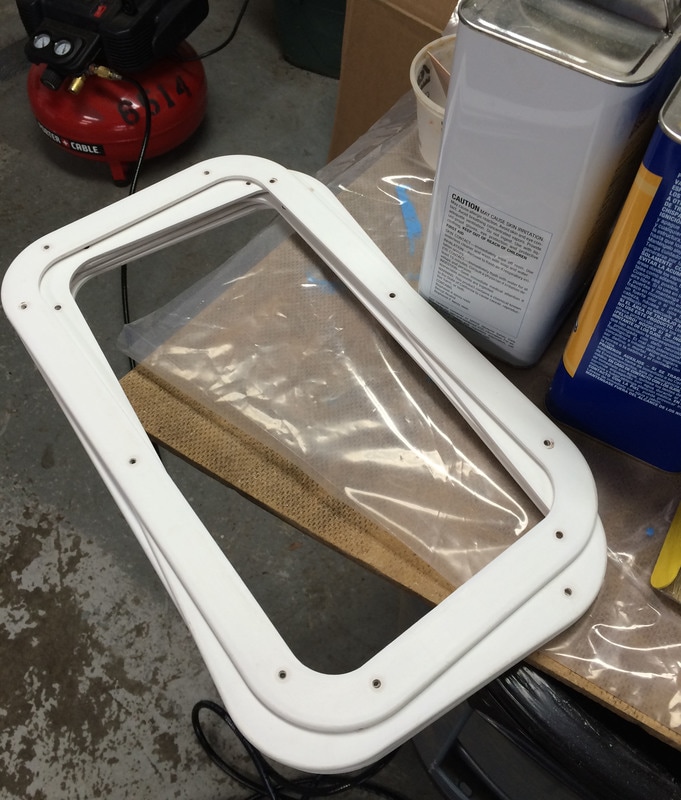
Filling the screw holes with thickened epoxy and sanding worked out great. I will be able to drill new holes for thru-bolting, and none will be the wiser. The end result with the trim rings came out very nice. Although I emailed Beckson and they advised painting with Krylon Plastic Paint, I opted to paint to with the same paint I will be using for the interior and exterior topsides, Rustoleum Marine Topside paint one part polyurethane. The Rustoleum Topside Marine paint is available at your big box stores. It runs about $11-15/quart, which makes it almost half the price of Brightside One part Polyurethane. I love the Brightside, but the cost is just too much. My experiments and research with the Rustoleum have confirmed that almost every bit as good. It flows very nice and settles really well. On wood and the Beckson trim rings I used a primer and then brushed it on. Excellent results.
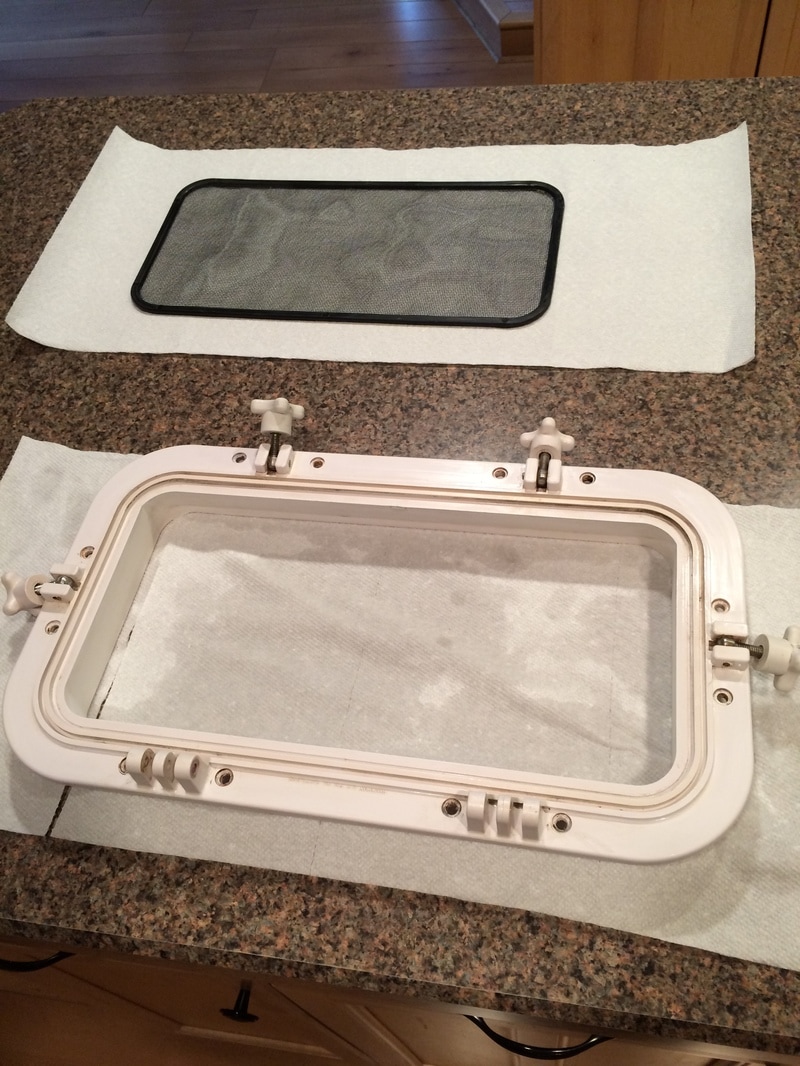

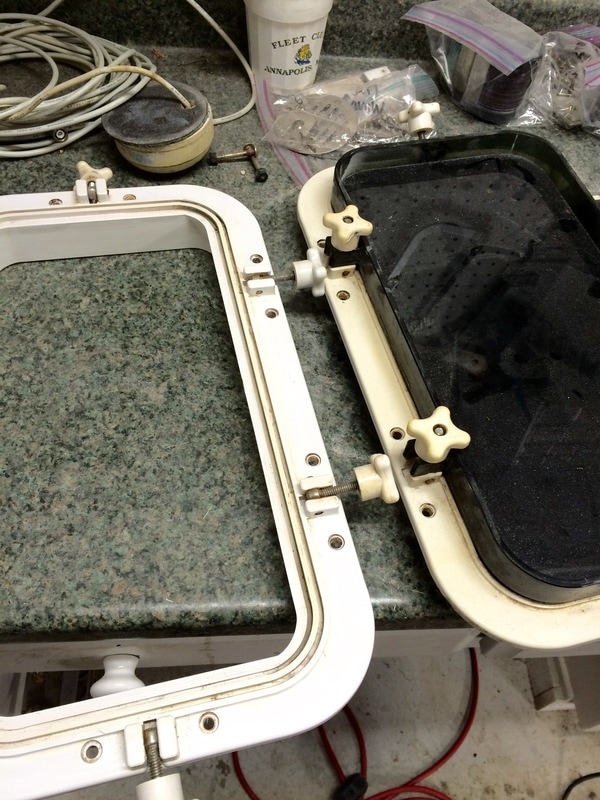
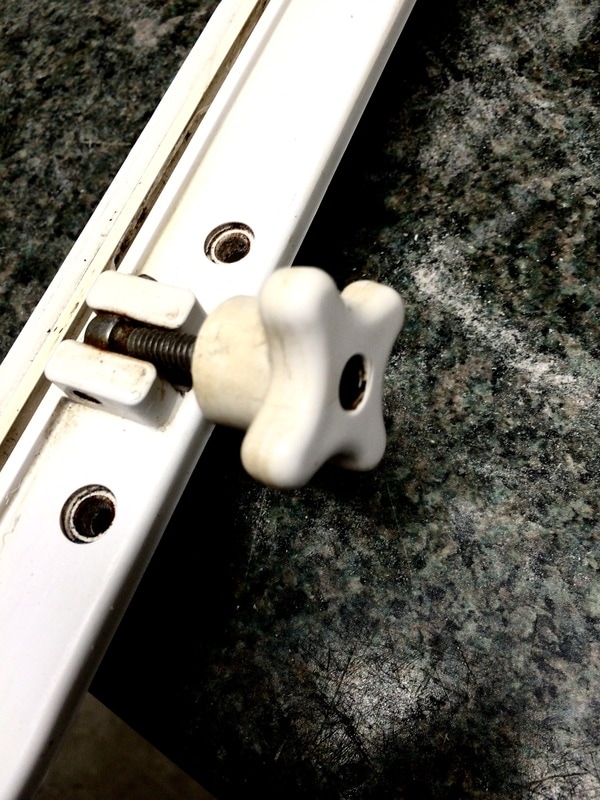
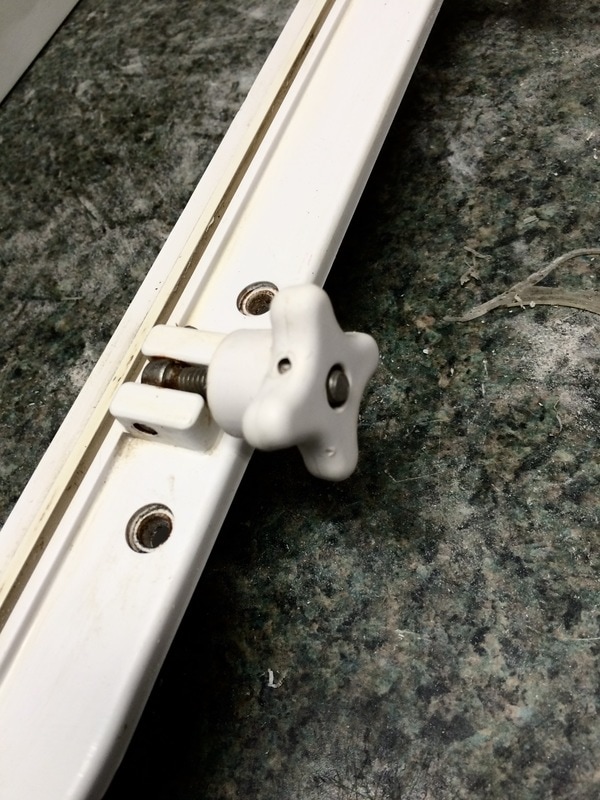
So I've been experimenting with cleaning the Beckson ports for re-install. With the hefty price they charge for components and individual units it makes sense to try and recycle whatever parts can be had. One problem my ports had is the white plastic port housing and knobs have turned slighted brown or yellow. Not uniformly, but it appears its maybe age or UV. I had luck sanding the trim rings and painting them but felt this was too aggressive for the interior port unit. Plus with sanding I couldn't get into all the nooks and crannies.
I tried Aceton on a paper towel. I suspect the ports are made of a PVC type plastic. With some Acetone I was able to "wipe" off a top layer of aged plastic and get to new material. With q-tips I could get into nooks and crannies. You will note the Aceton makes the plastic sticky to the touch but if ur careful you can give it a nice "wipe" then let it air dry. The key is a clean non transferring rag or papertowel and wear gloves so there's no fingerprints of ur crime. Result are excellent. So if your knobs or ring is showing age you might try this.
I tried Aceton on a paper towel. I suspect the ports are made of a PVC type plastic. With some Acetone I was able to "wipe" off a top layer of aged plastic and get to new material. With q-tips I could get into nooks and crannies. You will note the Aceton makes the plastic sticky to the touch but if ur careful you can give it a nice "wipe" then let it air dry. The key is a clean non transferring rag or papertowel and wear gloves so there's no fingerprints of ur crime. Result are excellent. So if your knobs or ring is showing age you might try this.
Let Me Tell You about Coosa Board...
Coosa Board....If you're not familiar with this product, let me introduce you to it and give some first hand feedback. I did a lot of research online and there's some info but it can be spread all around. Some people swear by it, some people complain about the cost. Many old school boat builders and DIYers online have reported some misinformation. Quite a few modern boat builders are using it, but it can be hard to hear about their construction examples. I was a little skeptical and hemmed an hawed about the technology and cost. But it was absolutely well worth it. Alternative brands are AirEx and Penske board.
Coosa Board is a composite material that can be used as a marine plywood substitute and core. It can be used anywhere marine plywood would be used, and it has excellent compression and structural strength. It's 30-40% lighter than plywood. Its made of a foam composite, and it has two layers of fiberglass fabric inside it, plus fibers mixed throughout. It doesn't absorb water, and it won't rot or mildew. The edges don't have to be sealed, and the sides don't need to be glassed or hot coated with resin before fiberglassing. It can be worked with wood working tools, hand tools, routed, drilled whatever. It can actually be painted without fiberglassing at all. Its not terribly porous to the eye, I bet a bare panel would look very good with a light bondo filler and paint.
Coosa Board is a composite material that can be used as a marine plywood substitute and core. It can be used anywhere marine plywood would be used, and it has excellent compression and structural strength. It's 30-40% lighter than plywood. Its made of a foam composite, and it has two layers of fiberglass fabric inside it, plus fibers mixed throughout. It doesn't absorb water, and it won't rot or mildew. The edges don't have to be sealed, and the sides don't need to be glassed or hot coated with resin before fiberglassing. It can be worked with wood working tools, hand tools, routed, drilled whatever. It can actually be painted without fiberglassing at all. Its not terribly porous to the eye, I bet a bare panel would look very good with a light bondo filler and paint.


Probably it's only real downside is the cost. But if you can locate a wholesale plastics supplier, its costs about $200 for a 8x4' piece at 1/2 thickness. Before you complain about the costs, consider the costs of marine plywood. Consider the cost of fiberglass and resin to completely coat and encapsulate the wood. The time to do that before you even install your wood panels, etc. Now some people say coosa won't hold a screw very well, but I did not see this to be the case. It acts just like soft pine to me. It's also a composite material with fiberglass, so it is messy when cutting and routing. Routing or grinding will vaporize very tiny particles. I wore full protective gear just during cutting to keep the itching down and had absolutely no problems.
I was initially concerned it would be difficult to cut, as several people online reported it dulled their saw blades, etc. But regular hand tools went through this stuff like butter. As I cut the pieces to replace the coring for the fwd cabin ports, I started thinking about all the things I could create with this stuff. Hardtop, pilothouse for a sailboat, battery boxes, generator box, backing plates, you name it. I experimented with a heat gun and it can be heated and then bent around a radius. The 1/2" thickness at full sheet can easily be bent onto a frame to match the camber of the A27 hardtop. I intend to use it exclusively to build the bathroom bulkheads and shower. I'm a believer. I can't wait to start on the bathroom floor and bulkheads. I think I might need 2 more sheets, and that will give me left overs for other projects. I'm going to use coosa board to also make the stringers for the floor supports for the area I cut out of the head.
I was initially concerned it would be difficult to cut, as several people online reported it dulled their saw blades, etc. But regular hand tools went through this stuff like butter. As I cut the pieces to replace the coring for the fwd cabin ports, I started thinking about all the things I could create with this stuff. Hardtop, pilothouse for a sailboat, battery boxes, generator box, backing plates, you name it. I experimented with a heat gun and it can be heated and then bent around a radius. The 1/2" thickness at full sheet can easily be bent onto a frame to match the camber of the A27 hardtop. I intend to use it exclusively to build the bathroom bulkheads and shower. I'm a believer. I can't wait to start on the bathroom floor and bulkheads. I think I might need 2 more sheets, and that will give me left overs for other projects. I'm going to use coosa board to also make the stringers for the floor supports for the area I cut out of the head.
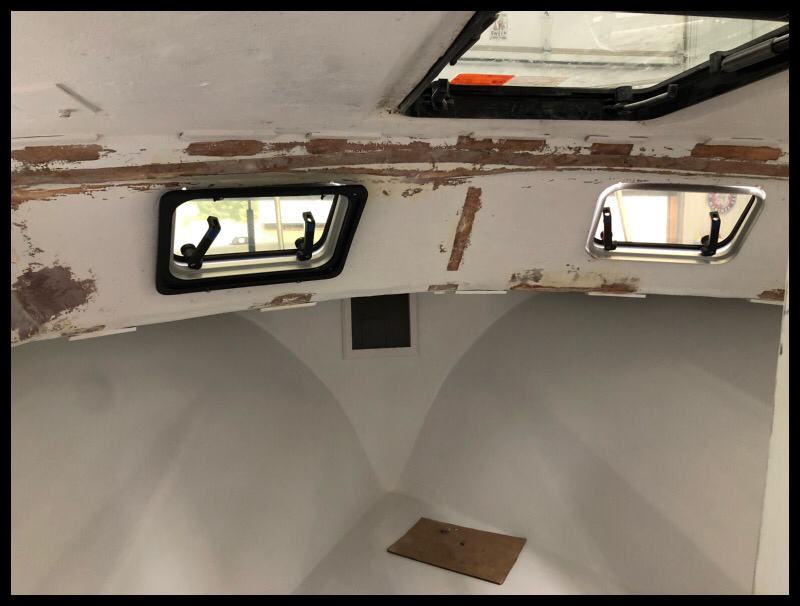
How I fixed the Forward Cabin Rotted Portholes...
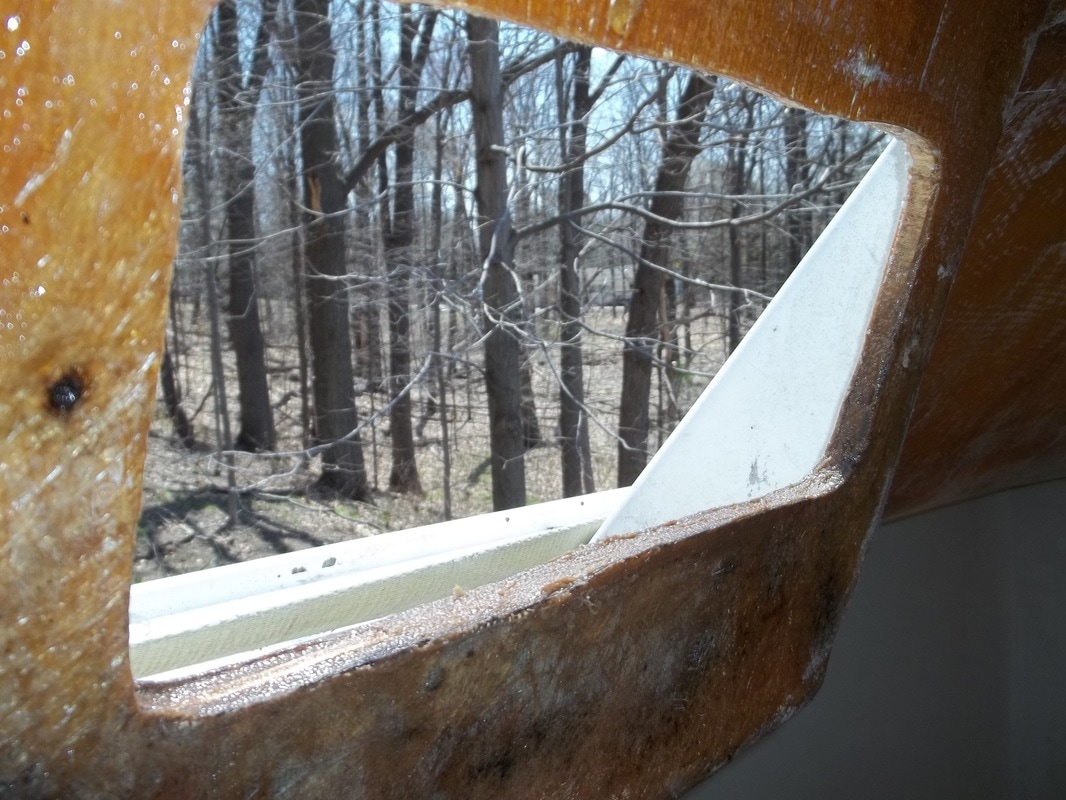
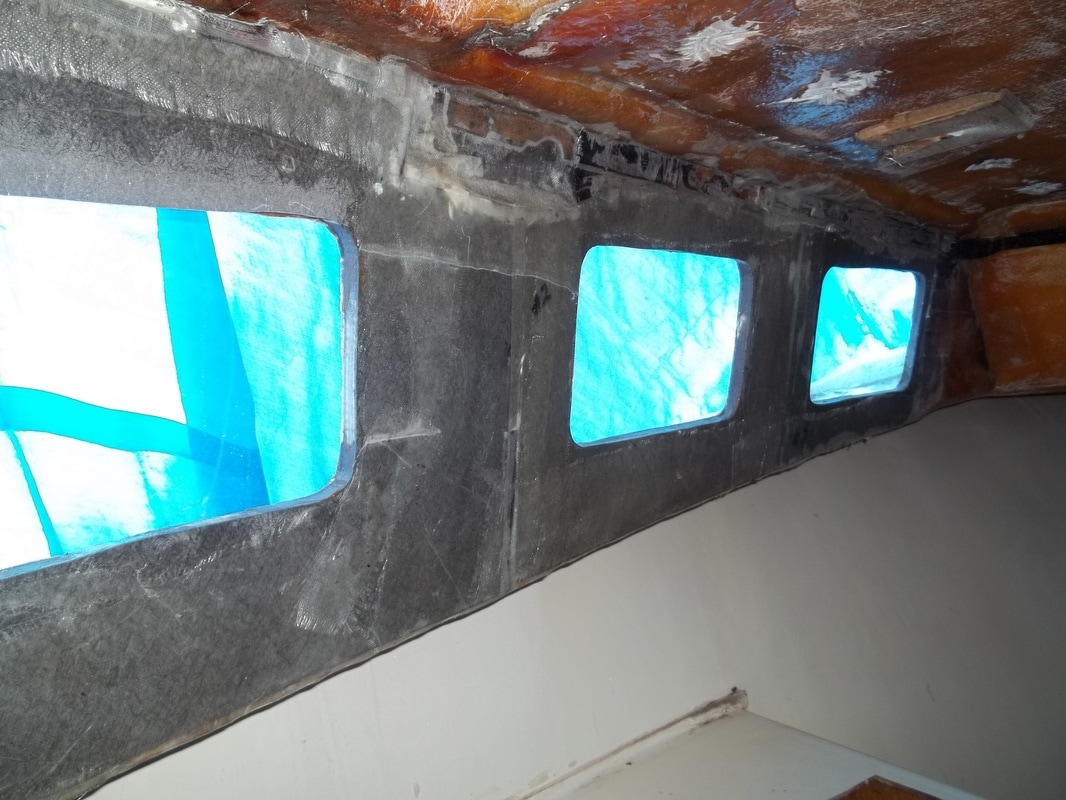
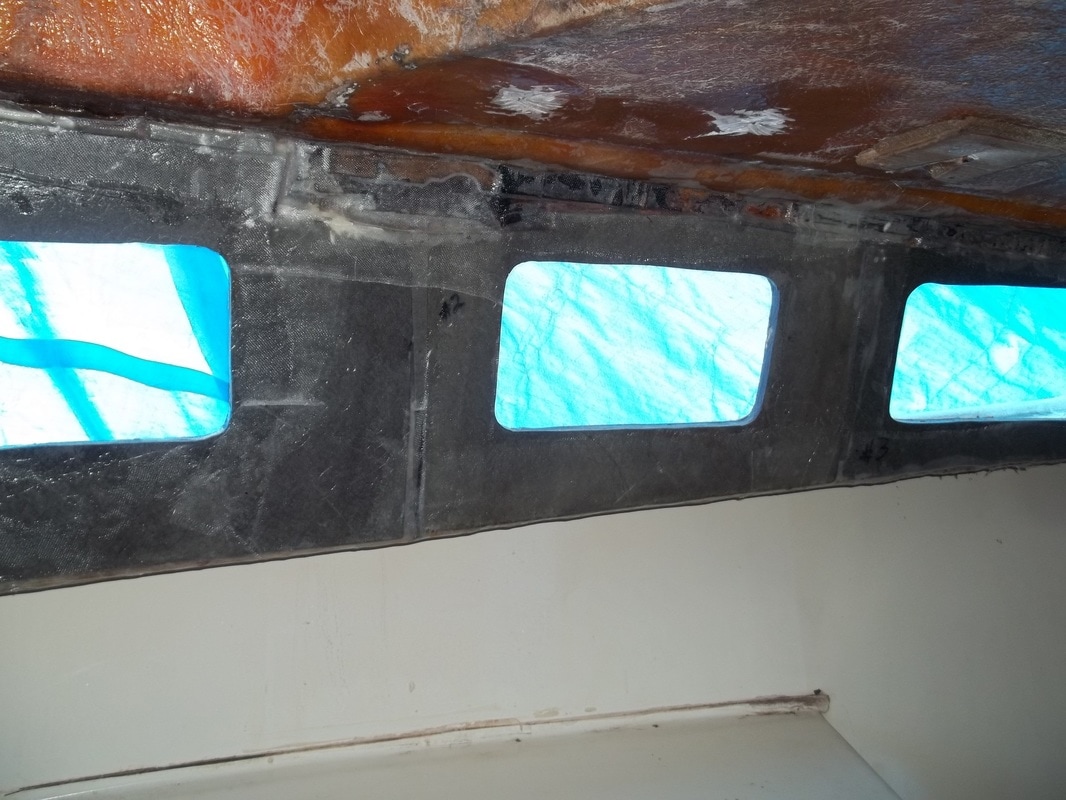
I was able to cut coosa board panels to replace the damaged plywood in the fwd cabin. It took less than 48x48". I cut the panels based off rough measurements, then mocked them up with duct tape. Traced the outline of the portholes, retraced them with the trim rings as final guide, and cut it with a jigsaw. It took about 5 hours to cut, fit, and secure the panels. I glued the panels to the cabin sides with 3m 5200, then went back and used my scraps to fill in the voids. I will follow with some thickened epoxy around the portholes, and in the small gaps. Then glass on 1-2 layers of fiberglass cloth.
The most noticeable thing in my entire experience with this stuff is the ease in moving it around. It is significantly lighter than wood. Moving a sheet was like moving pink sheet insulation. But this stuff is much much much tougher than that. Fitting the panels was a breeze because there was no weight to pull away from the tape. I cannot say enough about this material.
The most noticeable thing in my entire experience with this stuff is the ease in moving it around. It is significantly lighter than wood. Moving a sheet was like moving pink sheet insulation. But this stuff is much much much tougher than that. Fitting the panels was a breeze because there was no weight to pull away from the tape. I cannot say enough about this material.
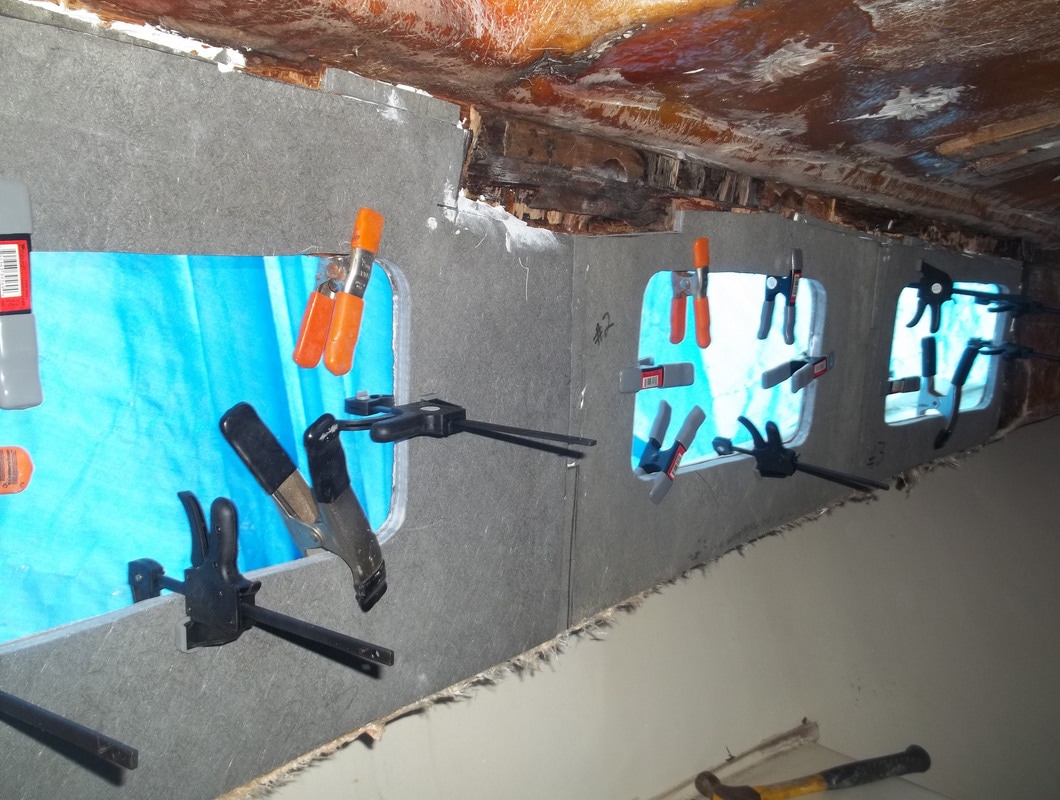
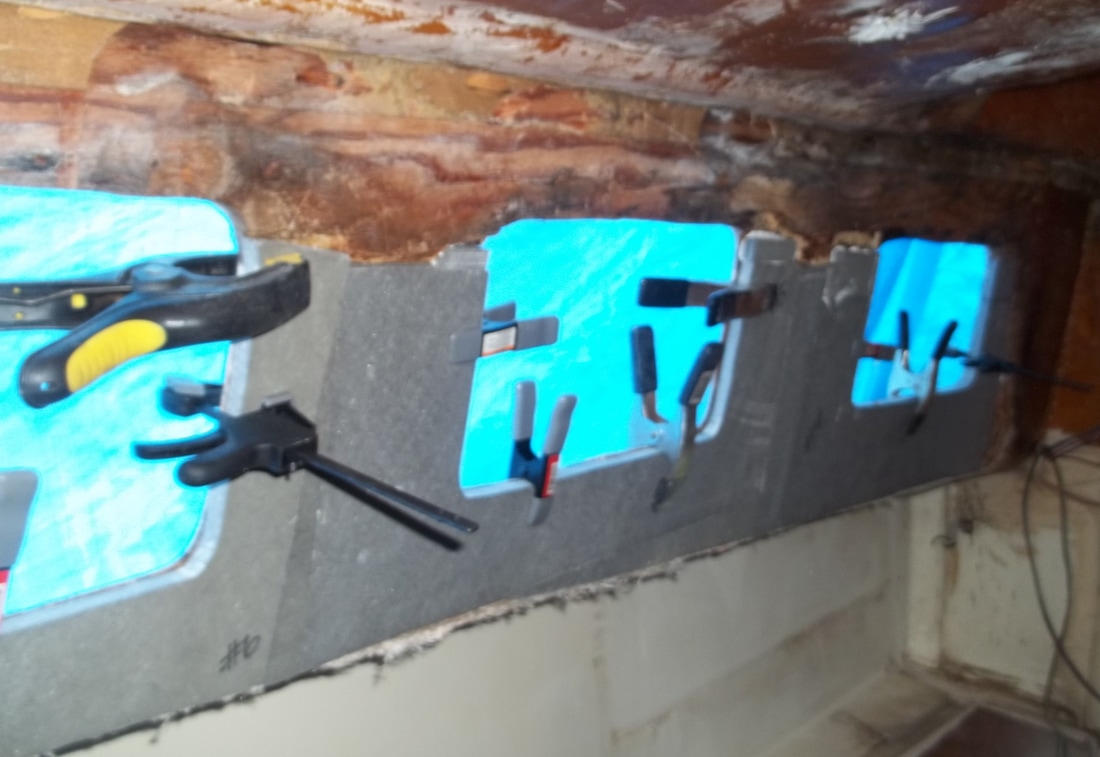
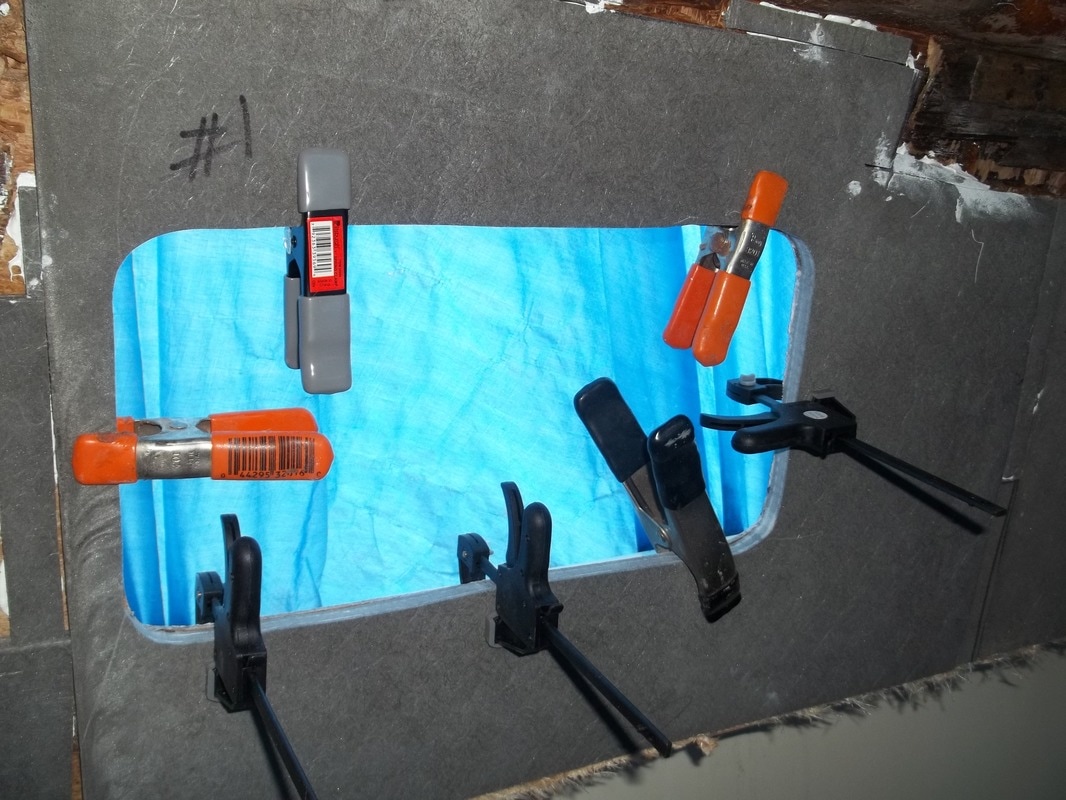
Panels glued in place using 3m 5200. The final layup will be 1-2 layers of fiberglass cloth, wrapped around the curve of the cabin top above and below.
Materials:
less than 48x48" coosa board 1/2" thick if you remove inner fiberglass and plywood
two tubes 3m 5200
24-30 spring clamps
Tips: remove only the plywood coring that's damaged. If its attached to the outer skin, leave it be, but if it crumbles under the gentle poking of a chisel, then its got to be removed down the fiberglass. My inner fiberglass skin was partially delaminated and so I took it down to the bottom edge of the cabin top. This is clearly a failure of the original Albin manufacturing: not glassing the entire cabin side, securing the windows with screws rather than tru-bolting, and not sealing the core at the portholes. I would venture that every A27 will have some deterioration at the portholes unless this was repaired early properly. I then glassed it in, making it bulletproof.

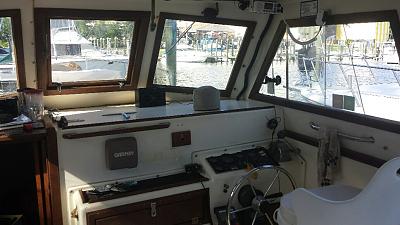
Rebedding the Pilothouse Windows
|
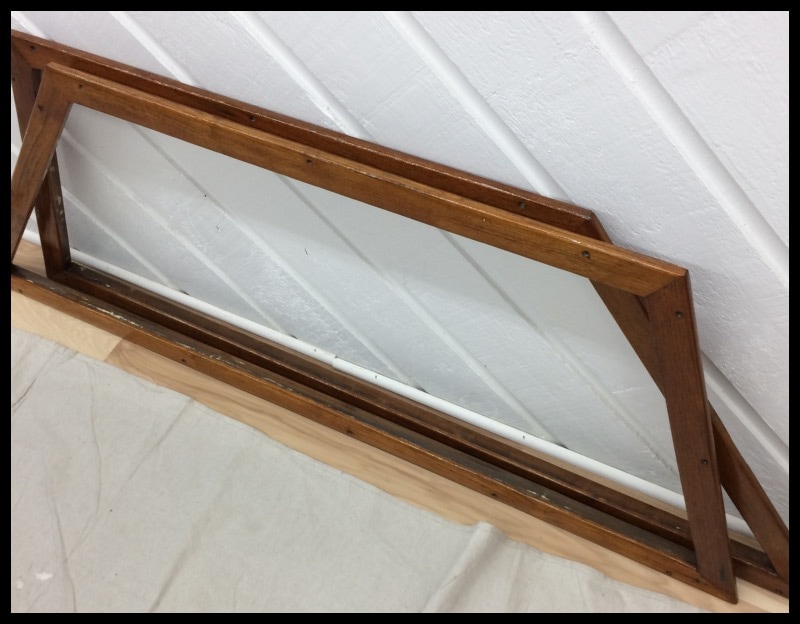
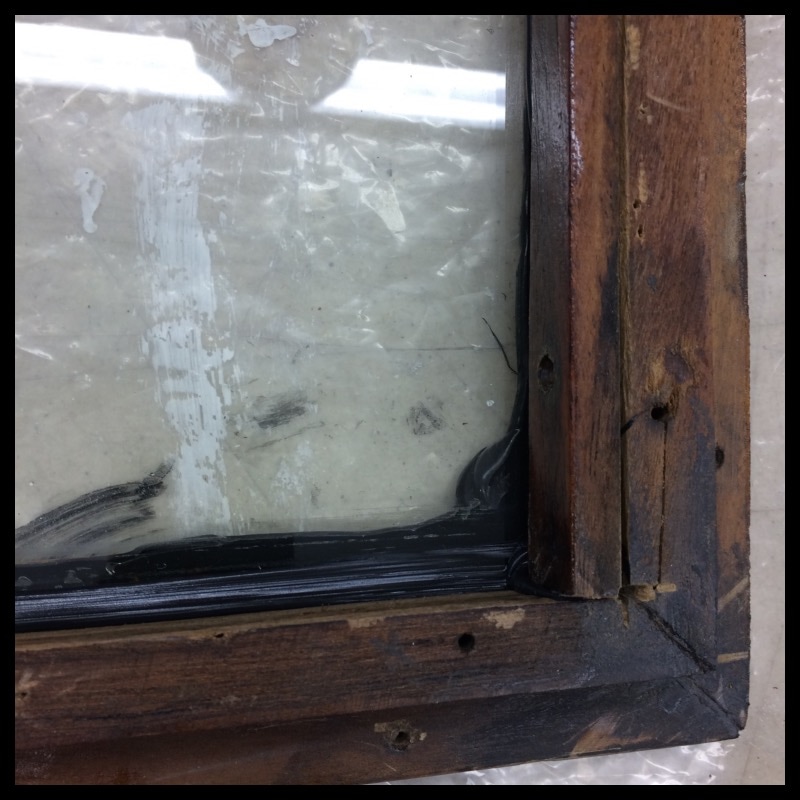
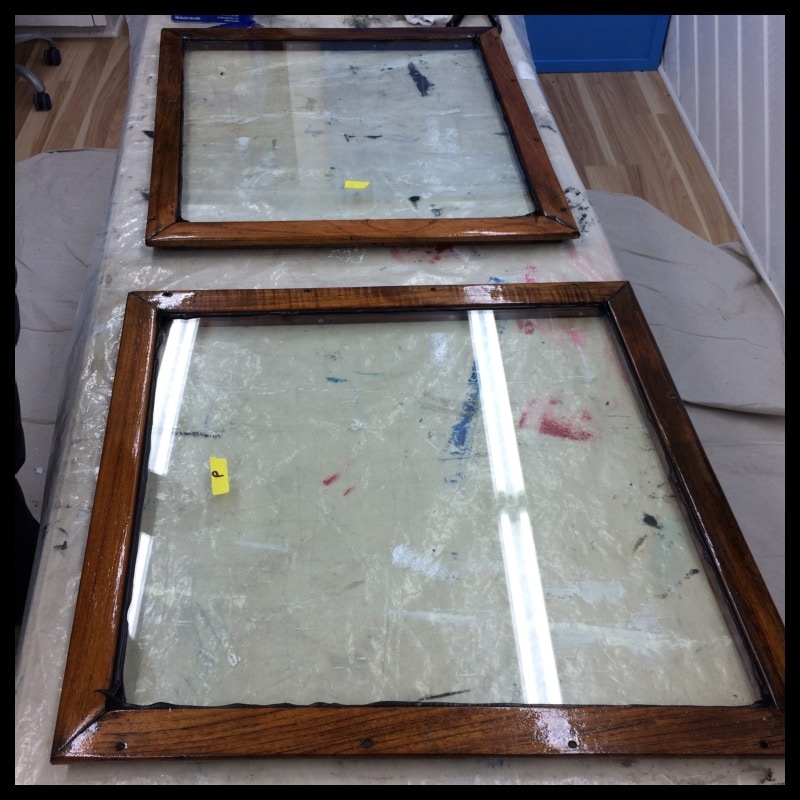
The pilothouse windows on the Albin 27 are basically 1/4" safety glass placed in a wooden frame that is them mounted to the pilothouse and trimmed out with teak. They are notorious for leaking. Its a very simple window design, but not a very sound one I you ask me. I debated changing the windows to something similar to my Compac 16 Pilothouse Project, but that would require changing rhe mittered corners to rounded ones, and whole lot of effort and expense. My teak window frames were in pretty good condition, so I decided to stick with the original windows.
|
|
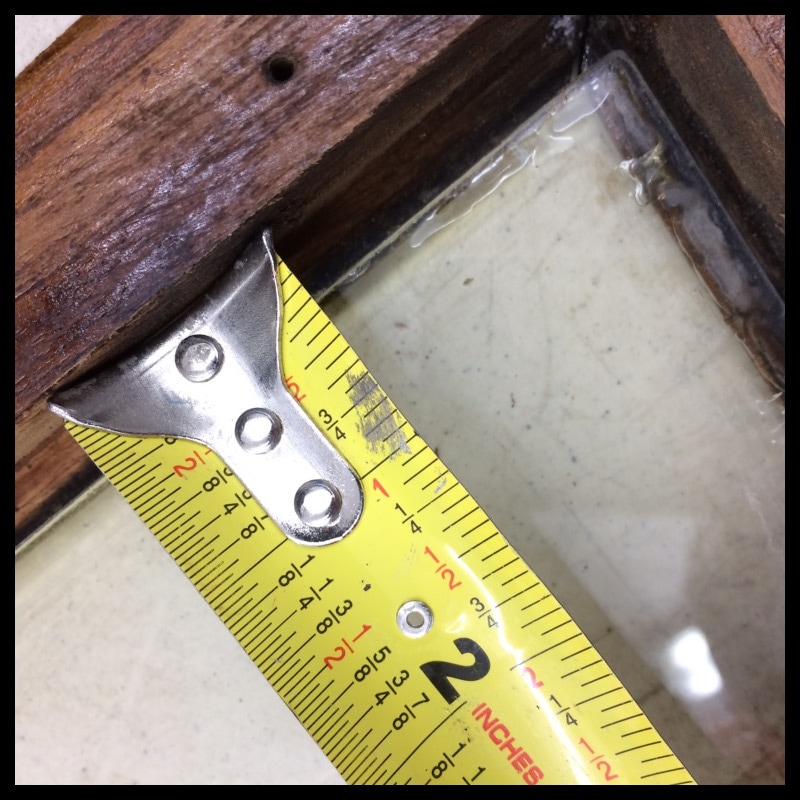
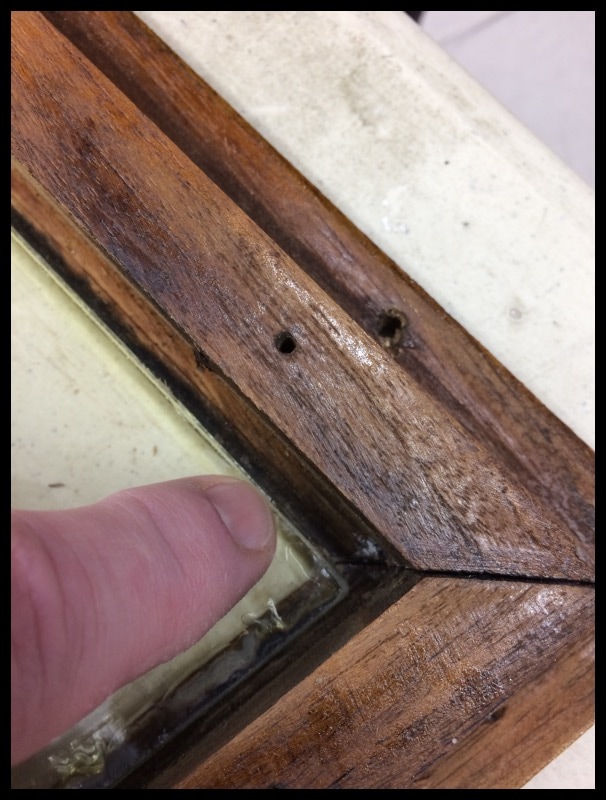
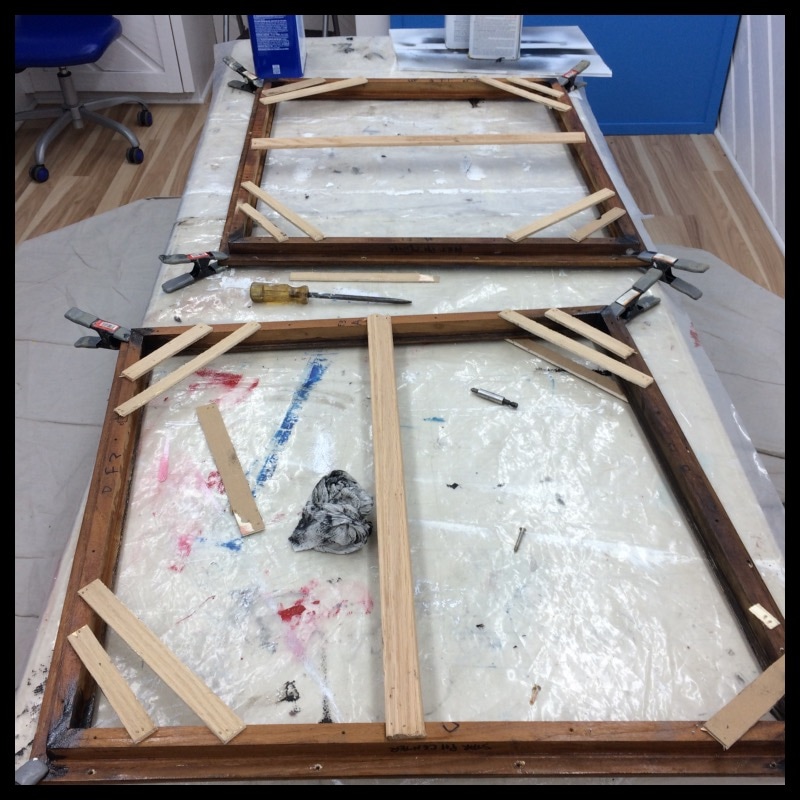
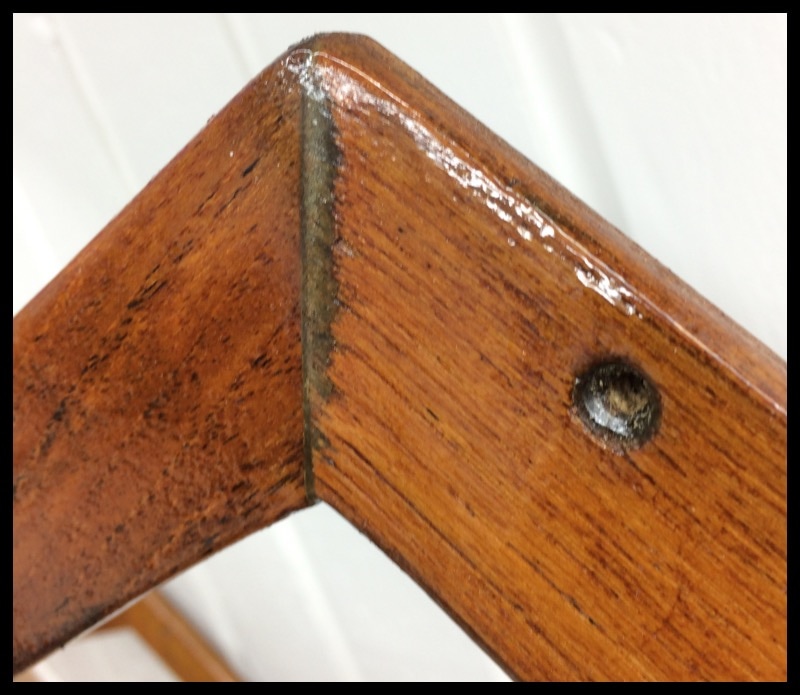
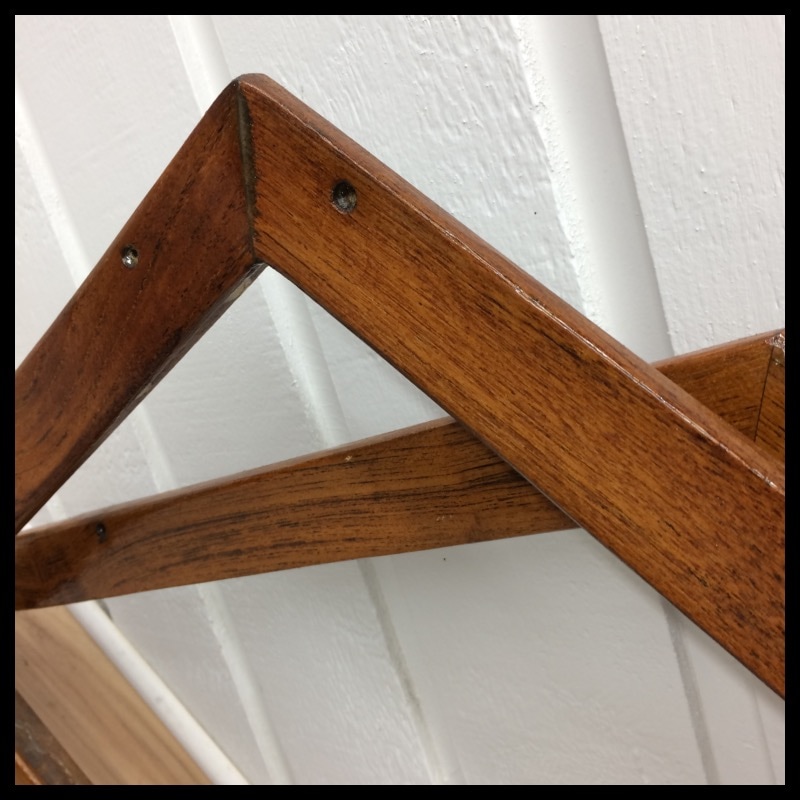
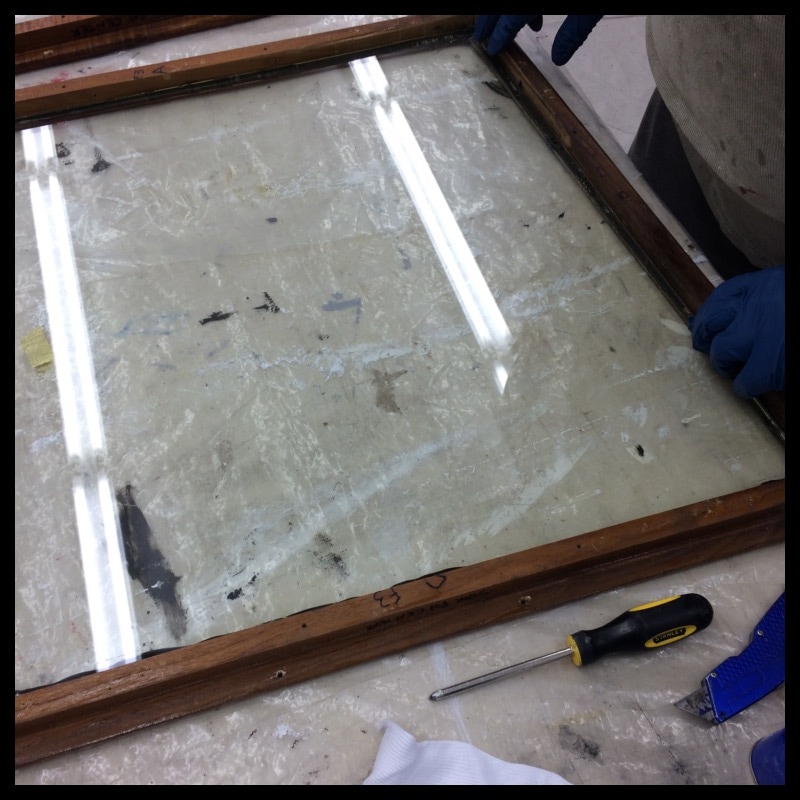
After spending a weekend jerking with the pilothouse windows, I now have strong opinions on the topic. I rescind my previous statement that the pilothouse window design was a good idea. Yes it's simple and cheap, but it's stupid. Stupid way to seal a window. My frames came apart relatively easily once I got them out of the pilothouse. The reason for this is because they are basically screwed together, one screw per corner like a picture frame, and the wood screws were rusted and broke in half. The head of the screw was on one part of frame and the shank was bedded in another. For every corner. This means when you try to get the screws out you have to damage the wood because everything is coming apart due to rust or water damage.
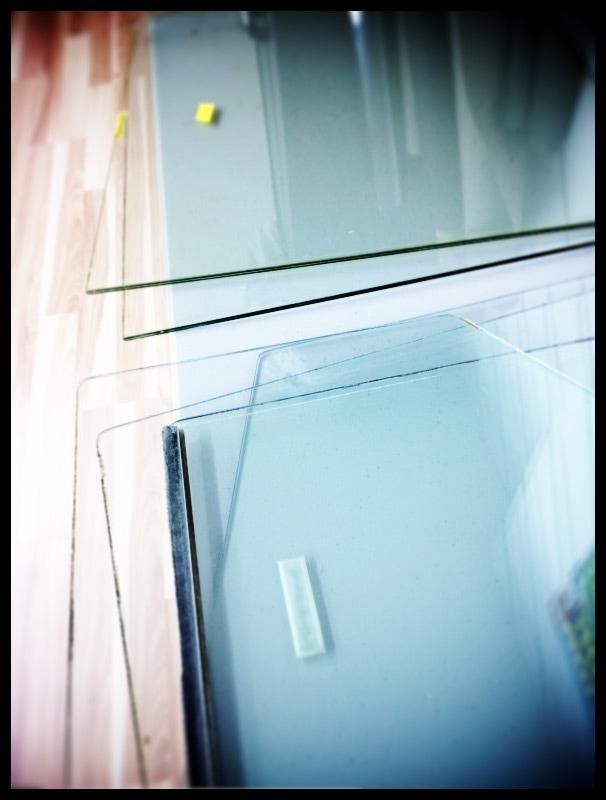
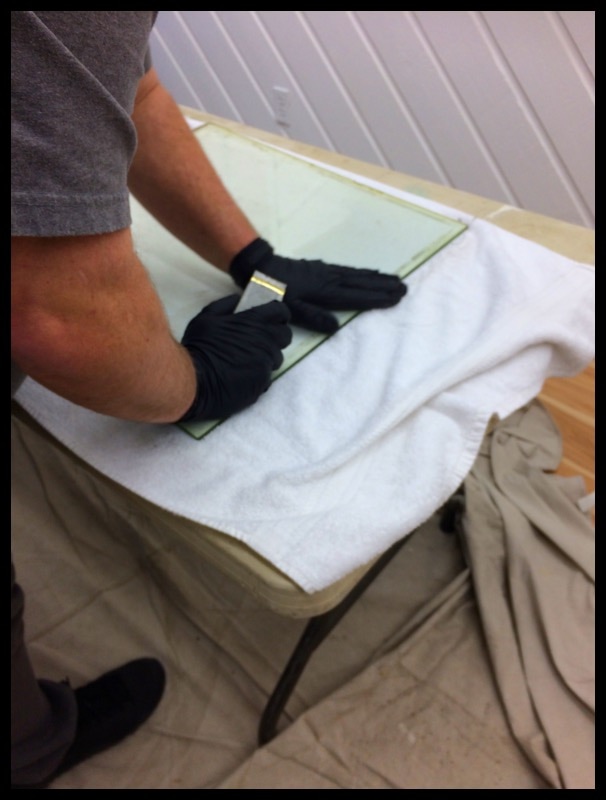
Wait for it... you can imagine what happens when you try to put it back together. You can't get tight corners. I started by filling the holes with epoxy. But then redrilling the corners was less than perfect. Meanwhile I cleaned up the glass panes. It's was a three step process: scrape the glass with a razor to remove 30 years worth of decals, glue, miscellaneous caulking, splatters and overspray of varnish and what have you; then wipe with acetone; and finally clean with water and bar keepers friend mixture.
Wait for it... you can imagine what happens when you try to put it back together. You can't get tight corners. I started by filling the holes with epoxy. But then redrilling the corners was less than perfect. Meanwhile I cleaned up the glass panes. It's was a three step process: scrape the glass with a razor to remove 30 years worth of decals, glue, miscellaneous caulking, splatters and overspray of varnish and what have you; then wipe with acetone; and finally clean with water and bar keepers friend mixture.


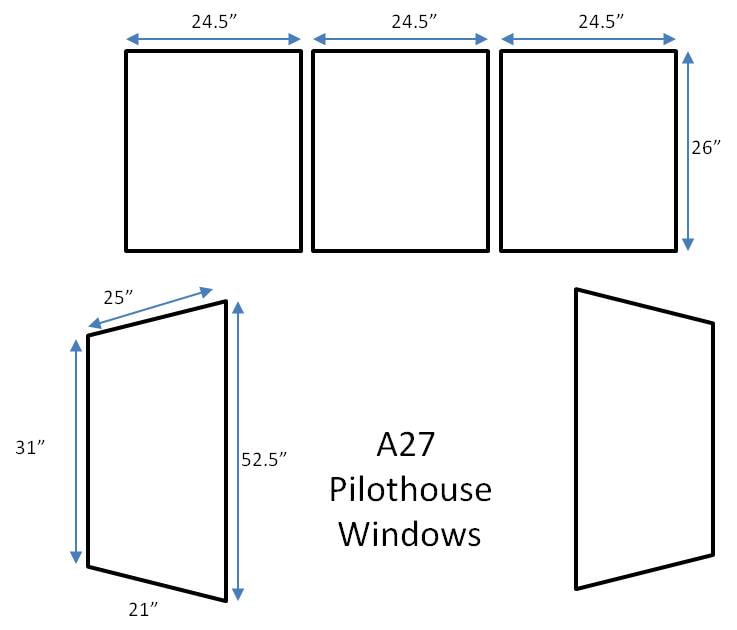
Right about this time I realized the wooden frames were actually too big for the glass panes. That's right, during dry fitting I came to the conclusion that the two forward pilothouse window frames were approximately 3/8" TOO BIG. How can this be? Near as I can tell it's a factory thing. The panes of glass are original, safety glass, cut in a trapezoid shape. There are no right angles. But the frame has some right angles. I tried one way, then the next, an infinite combo. But when I disassembled them I took detailed notes and labeled everything. I even drew a diagram to remind me how they went together. And they only go together one way. The frames from the factory were made too big.
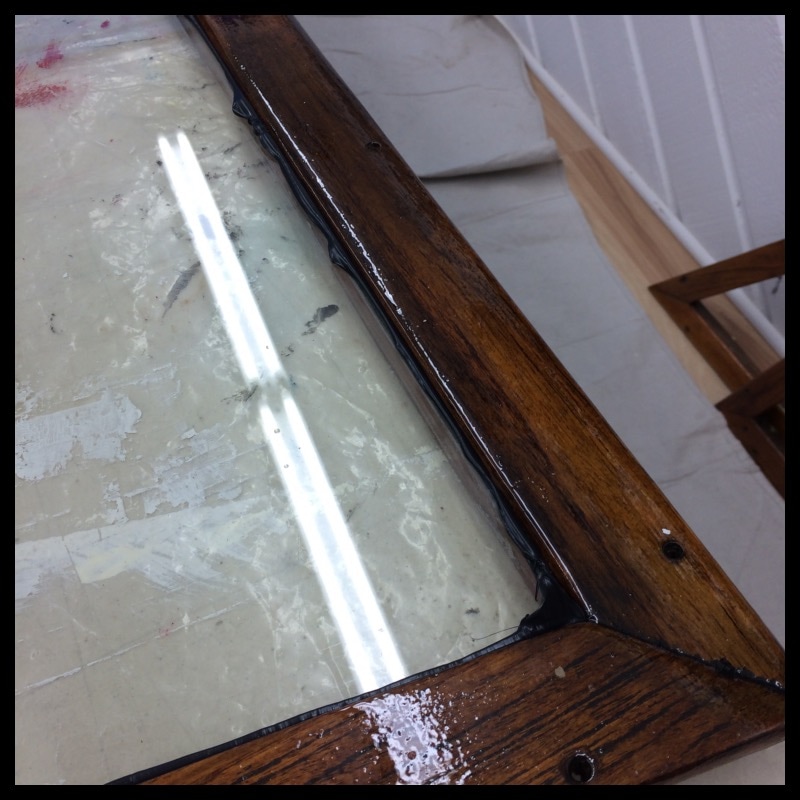
I initially chaulked this up to wiggle room for thermal expansion or boat motion. But on studying the frames, they were 3/8" too big. Here's why: the lip that holds the glass is at most 5/16" wide. Which means even if the glass was floated in the center of the frame, there would only be about 1/8" of frame even touching the glass all the way around. That's not enough. So I decided if the frames were cut to size, then at least I'd have 5/16" of wood in contact with the glass all the way around.
I initially chaulked this up to wiggle room for thermal expansion or boat motion. But on studying the frames, they were 3/8" too big. Here's why: the lip that holds the glass is at most 5/16" wide. Which means even if the glass was floated in the center of the frame, there would only be about 1/8" of frame even touching the glass all the way around. That's not enough. So I decided if the frames were cut to size, then at least I'd have 5/16" of wood in contact with the glass all the way around.
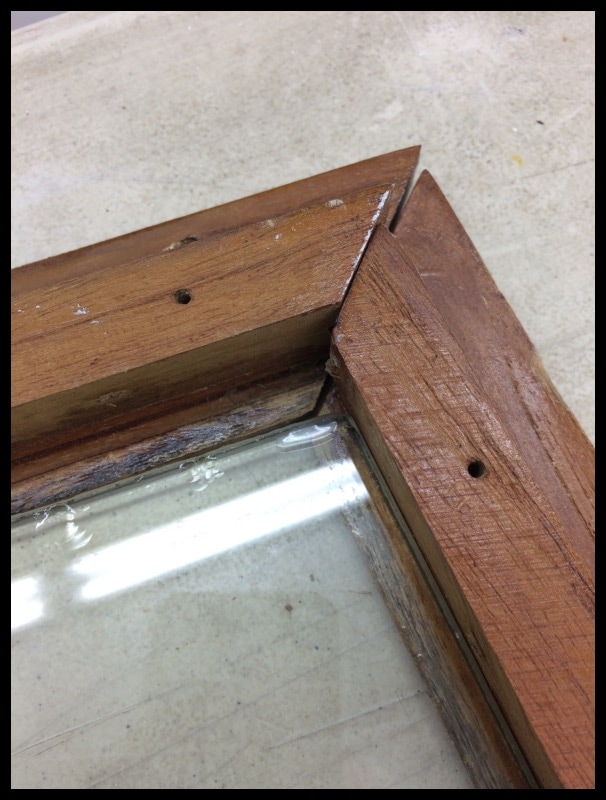
I hemmed and hawed for two days. I read up on thermal expansion and boat motion and window glazing. Then I gave up. If you want your glass bedded in sealant, they have to be relatively tight in the frame. The frame fits into the cutout in the pilothouse and there's wiggle room there. But a loose glass pane barely touching a wooden frame is just stupid. So I cut the frames down on one side, just a hair, to get a tighter fit and something I could bed the glass in.
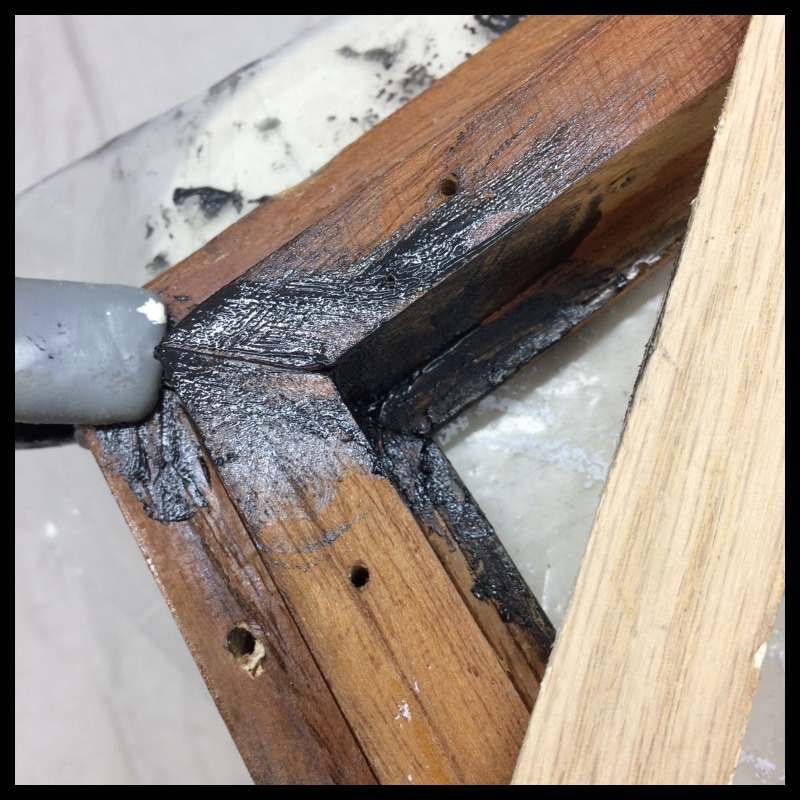
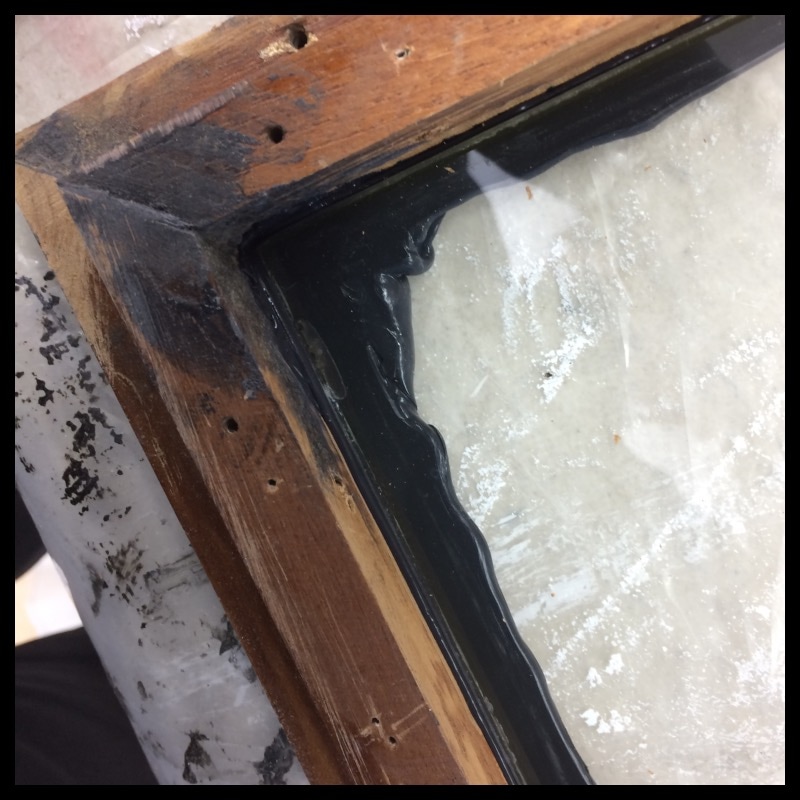
And when I tried to screw it together, I realized it was even more of a disaster because 1) I cut mitter cutters like a drunk sailor, and 2) the corner screw technique is an abortion no matter how you fill the crew holes. This is 30 year old wood and it's tired. About this time I went with the epoxy route, as previously suggested. I decided to epoxy the frame corners together. This accomplished several things: 1) it covered up my heinous mitter cuts and 2) made a stronger joint; and 3) sealed the corners for future water leaks.
And when I tried to screw it together, I realized it was even more of a disaster because 1) I cut mitter cutters like a drunk sailor, and 2) the corner screw technique is an abortion no matter how you fill the crew holes. This is 30 year old wood and it's tired. About this time I went with the epoxy route, as previously suggested. I decided to epoxy the frame corners together. This accomplished several things: 1) it covered up my heinous mitter cuts and 2) made a stronger joint; and 3) sealed the corners for future water leaks.
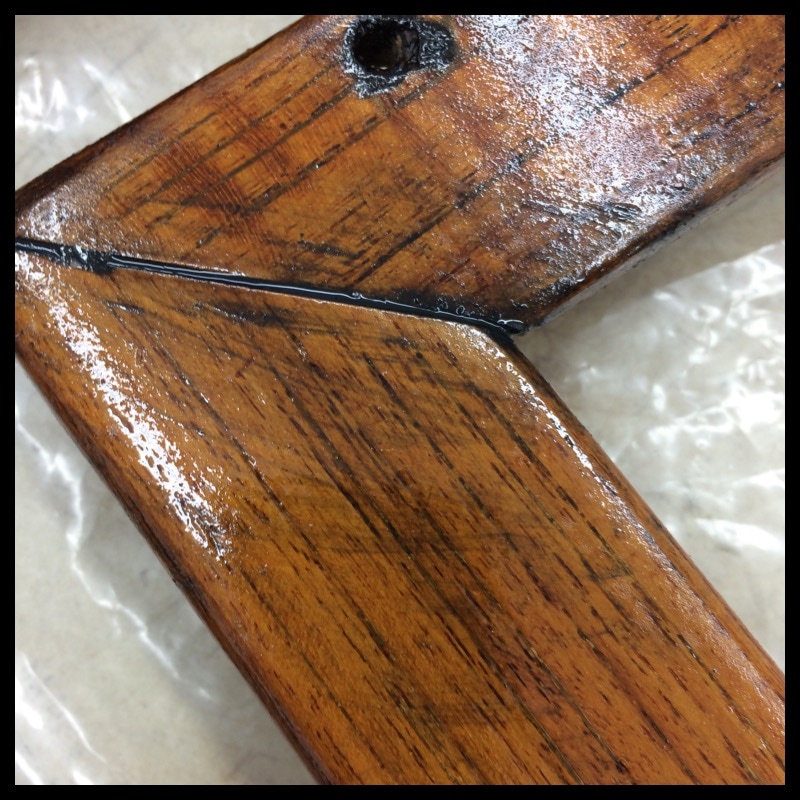
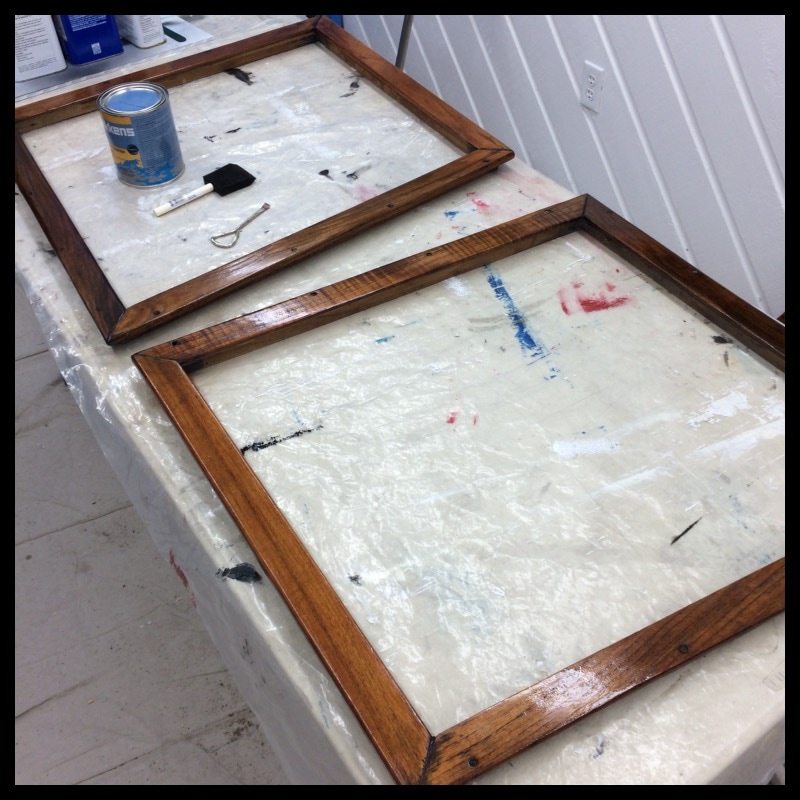

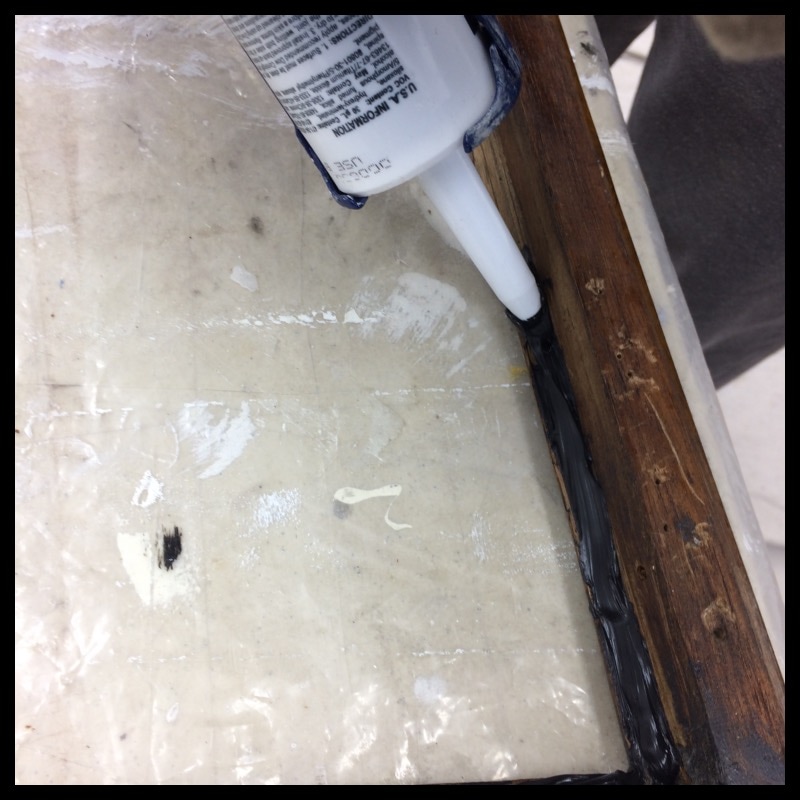
The glass fits in the frames much better. Clearly epoxying the corners is the way to go for assembly. For sealant I chose Dow 795 silicon which is an industrial silicon used for installing glass windows on sky scrappers. It has a very high expansion/flexibility and adhesion rate. You can buy it from Amazon. It is a better replacement than the West Marine silicon and it's cheaper, like $8. The reason the pilothouse windows should be bedded in silicon rather than some other sealant is because you're bonding glass to wood, which is the same as old time windows. Glazing for those types of windows is silicon. It allows the glass to be removed if it gets damaged. The entire wooden frame with glass installed can then be sealed to the pilothouse using 3m 4200. One tube of 795 did both port & starboard front pilothouse windows and probably the center.
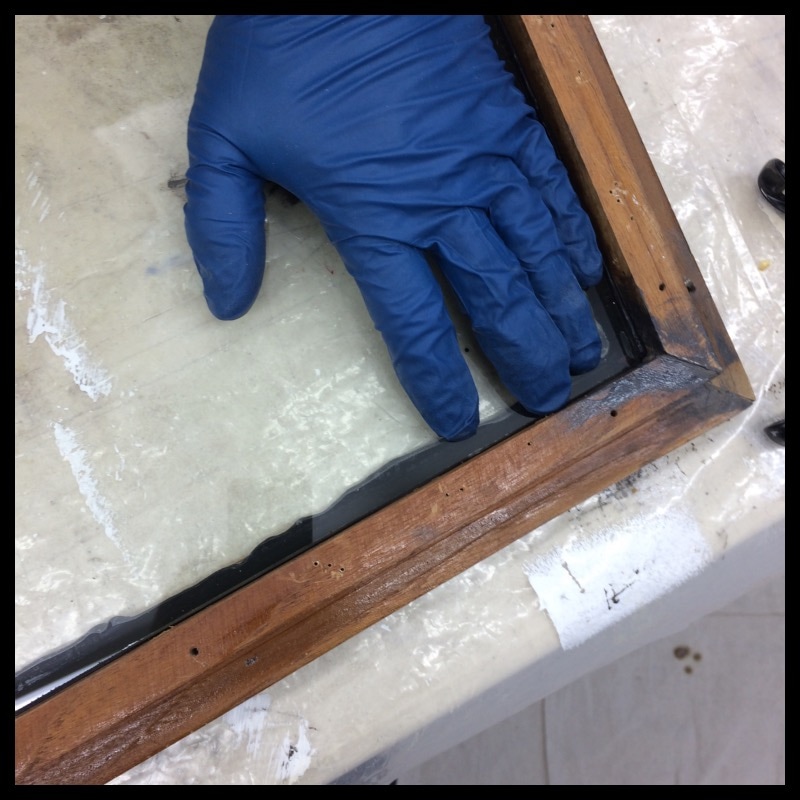
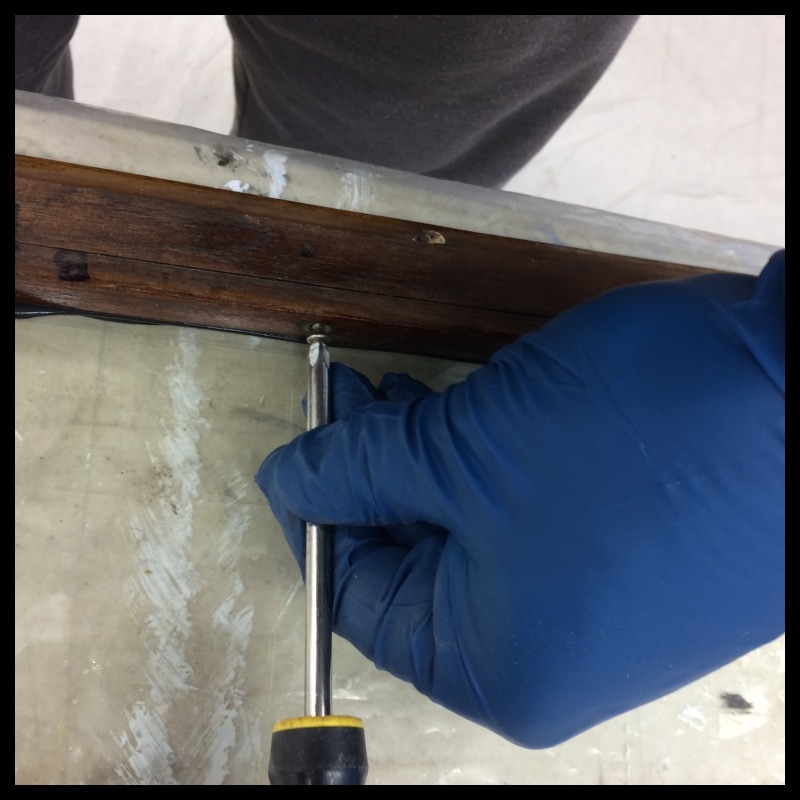


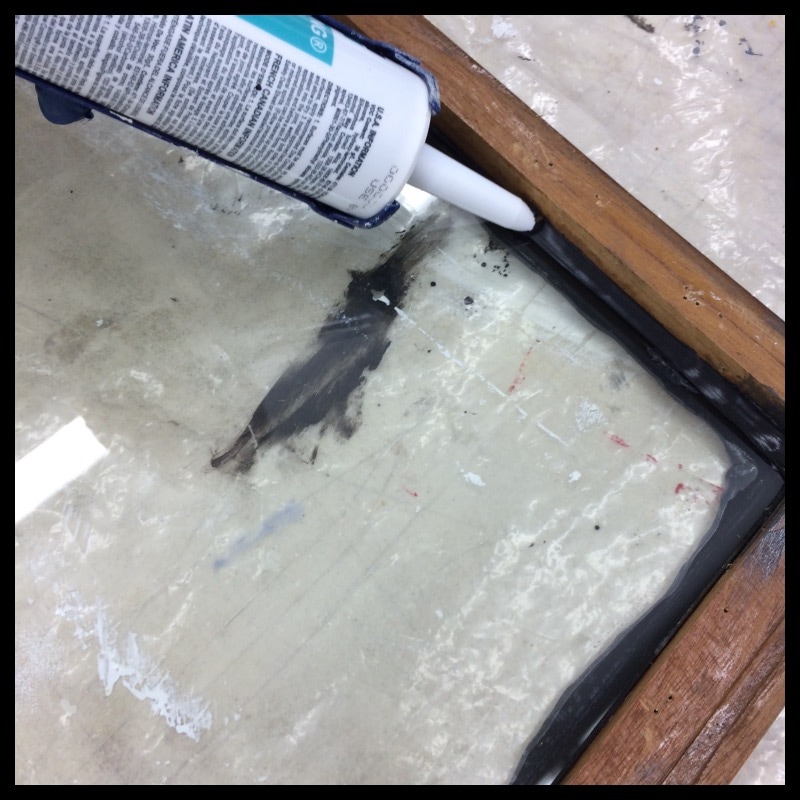

Apply a second bead to the glass and lip edge. This is where the teak casing pieces with screw in and hold the glass pane in place. Apply a bead to the lip of the frame all the way around. Then drop the glass onto the frame and you can clearly see the seal. The silicon will ooze out once everything is in place. Let it dry and then trim the excess off with a knife. The teak casing (glazing strip) goes on top of the glass and gets screwed in place to hold the glass pane in the frame. Couple of notes on the Dow 795: make sure the shelf date of the tube is within the time frame you're using it. This silicon cures fully within 7-14 days, tack free in 3 hours. The extra silicon squished out cleans up with a trim razor easily.
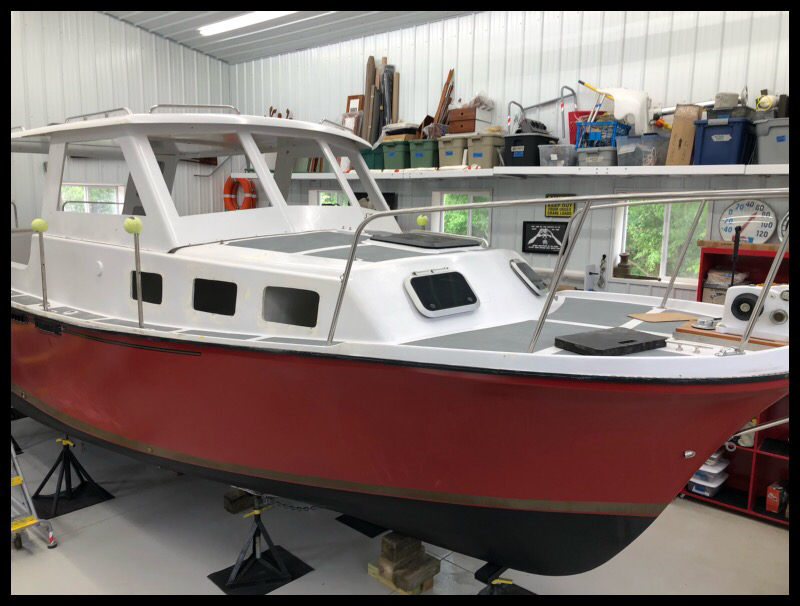
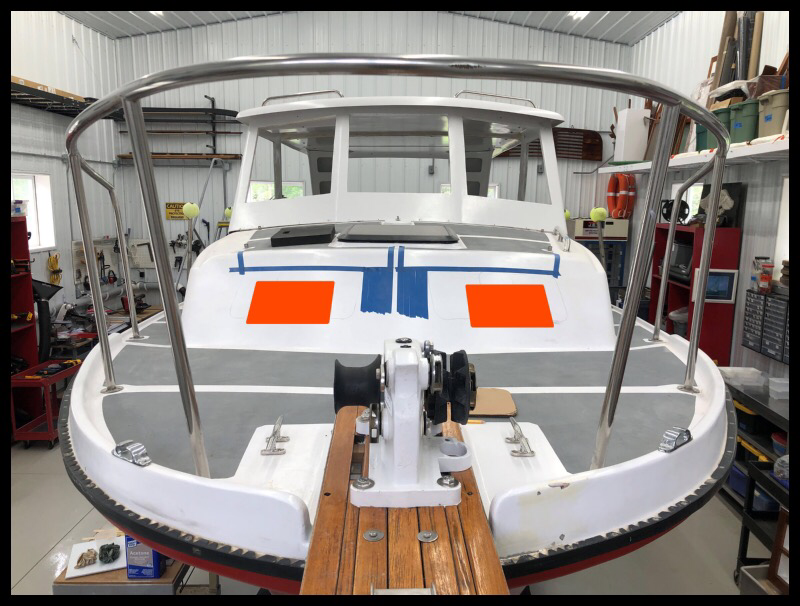
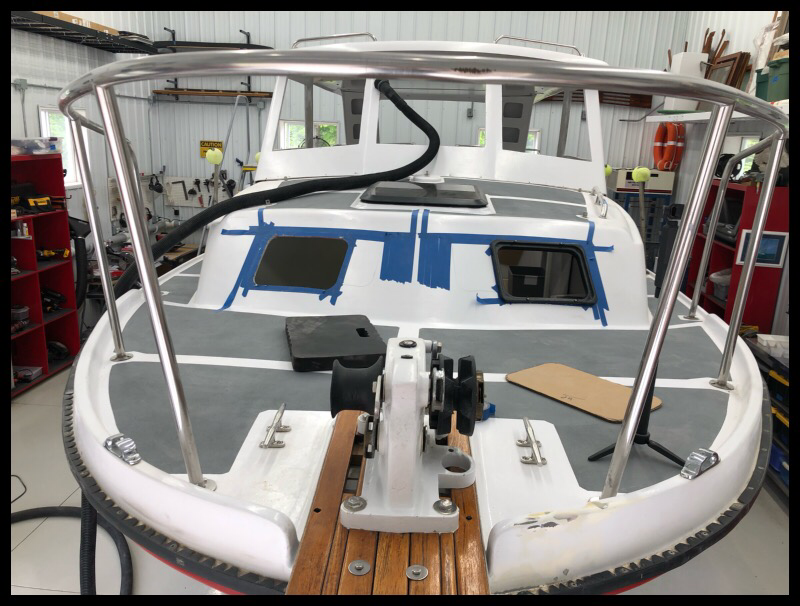
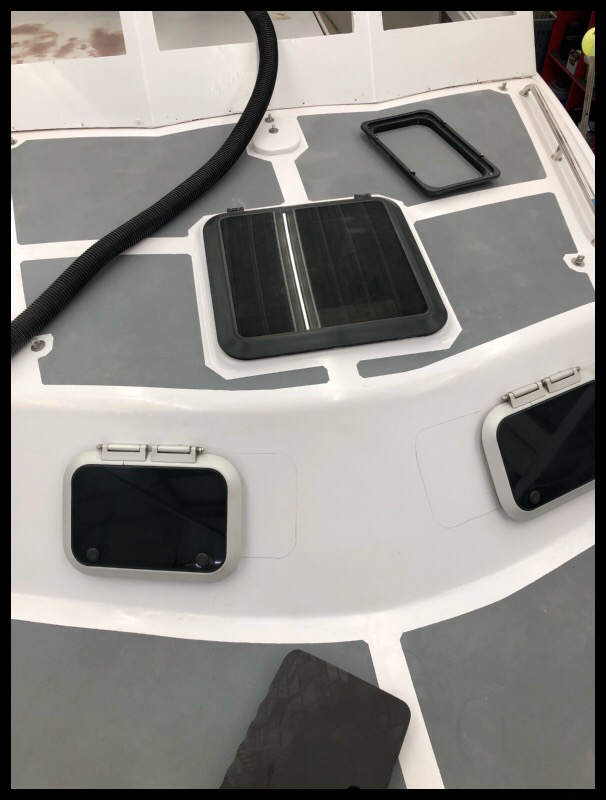
Installing Hatches in the Forward Cabin Deck
Summer 2022:
I recently determined that forward edge of the forward cabin—The part of the forward cabin deck that slopes down to the main deck is not cored with balsa. It appears to be cored similar to parts of the transom and sides of the boat with coremat a type of fiberglass mat mixed with resin composite. See the Albin 27 FAQ section of my website
I found this out when when trying to install hatches in the front of the forward cabin. This is good news. This was probably done as part of a mold and for extra strength