Albin 27 Head Modification
I'm determined to have a separate shower in my pocket trawler. I lived aboard for a year on a 30ft sailboat, and again for 4 years on a 45ft coastal cruiser. The sailboat had no shower, and so I was tied to marinas or roughing it. The coastal cruiser was basically a Hatteras hull with a house boat configuration up top. It had a head with a separate shower, and an aft stateroom with California king bed. Priceless. My female guests reveled in the "normalicy" of it. At the end of a long day, or long night LOL, a hot shower was to be king. The shower was tiny, but separate being the key. It had a bed that never needed to be stowed or made up. (To be sure I chose the A27 FC because of the aft cabin and the potential for a shower, a great galley, the cockpit area, efficiency, and the hull shape.) Its from my live aboard time, that I came to believe there are two things that make long term boat living civilized. (Btw my shower never got moldy because I had adequate ventilation and it was kept clean.)
Just like when I was a Marine, to me the key is having a hot shower and air conditioning; that's the difference between roughing it and luxury. Camping vs concierge service. I'm well aware many people frown on the idea of a shower in a boat. But everyone has a shower in the house. They bring the TV, microwave, radio, computer, etc to the boat---but no shower? Let me tell you from first hand experience, a shower in a boat is priceless. Yes it can double as a foulie locker. Forget foulies, how about wet towels, dirty clothes, wet space? Yes you need some tankage. Yes you need some space to build it. Of course it needs some ventilation. You shower in your bathing suit on the swim platform or deck- but when you need to be clean, u need some privacy below decks. Having a shower facilitates living on the boat. For a day, or three days, or more. Every day I live on the boat is less a day spent in the marina, sans that cost. If I can stay away from the marina for three days and nights because I don't need to their shower or head, I'm one step ahead of the game.
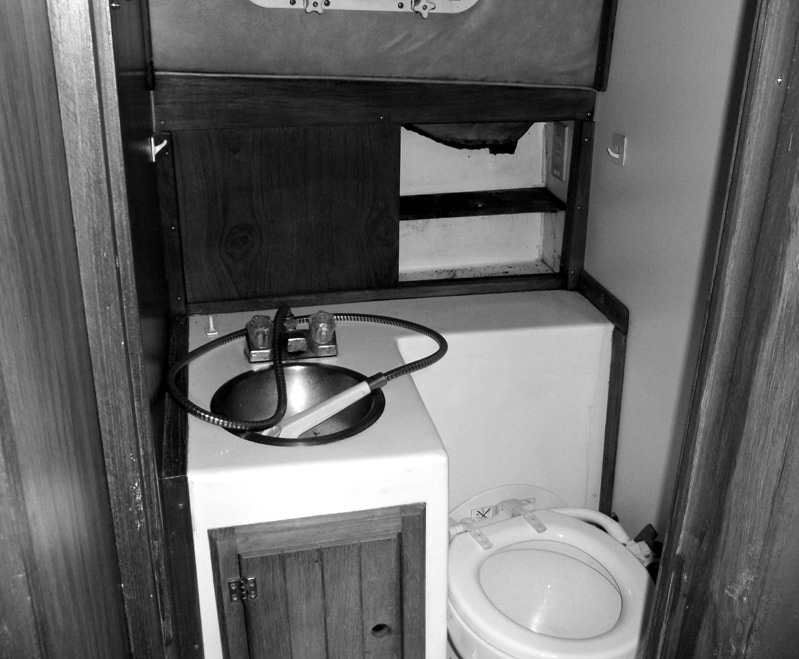
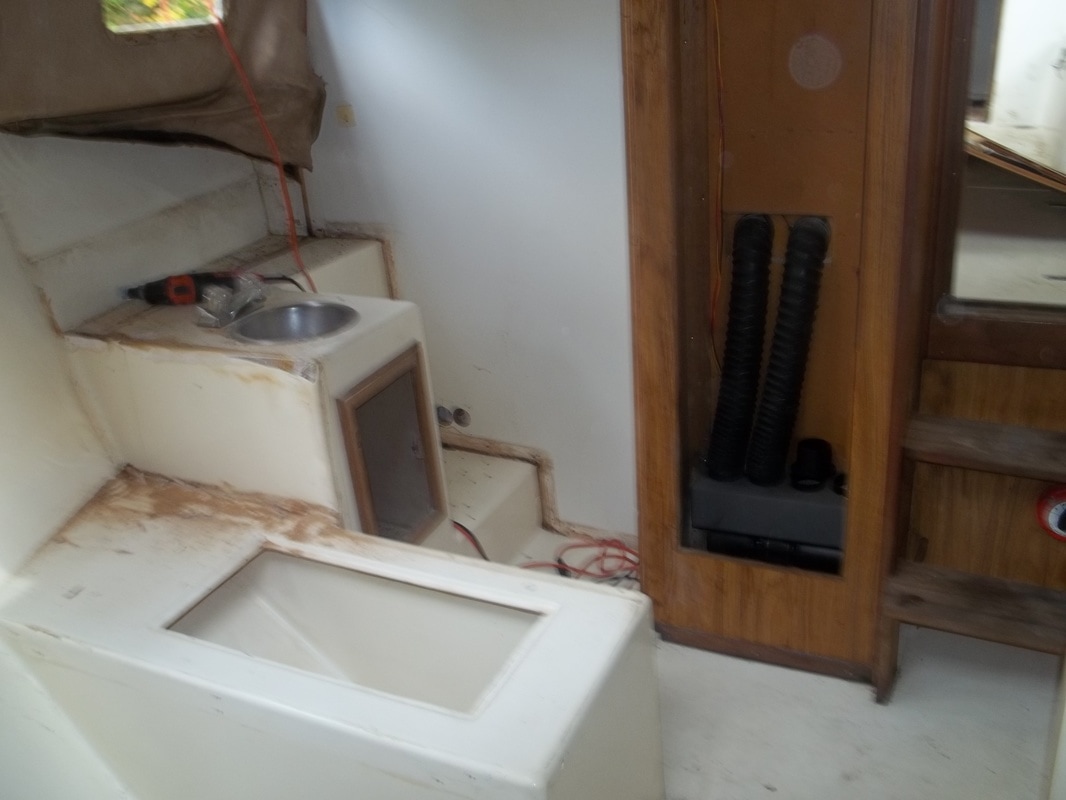
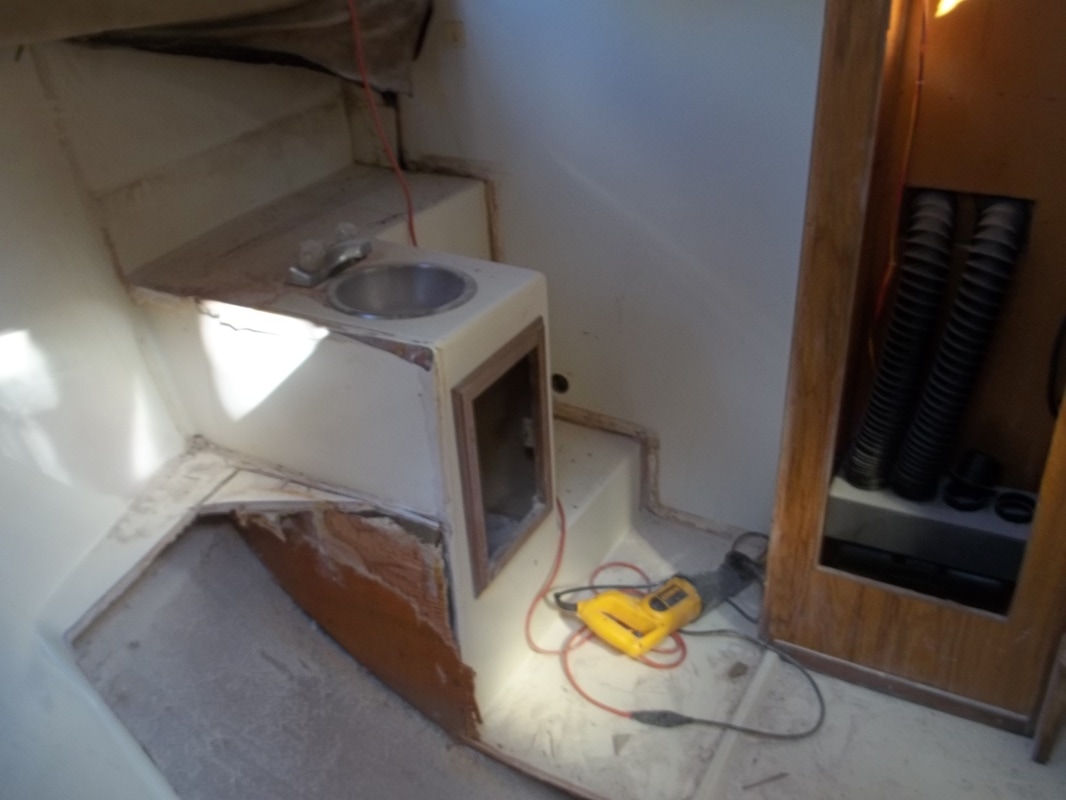
It seems to me, the factory head & v-berth configuration tries to be many things to many people, and in doing so it's not particularly good at any of them. I'm 6' 250 and the toilet space is cramped. The dinette table is, interesting, I guess. The v-berth-many things at once. The head sink is tiny &redundant, with limited storage, not to mention it all needs a refit due to age. Taking a shower on the toilet is---taking a shower on a toilet?! I know this is the solution offered by boat manufacturers since forever--but do we all take a shower on our toilet at home? Even in an RV? I don't think so. To me the wasted space is a head that no one feels comfortable using because its too small, has no shower, "looks" like a bathroom but isn't, and its really no place you want to go, let alone get cleaned up or change into fresh clothes before or after bed. Better to have a head that has a great toilet space, and a great shower (for a boat). Lets do two things well and serviceable. Just two. And as for resale, well you can be an A27 purist and squeeze into your factory head, but who wouldn't want a shower on a 27ft boat if the shower looked like it originally belonged there? The ladies, and me, for sure.
Just like when I was a Marine, to me the key is having a hot shower and air conditioning; that's the difference between roughing it and luxury. Camping vs concierge service. I'm well aware many people frown on the idea of a shower in a boat. But everyone has a shower in the house. They bring the TV, microwave, radio, computer, etc to the boat---but no shower? Let me tell you from first hand experience, a shower in a boat is priceless. Yes it can double as a foulie locker. Forget foulies, how about wet towels, dirty clothes, wet space? Yes you need some tankage. Yes you need some space to build it. Of course it needs some ventilation. You shower in your bathing suit on the swim platform or deck- but when you need to be clean, u need some privacy below decks. Having a shower facilitates living on the boat. For a day, or three days, or more. Every day I live on the boat is less a day spent in the marina, sans that cost. If I can stay away from the marina for three days and nights because I don't need to their shower or head, I'm one step ahead of the game.
It seems to me, the factory head & v-berth configuration tries to be many things to many people, and in doing so it's not particularly good at any of them. I'm 6' 250 and the toilet space is cramped. The dinette table is, interesting, I guess. The v-berth-many things at once. The head sink is tiny &redundant, with limited storage, not to mention it all needs a refit due to age. Taking a shower on the toilet is---taking a shower on a toilet?! I know this is the solution offered by boat manufacturers since forever--but do we all take a shower on our toilet at home? Even in an RV? I don't think so. To me the wasted space is a head that no one feels comfortable using because its too small, has no shower, "looks" like a bathroom but isn't, and its really no place you want to go, let alone get cleaned up or change into fresh clothes before or after bed. Better to have a head that has a great toilet space, and a great shower (for a boat). Lets do two things well and serviceable. Just two. And as for resale, well you can be an A27 purist and squeeze into your factory head, but who wouldn't want a shower on a 27ft boat if the shower looked like it originally belonged there? The ladies, and me, for sure.
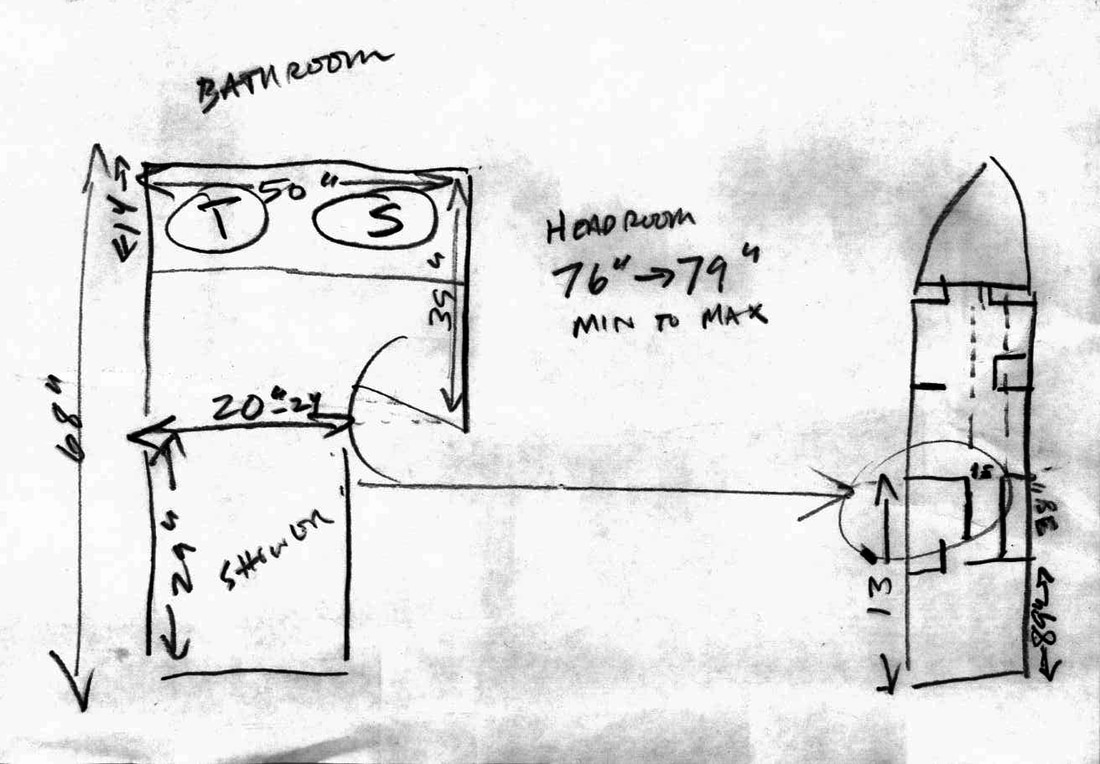
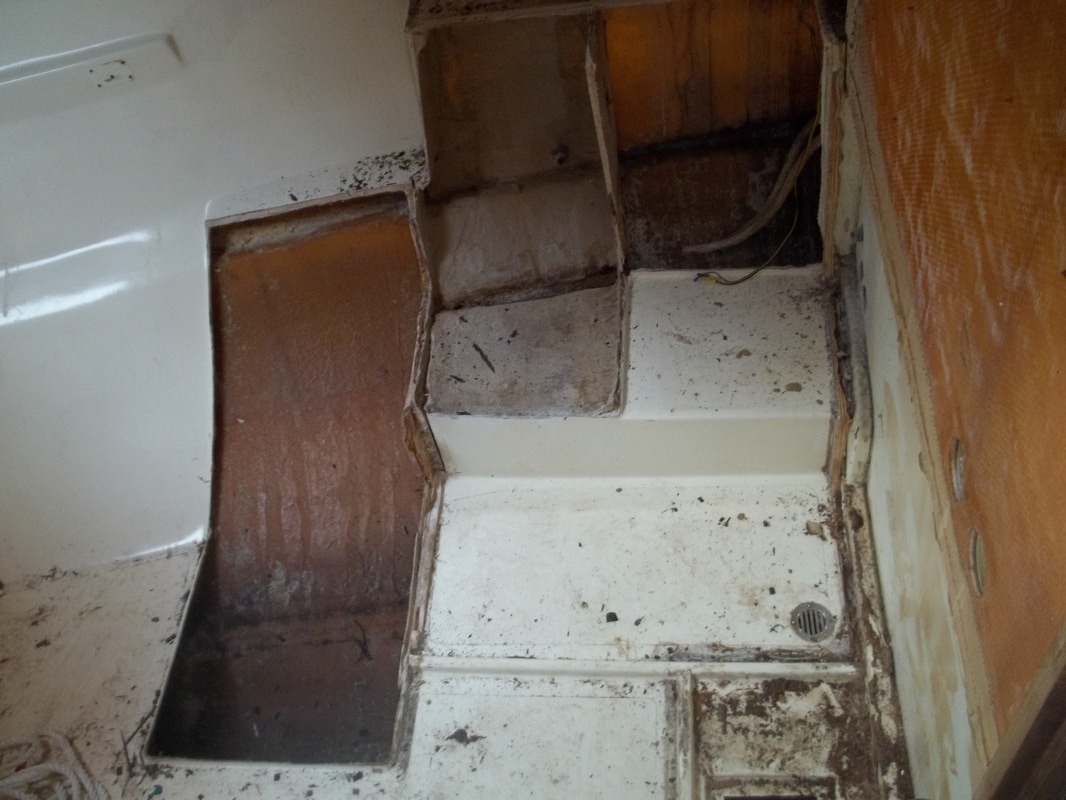
Here's what I am thinking, take out the marine toilet and the sink. Cut the pan liner that makes up the step for the toilet and the sink cabinet. Cut & remove the bench seat in the v-berth area. Remove the table. Put the forward-most bulkhead where the bench seat used to be(forward edge). In this way , the bathroom would be enlarged. The toilet would go across from the new opening door. To the right as you enter the head, would be a standing shower, separate from the toilet. There would be no sink in the head, since there's a sink in the galley 3-4 feet away. I would build the shower enclosure & rebuild the head space with FRP panels from Home Depot. The v-berth would become a quarter berth. And dining accommodations get moved on deck where I plan to extend the hardtop.
|

|
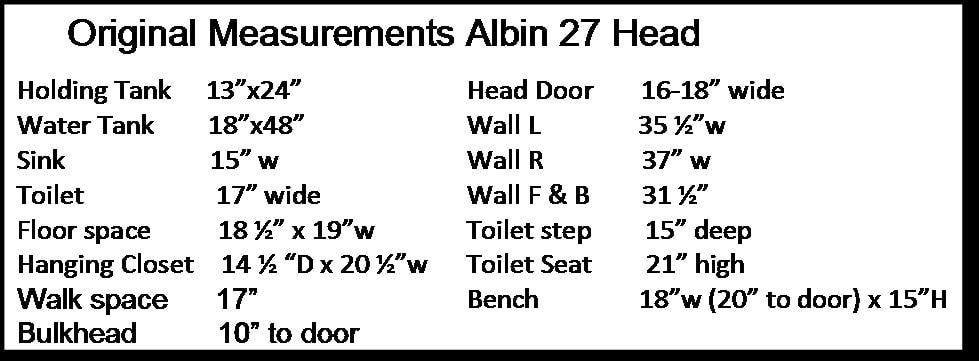
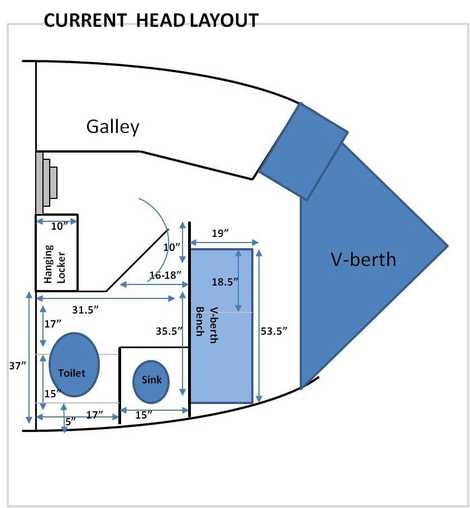
I spent some time climbing around the boat last night. Took some measurements of the current layout. The current head layout just seems to be doing too many things at once, packed into too tight a space. The door opening alone, as you enter head goes from 16" to 18" only! There's only 17" sitting on the can between the sink and bulkhead. Amazing! My measurements are approximate, and it goes without saying that the diagrams are not to scale. I tried to measure the key points and then study the floor pan layout to determine heights and hull curvature. The first diagram is of the current layout. I assume this is standard to most A27FC. The second diagram was my initial re-design, but it presents a problem with the door. It would likely be even less width than current layout. My second version I like better.
|
Here's some measurements from the 45' coastal cruiser I once lived on. I thought is was so great I took measurements before I sold it. The shower space was 29"x 20"-24" depending on the height, vinyl walling over plywood I think.. This was basically a European shower, I was told. Practically, it might be possible to go a little smaller, but it was sheer luxury at this size.
That shower was supplied by 100gal fresh water, and a household hot water heater. Of course there was a generator on the boat. Two people could shower like in a house for a week, no issue. For the A27, I would try for 30-50gal fresh water, with a 6-10 hot water heater, or a heat on demand system. Shower sump needed since you don't ever want gray water in bilge. Had a 20gal holding tank that lasted a week for two people before a pump out. I later installed a Lectrasan head system, very successful. |
|
Things People Will Tell you about Adding a Stand Alone Shower
When I suggested the idea of modifying my Albin 27 to accommodate a free standing shower, I heard a lot of interesting comments from other Albin Owners. Albin 27 Owners often embrace heard mentality and the lesser informed among them. So its not surprising that they were skeptical about such a major modification of the Albin 27. In a nutshell comments fell along these themes:
#1 You Don't Need a Stand Alone Shower. Of course the person who said this never actually used their boat, or stayed aboard their boat more than a few hours. They certainly never over-nighted for more than a long weekend, and they if they did they were tied to the luxury marina with the awesome free marina bathrooms. They also not take showers regularly. Their guests smell. Sometimes just for fun they spritz themselves while standing on top of the toilet they just used after Mexican Night at their favorite marina. I don't understand these people.
#2 You will Damage the Safety Structure of your Boat. There's not a lot going on here, brainpower-wise.
#3 You will Ruin the Re-sale Value of Your Boat. Hmmm, let me think about this. On the one hand a prospective boat buyer could choose an original Albin 27 with a tiny bathroom that's so small no normal sized person can use it. Also a normal sized person can barely fit at the dining room table. Or they can chose an Albin 27 with a new gigantic bathroom that separates the head from the shower. This definitely seems like a no-brainer. From a sales point of view, it makes sense to offer something other than whats already available. If you want an "original" boat, there's lots to choose from. If you want a refitted, modern boat, well then you can choose my boat.
#4 I like Sleeping in My Galley. Or "I-really-like-my-tiny-dining-room-table-and-the-uncomfortable-v-berth." The person who said this weighs less than 100 lbs, is seventy-five years old, and needs to be within falling distance of the Albin 27 bathroom so they can make frequent trips to the head at all hours of the night. They sleep in the v-berth, which is essentially the galley after all. By virtue of their diminutive size they can shoe-horn themselves into the dining room table and they think its a great place to eat lunch: down below, next to the head, crammed into a corner, on top of their sheets. They fit so well in the bathroom they can't understand why you would go through the effort to change anything. They can fit inside a kitty litter box.
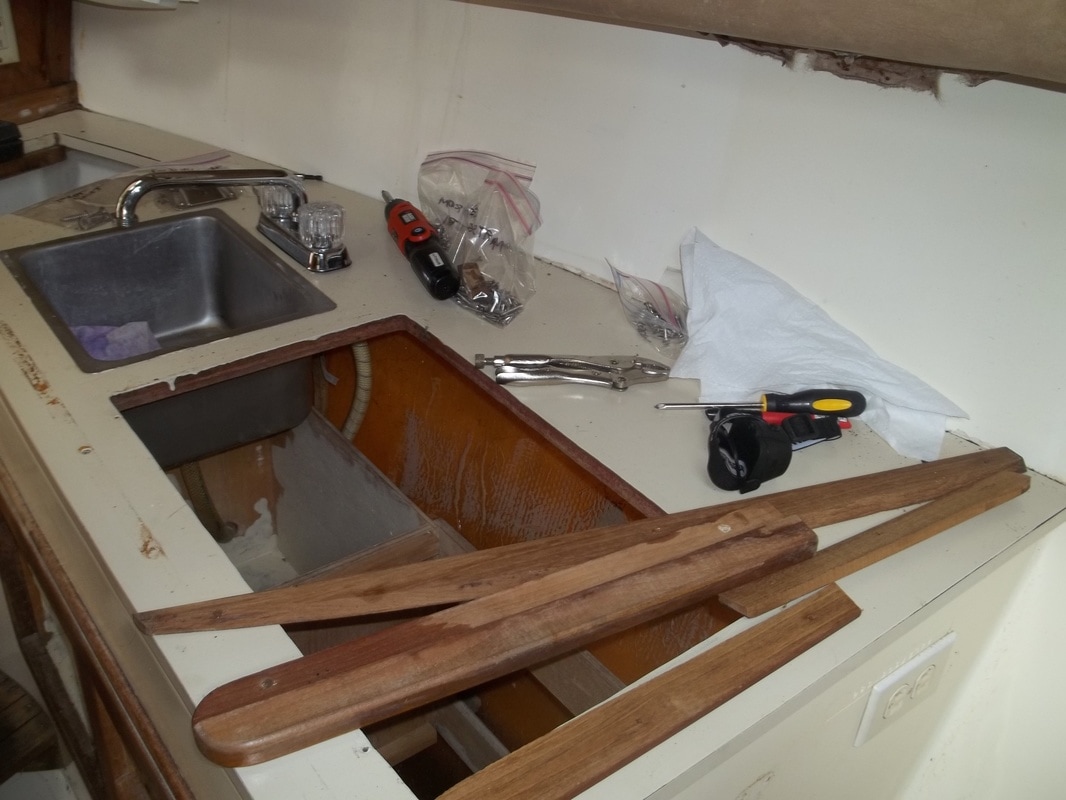
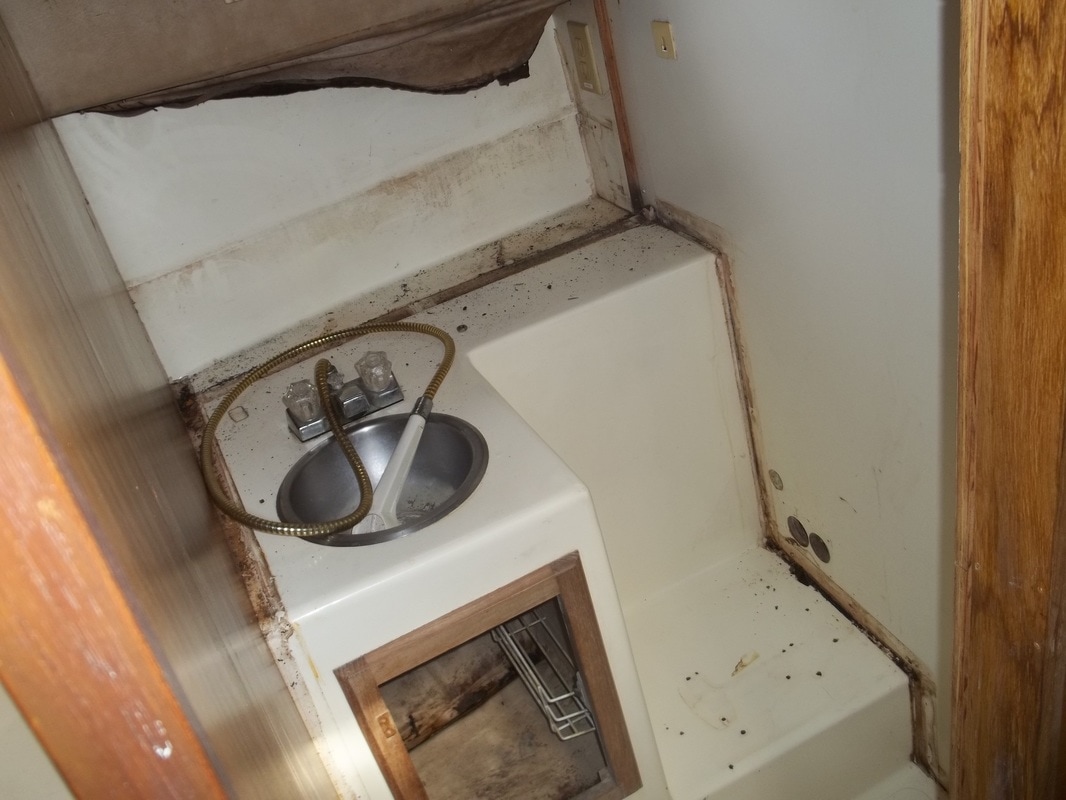
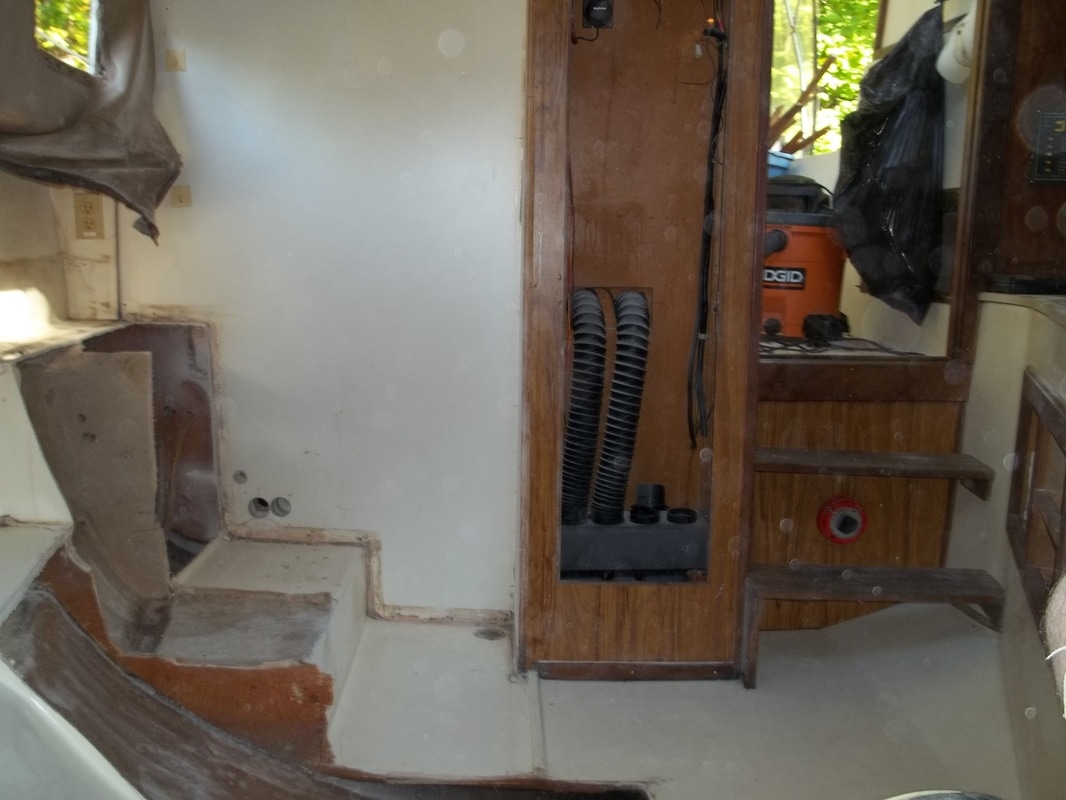
Removing Old Water Tank
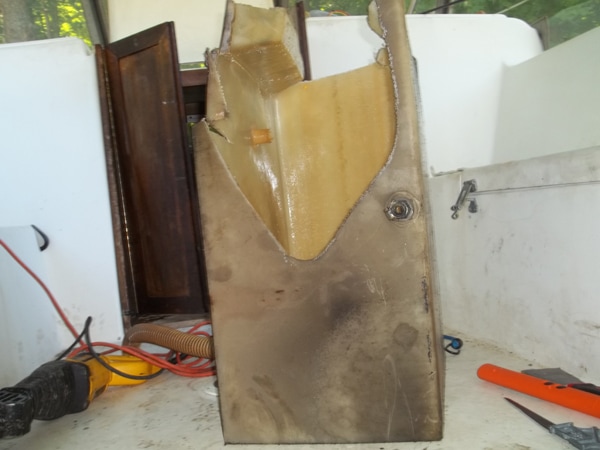
Old hot water heater, rusted, removed. I had to remove the starboard aft cabin bulkhead to be able to get it out. Good thing I did, solid rust bucket. Next came the3 old water tank which was cracked. A sawsall made short work of the plastic tank. Had to cut in several places, and fold or bend it on itself to eventually get it out in pieces. To cut it out I kneeled on the starboard side of the engine, leaned across engine and cut into the side with the sawsall. Took about twenty minutes to cut it out. Good thing I did, not only was it cracked but scummy, moldy, and quite a bit of sediment in the bottom. Probably the original water tank. Reads 40gal. The resulting space is very nice. Plenty of room. Needs a good cleaning.
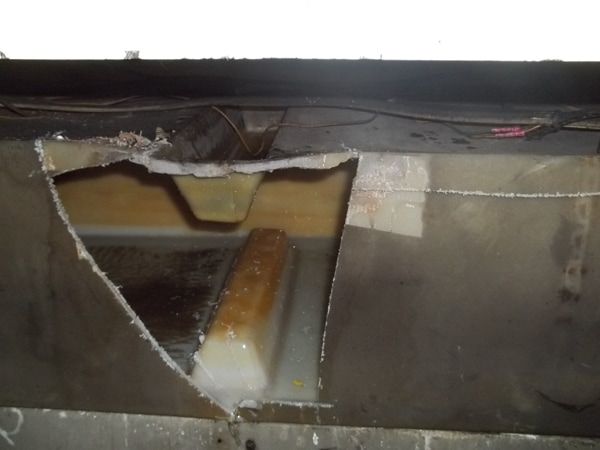
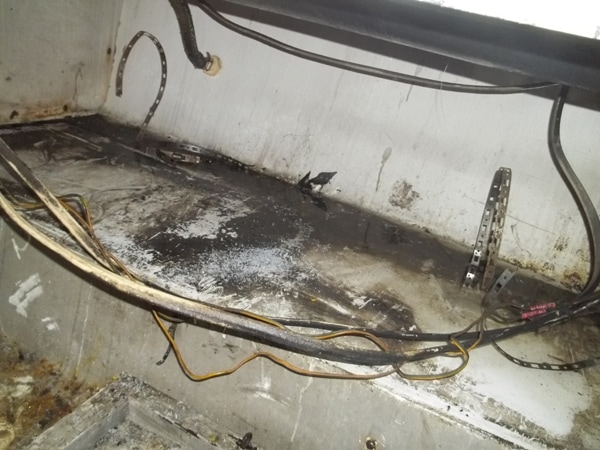
How do you know the previous owner loves you?--when you realize the holding tank is full. Now to be fair, the PO did warn me that the marina might have failed to empty the tank....Buddy, they owe you a refund. I checked the tank with a light and it appeared to be empty, but that was just the Gods screwing with me, because as soon as I started cutting into hoses, I was up s***t creek without a paddle. And by the time I drug that sucker out of the engine room, I had smelled many better days. With the toilet and tanks gone, I started eyeing the bulkheads and sink, and that damn bench. I heard Don in my ears, saying "don't do it!" and scores of others warning of resale value and structural limitations. It was time to commit. I went to find the sawsall.....
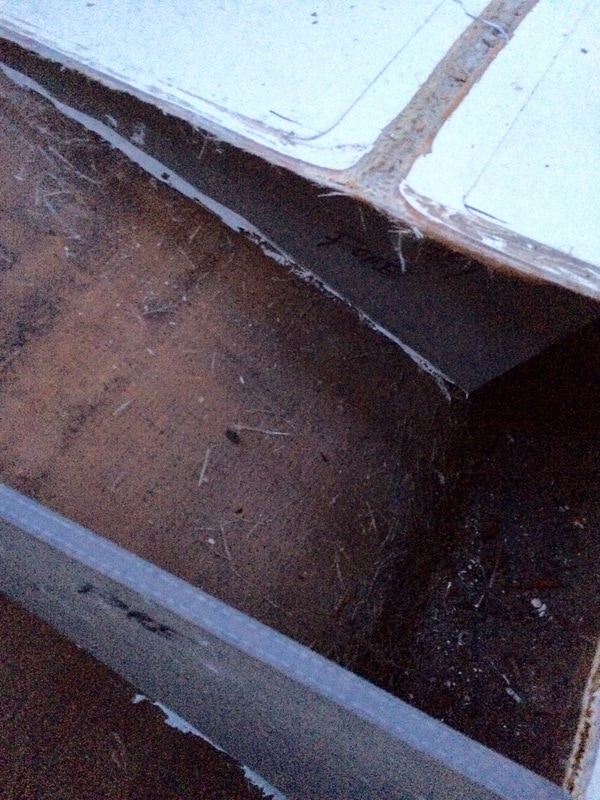
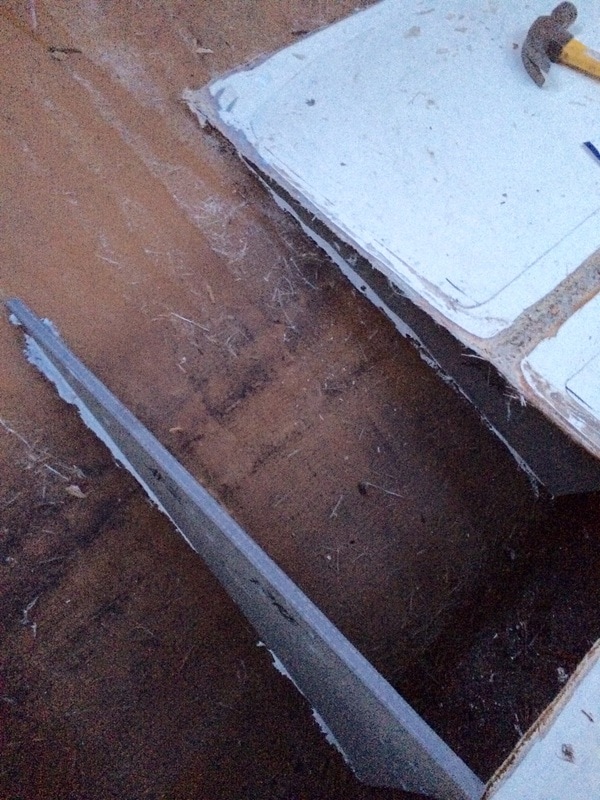
How to Take Out a Bulkhead or Two
For this job you will need a sawsall, and a 4" grinder, and a one of those oscilating plunge cut multi-tools. Plus a respirator and some MGC, probably at least a gallon and maybe more if you are small guy or wear tight pants. Get the ultra premium grade, and don't hold back, you will need the full gallon. This is a messy job. The Albin 27FC is constructed fairly well, and the glass (the pan liner) is laid up very nice. I burned through 3 sawsall blades, wore down a grinder disc, and burned through 3 oscilating multi-tool half-round cutters. This is what I learned:
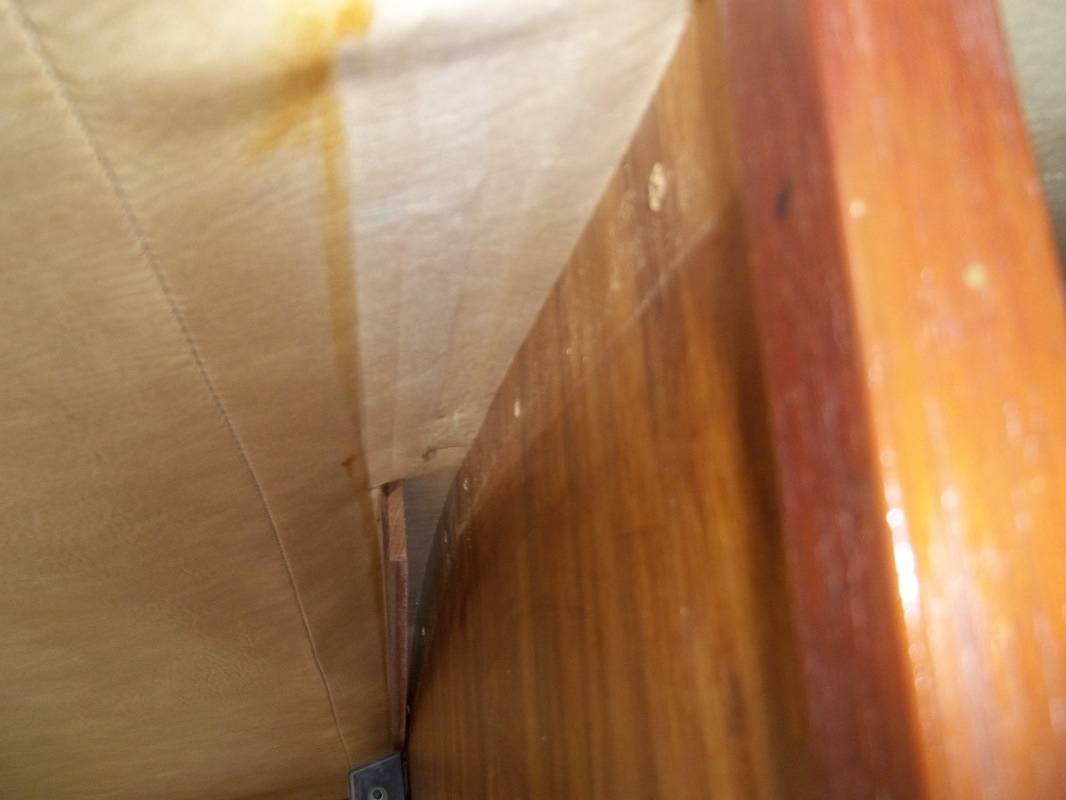
- the bulkhead is not tabbed in. Whaaa? That's right its not tabbed into the ceiling or floor. Oh snappp
-all the trim comes off with little screws
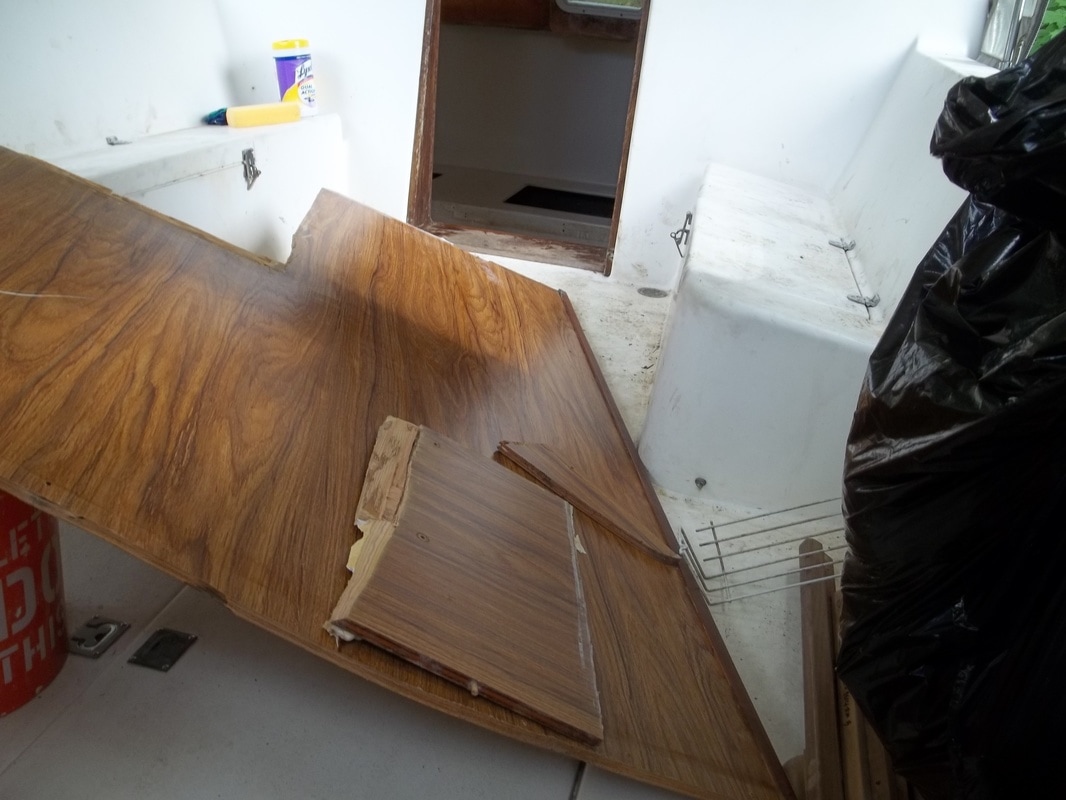
-the bulkhead is screwed into the side of the sink, and then glued in place with maybe 3m4200 or something. It's almost a full 4x8' sheet, and passed between the bench and sink. This turned out to be the most difficult as you can't get into the cranny to cut the stuff. I ended up cutting the bulkhead. But that's ok, because my new bulkhead is marine lumber, because I refuse to varnish things for the rest of life. The sink and bench are each glassed to the hull and the base looks like 1/2" ply glassed in.
-the bulkhead is two pieces of plywood joined with dowels to create a piece that's more than 49" wide, a small section closest to the hull will come out once you start cutting, but you still have a 49"x70" tall piece to get out and its glued in place. Everything fits out the companionway hatch.
- You have to go at it piece meal, from the forward area by the bench, and then aft from the head area, to reach everything and make sure you don't cut the hull. If need be go ahead and "cut access holes" so you can see how much space you have to the hull and whats connected to what. Better to make small cuts and eat the elephant one bite at time.
-The forward corner of the sink and former bulkhead was hardest to remove.
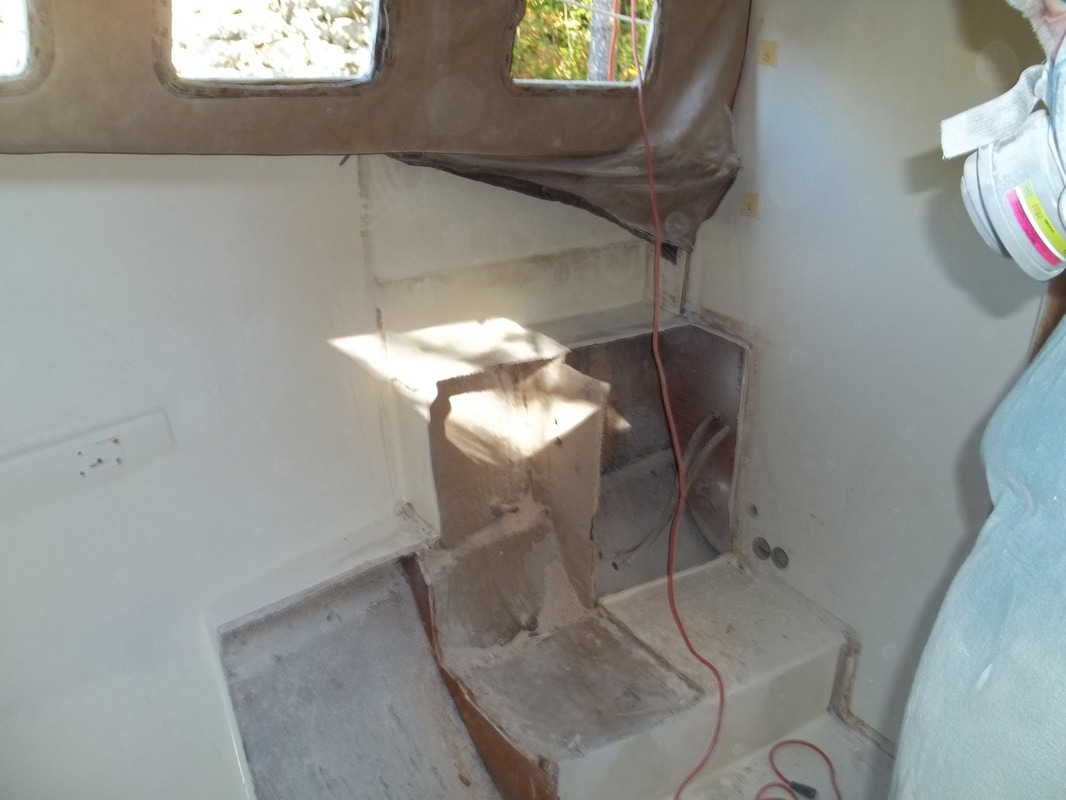
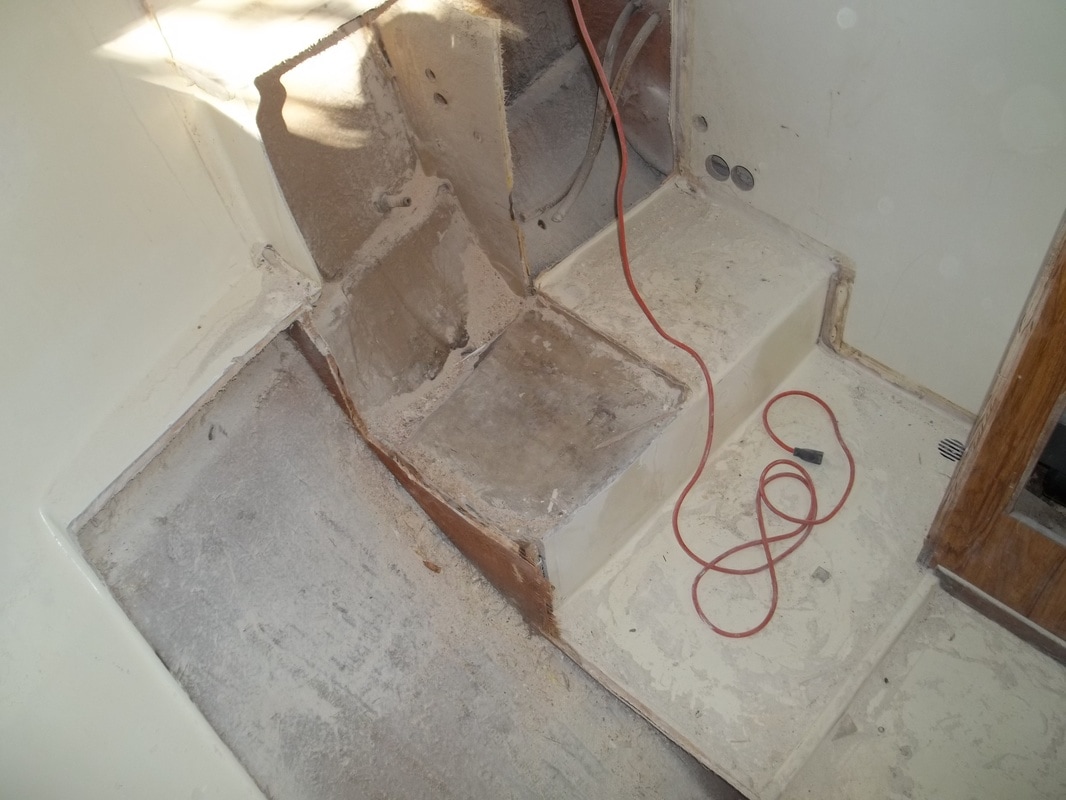
-does not appear to be any "structural" integrity issues-- hull flex-- cutting into the pan liner. The liner is not tabbed to the hull below the deck, and only tabbed in the sink and bench area. The bilge extends under the floor well fwd of the bench area. Its not supported now. But it will be . In fact the new bulkhead, in its new position will provide an excellent support to the mast step for my Albin 27 auxiliary sailer project. Easy access straight to the keel.
- the grinder works best, but you need all three tools for different cuts at different times, so they can play off each other.
-this is a tough job, and you need a respirator, and a gallon of MGC no matter what
I still have to clean everything closer to hull, mock up the new lines, and then start figuring how to reinforce a few key areas of the pan liner. I think most reinforcement will be to keep the liner from flexing underfoot, and I want to investigate a sump for the shower. I plan to lower the "step" where the toilet was to create more standing area, and to go half way into the hanging locker to enlarge the overall head footprint. All in all ' very pleased with the results, and there are no deal breakers yet. Full steam ahead!
- the bulkhead is not tabbed in. Whaaa? That's right its not tabbed into the ceiling or floor. Oh snappp
-all the trim comes off with little screws
-the bulkhead is screwed into the side of the sink, and then glued in place with maybe 3m4200 or something. It's almost a full 4x8' sheet, and passed between the bench and sink. This turned out to be the most difficult as you can't get into the cranny to cut the stuff. I ended up cutting the bulkhead. But that's ok, because my new bulkhead is marine lumber, because I refuse to varnish things for the rest of life. The sink and bench are each glassed to the hull and the base looks like 1/2" ply glassed in.
-the bulkhead is two pieces of plywood joined with dowels to create a piece that's more than 49" wide, a small section closest to the hull will come out once you start cutting, but you still have a 49"x70" tall piece to get out and its glued in place. Everything fits out the companionway hatch.
- You have to go at it piece meal, from the forward area by the bench, and then aft from the head area, to reach everything and make sure you don't cut the hull. If need be go ahead and "cut access holes" so you can see how much space you have to the hull and whats connected to what. Better to make small cuts and eat the elephant one bite at time.
-The forward corner of the sink and former bulkhead was hardest to remove.
-does not appear to be any "structural" integrity issues-- hull flex-- cutting into the pan liner. The liner is not tabbed to the hull below the deck, and only tabbed in the sink and bench area. The bilge extends under the floor well fwd of the bench area. Its not supported now. But it will be . In fact the new bulkhead, in its new position will provide an excellent support to the mast step for my Albin 27 auxiliary sailer project. Easy access straight to the keel.
- the grinder works best, but you need all three tools for different cuts at different times, so they can play off each other.
-this is a tough job, and you need a respirator, and a gallon of MGC no matter what
I still have to clean everything closer to hull, mock up the new lines, and then start figuring how to reinforce a few key areas of the pan liner. I think most reinforcement will be to keep the liner from flexing underfoot, and I want to investigate a sump for the shower. I plan to lower the "step" where the toilet was to create more standing area, and to go half way into the hanging locker to enlarge the overall head footprint. All in all ' very pleased with the results, and there are no deal breakers yet. Full steam ahead!
What is "MGC"....
Muchos Grande Cajones (Lots of Big Ballz)
Bathroom Mock-up
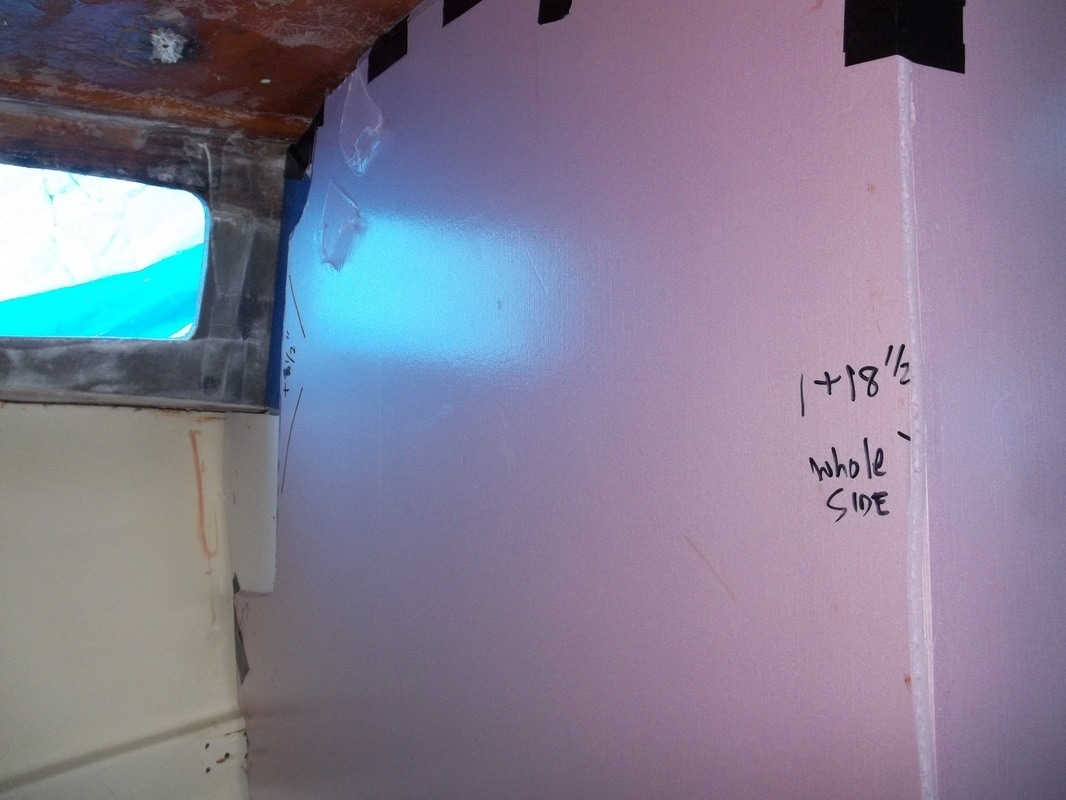
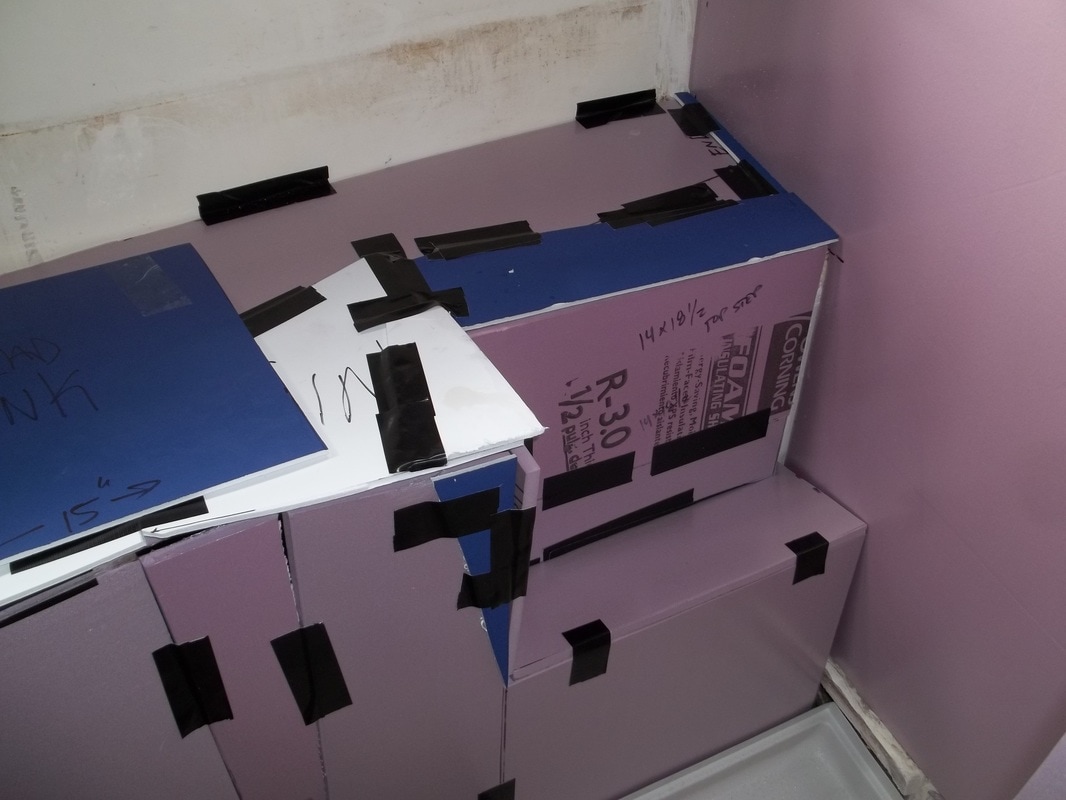
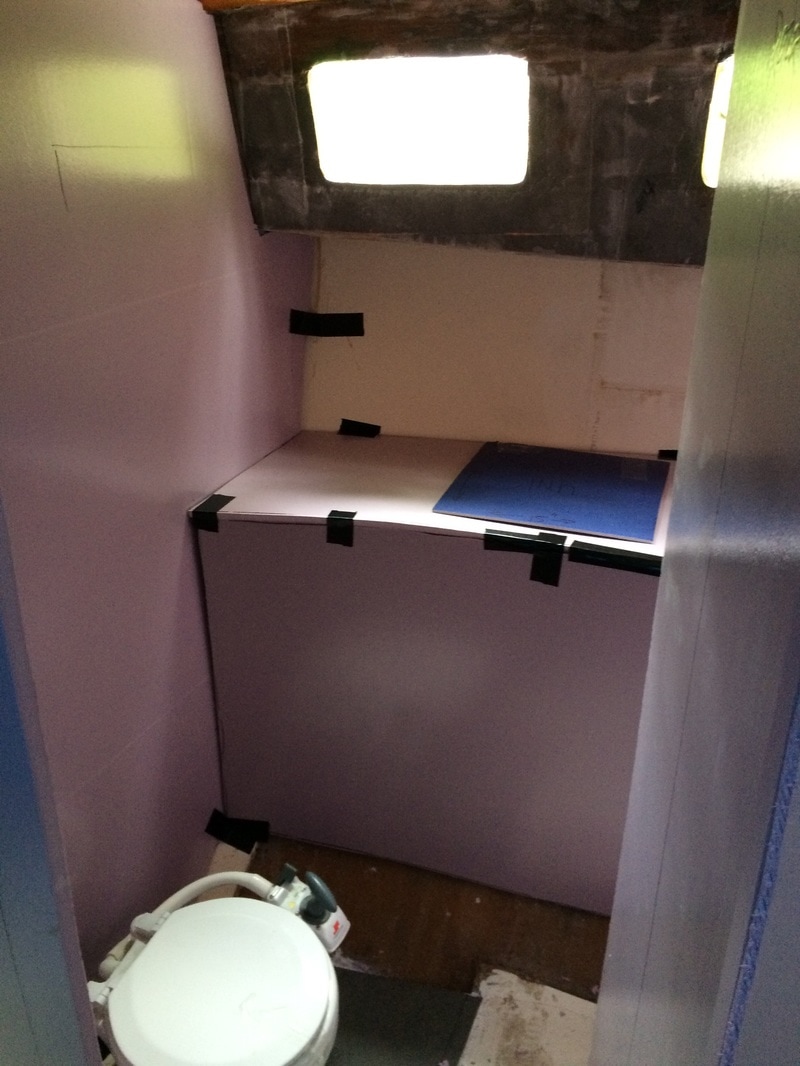
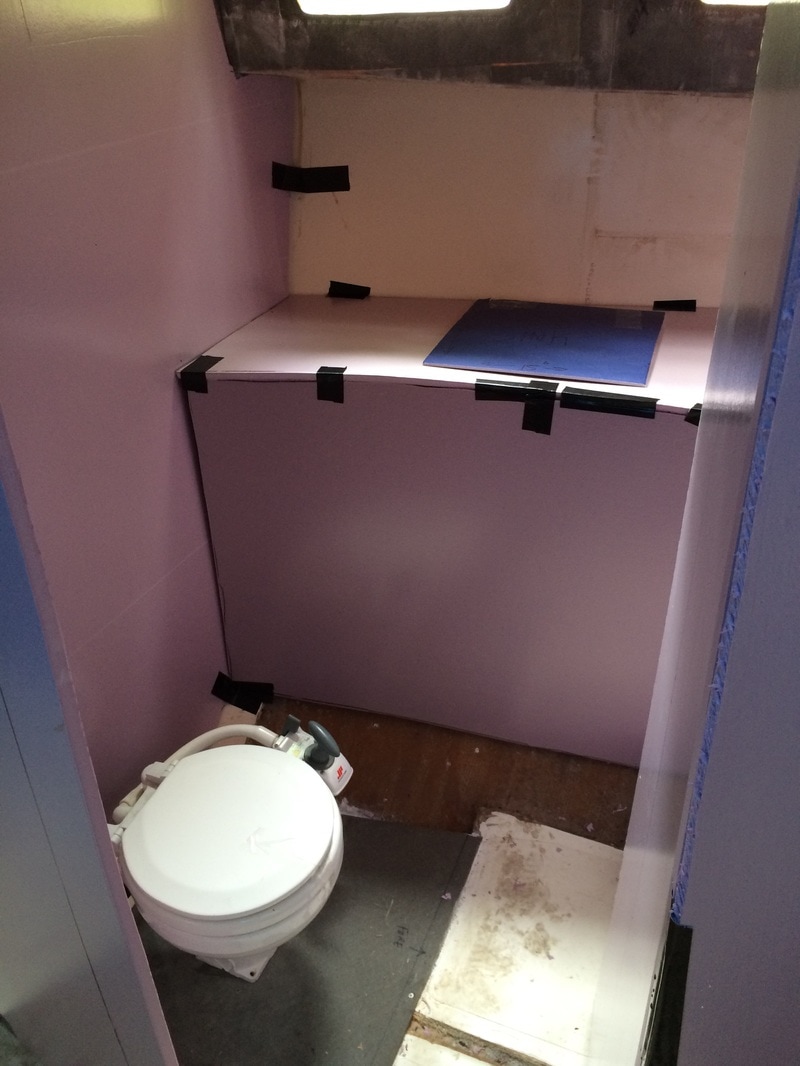
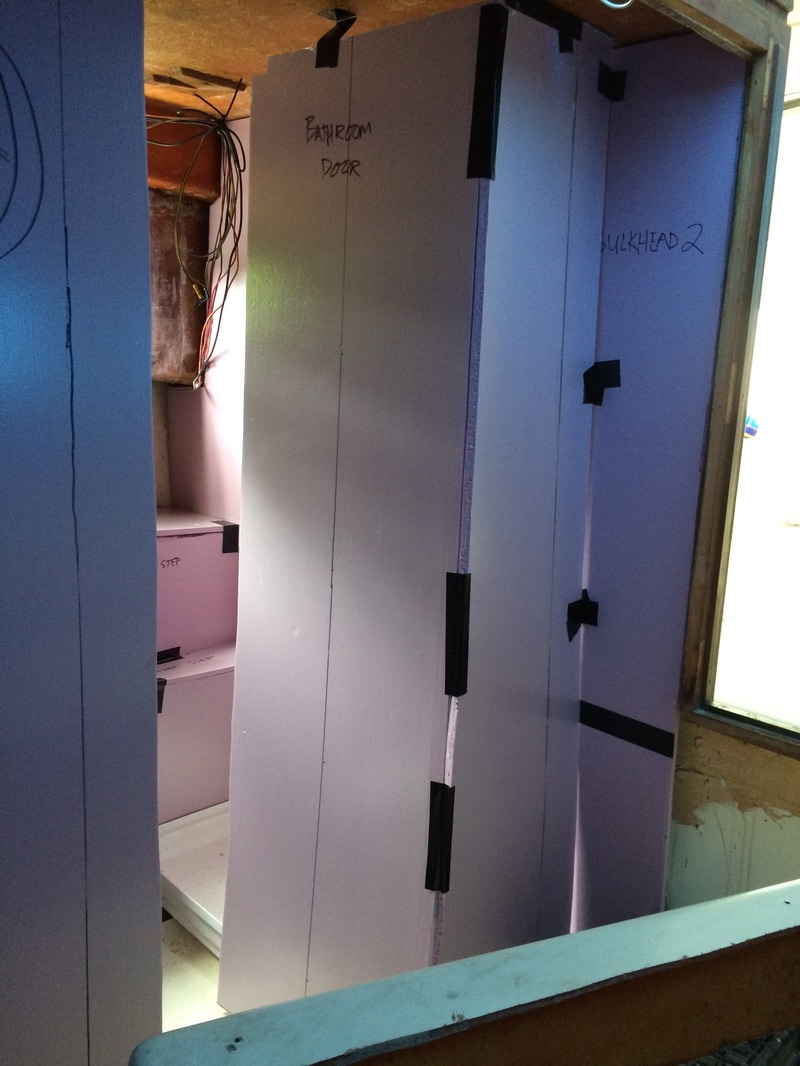
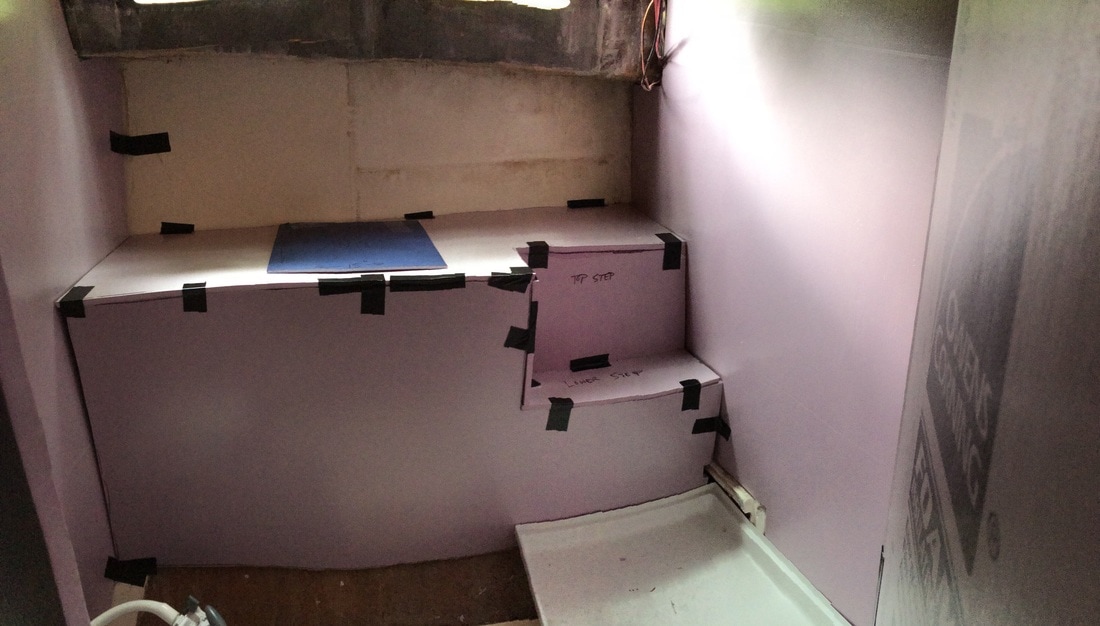
Photographs of the head bulkhead mockups below. I want to thank everyone who recommended using cardboard for a bulkhead mockup to get an idea of how things might fit, and me fit inside them. I used foam posterboard 20x30" sheets from Walmart, which I ducktaped together and put in place. It worked exceptionally well and is re-usable so it will be great for additional projects I have planed. First immediate observation, the white poster board even with duct tape was an immediate improvement to the off white almost tan pan linner throughout the boat. May be hard to see from the pics, but the white fields of the mock bulkheads were clean, refreshing to look at, reflected light well, and man did it look good. LOL Just my opinion. I can foresee painting the liner throughout. Its got to be white.
I planned an a/c&d/c refrigerator between the mock bulkhead and the vberth, but the foot print is not level due to the curve of the hull at the floor. However, raised off the deck approx. chest height there's a great space, which I think will work well. I still need to hash out the refrig dimensions. Fifth, instead of a the 90 degree angle at the mock bulkhead, I would consider joining the two bulkheads with a 45 degree piece just to reduce the sharp edges. Another solution is a curve, using wiggle wood or something. I will have to think on that. All in all, very successful. I like it. Full steam ahead. The next steps will be removing and getting into things. This may take a while to report on.
I planned an a/c&d/c refrigerator between the mock bulkhead and the vberth, but the foot print is not level due to the curve of the hull at the floor. However, raised off the deck approx. chest height there's a great space, which I think will work well. I still need to hash out the refrig dimensions. Fifth, instead of a the 90 degree angle at the mock bulkhead, I would consider joining the two bulkheads with a 45 degree piece just to reduce the sharp edges. Another solution is a curve, using wiggle wood or something. I will have to think on that. All in all, very successful. I like it. Full steam ahead. The next steps will be removing and getting into things. This may take a while to report on.


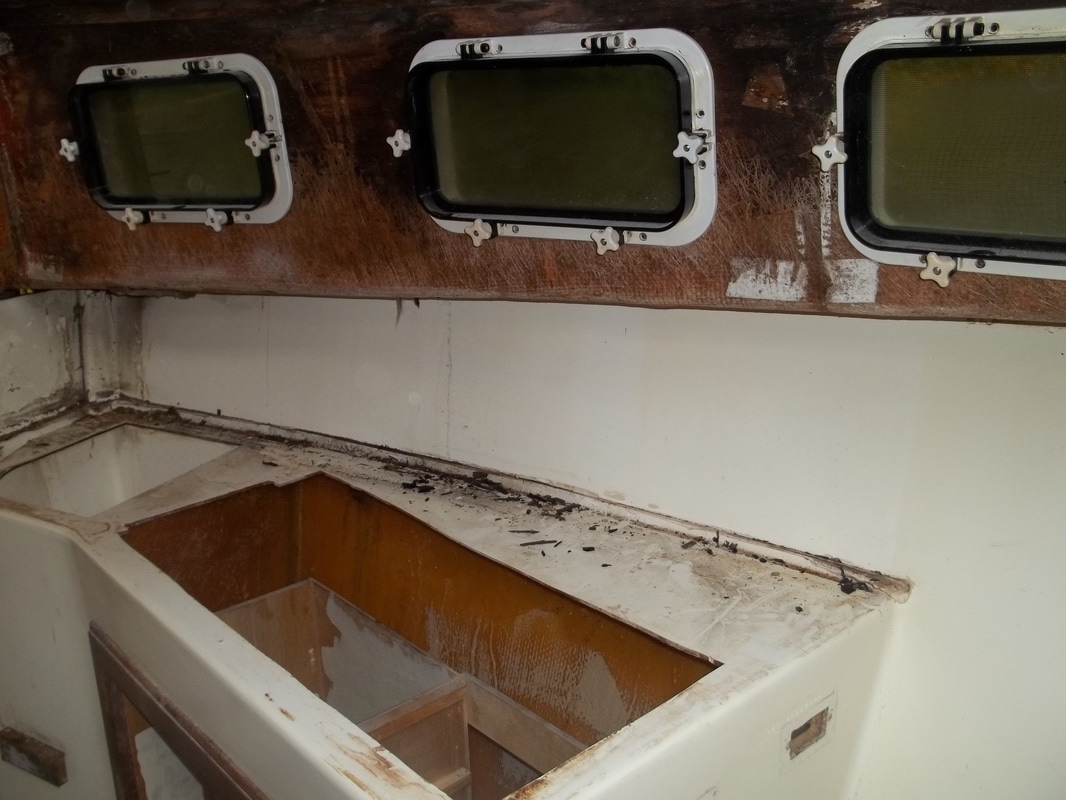


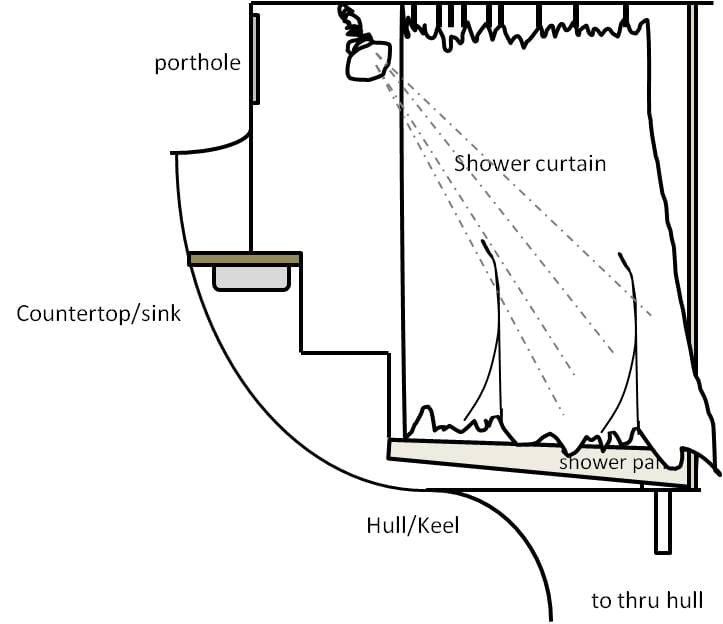
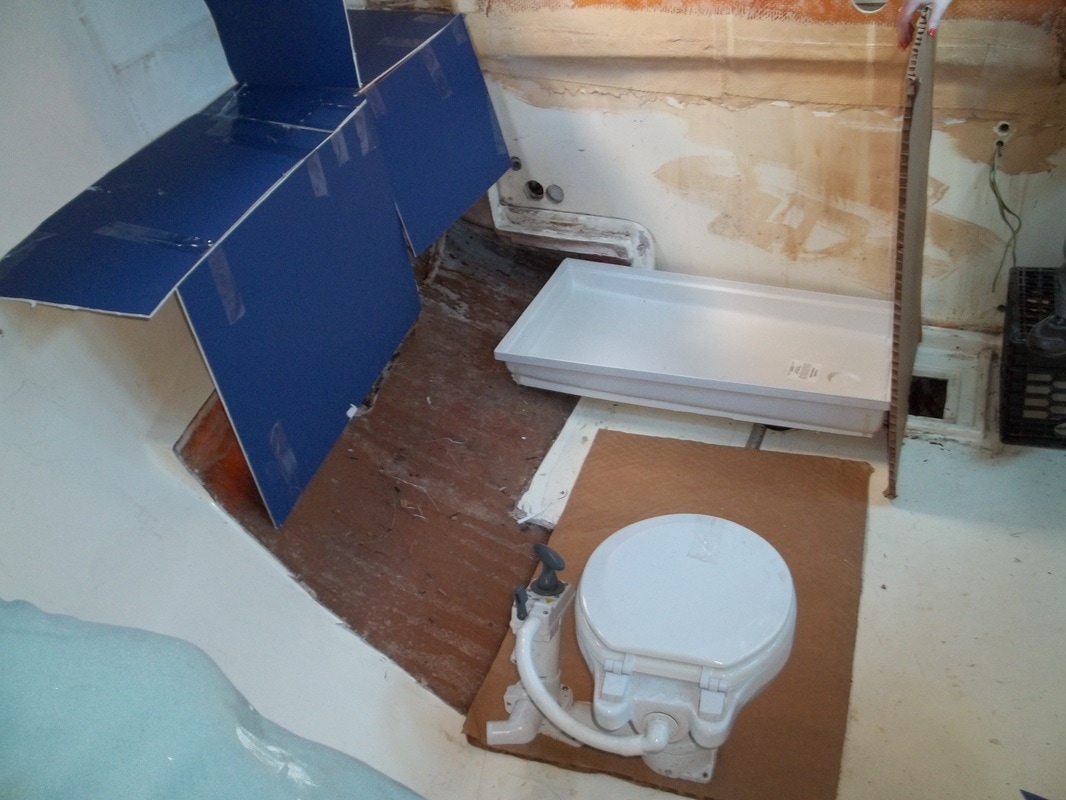
In general, I think the shower is better aft, since there slightly more headroom. As u go fwd, headroom decreases in the fwd cabin. The most headroom is at the aft most bulkhead. And a shower requires the most headroom possible so the shower head works properly. I am currently trying to solve the shower pan problem. Where and what to make the pan out of, and confirming that a sump or a pump-out will fit below the pan/deck so no more draining into the bilge. I've located a small rv shower pan that might be adapted for my purpose. I plan to do another mock up this wkd. BTW removed the entire hangling locker and d/c panel and wiring. There is great room without the hanging locker and access to the fwd bilge through the pan liner.
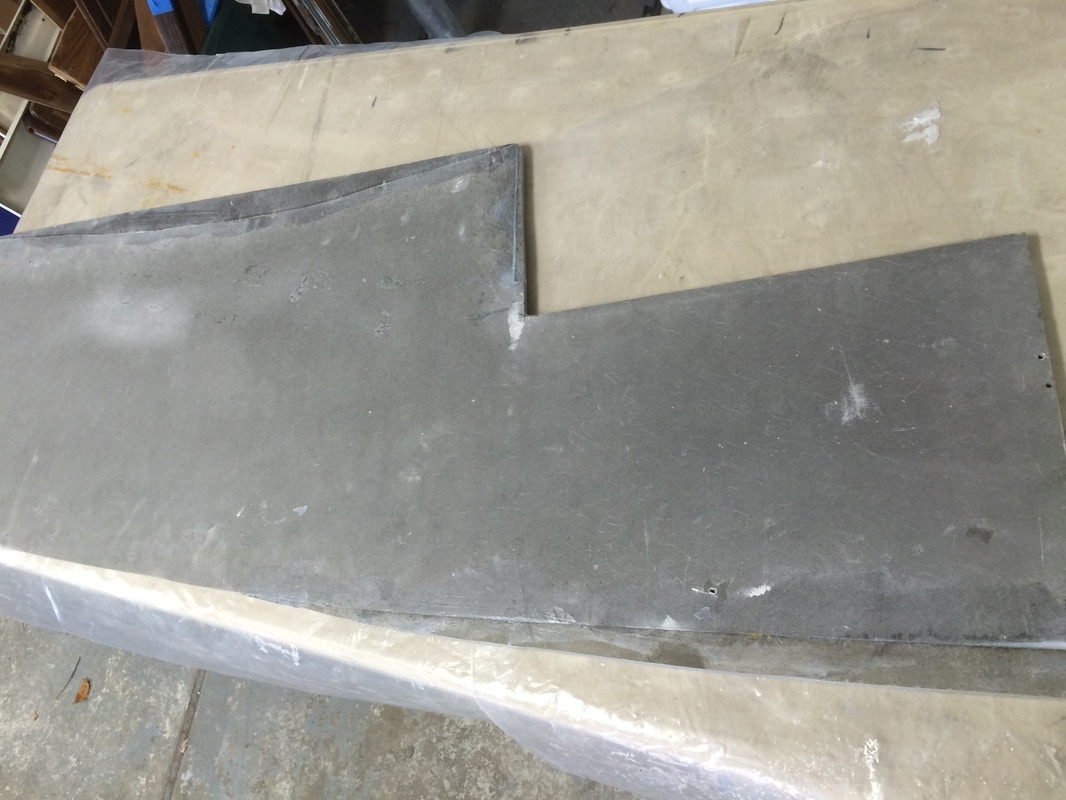
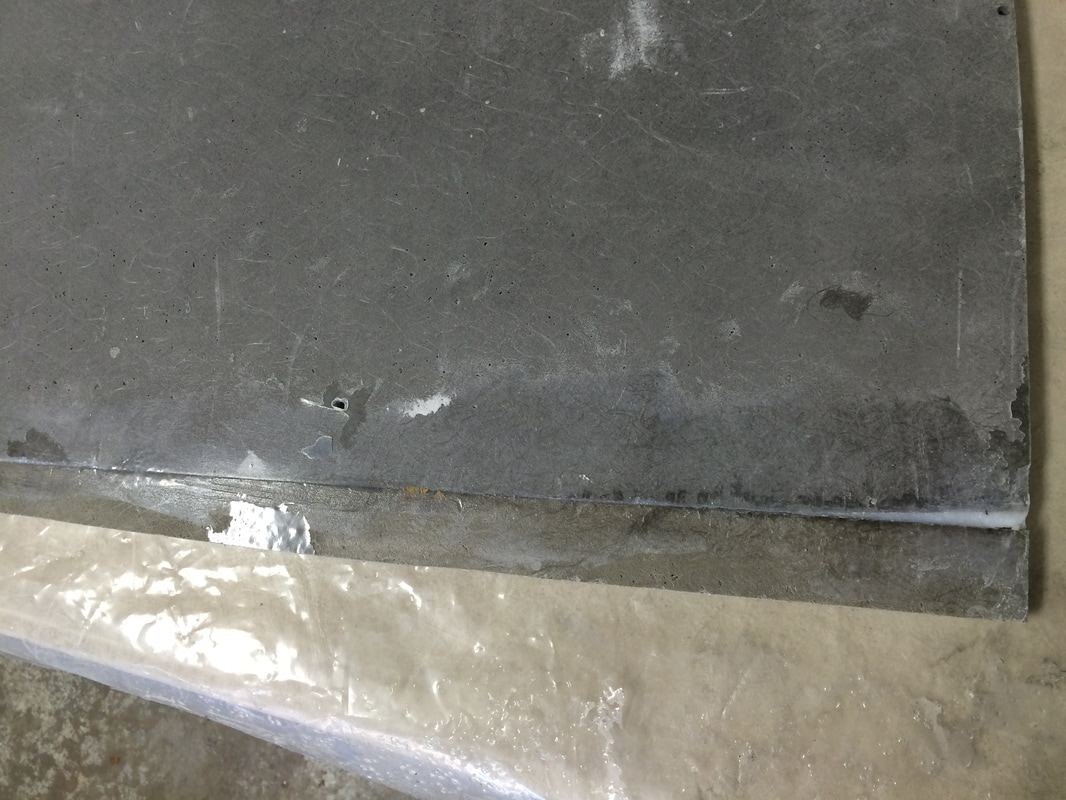
Ladies and Gentlemen: Gaze with envy at my new shower pan liner. It just arrived today! Oh yes, its 20.5" x 36". That's right, thirty-six inches of pure shower heaven on an Albin 27 FC. I had to purchase it and have it on hand to begin the floor work and bulkhead patterning that will begin once the snow melts. I can only imagine the orgy of spaciousness and convenience that awaits in my oasis of a head. The dream is alive!
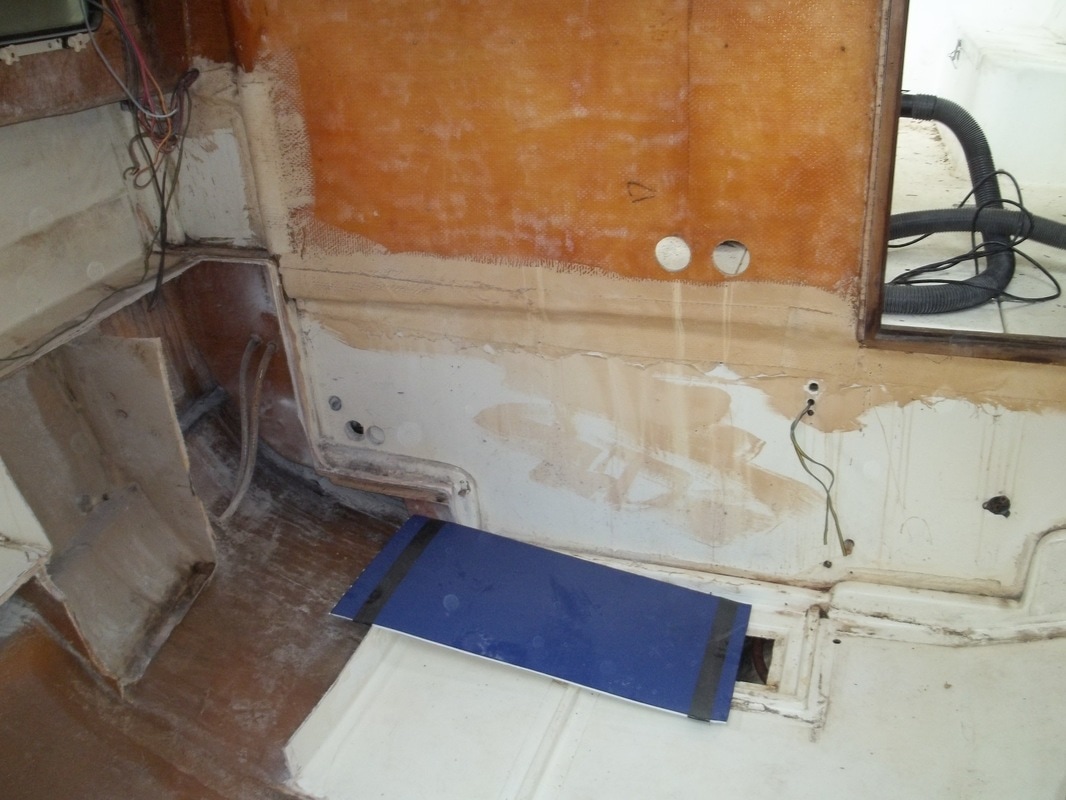
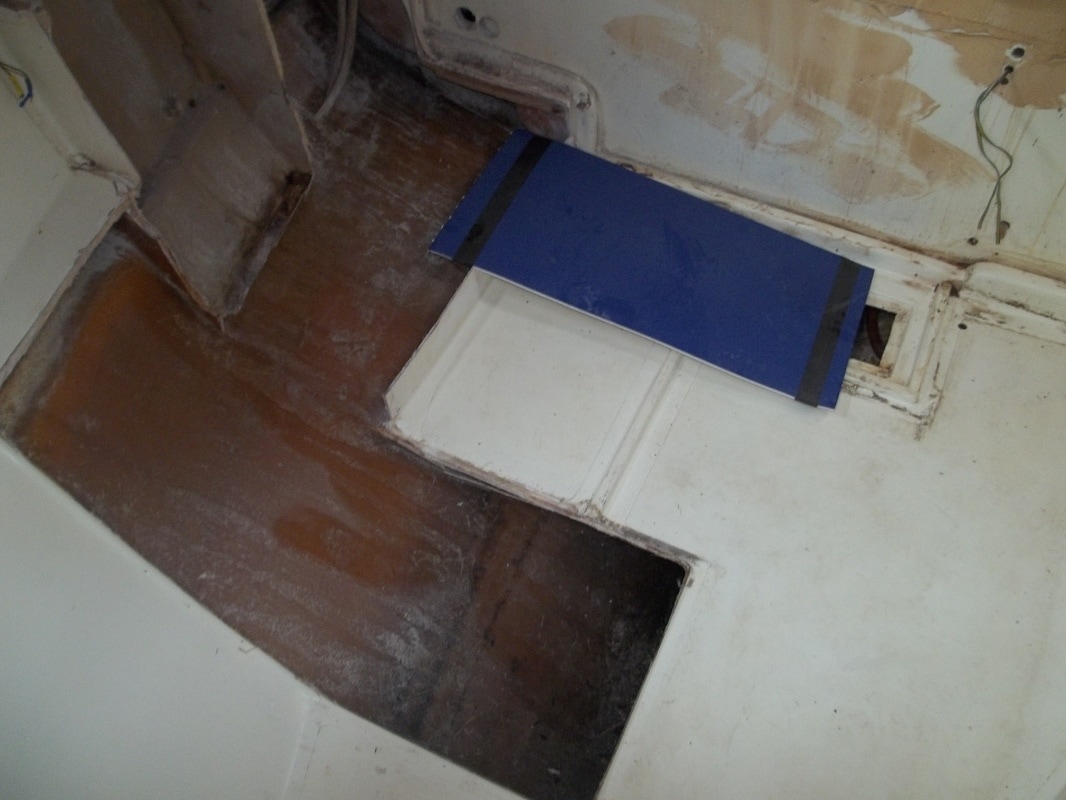
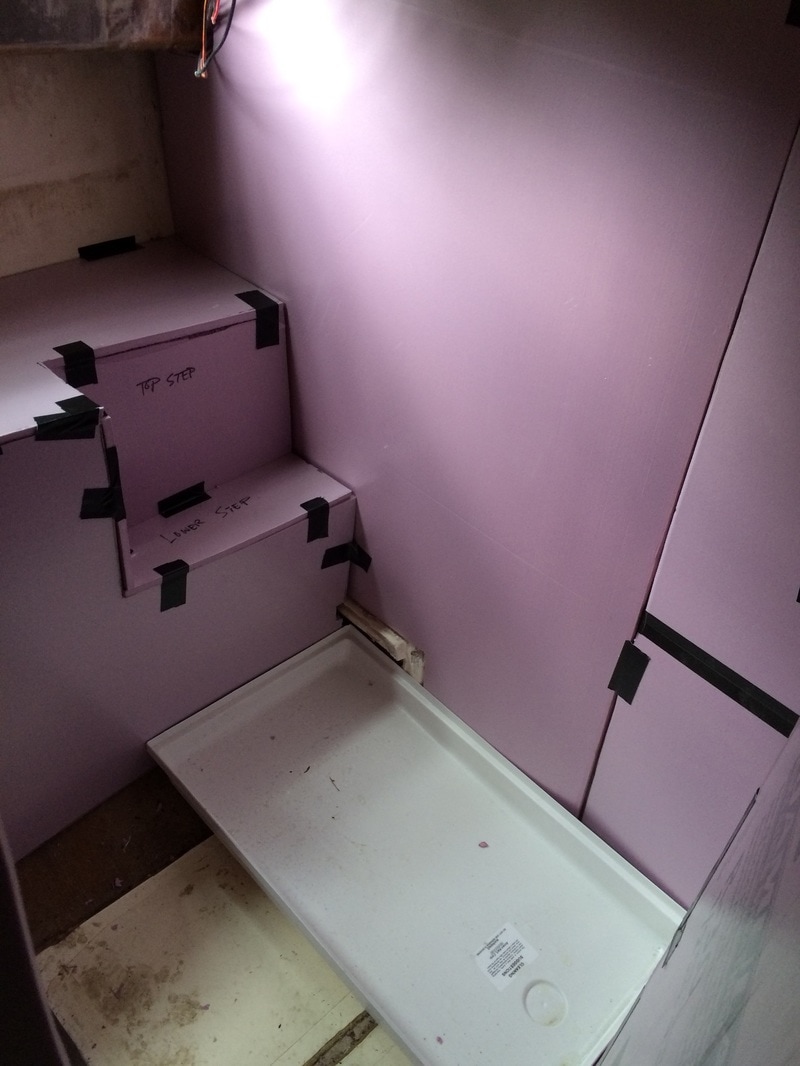
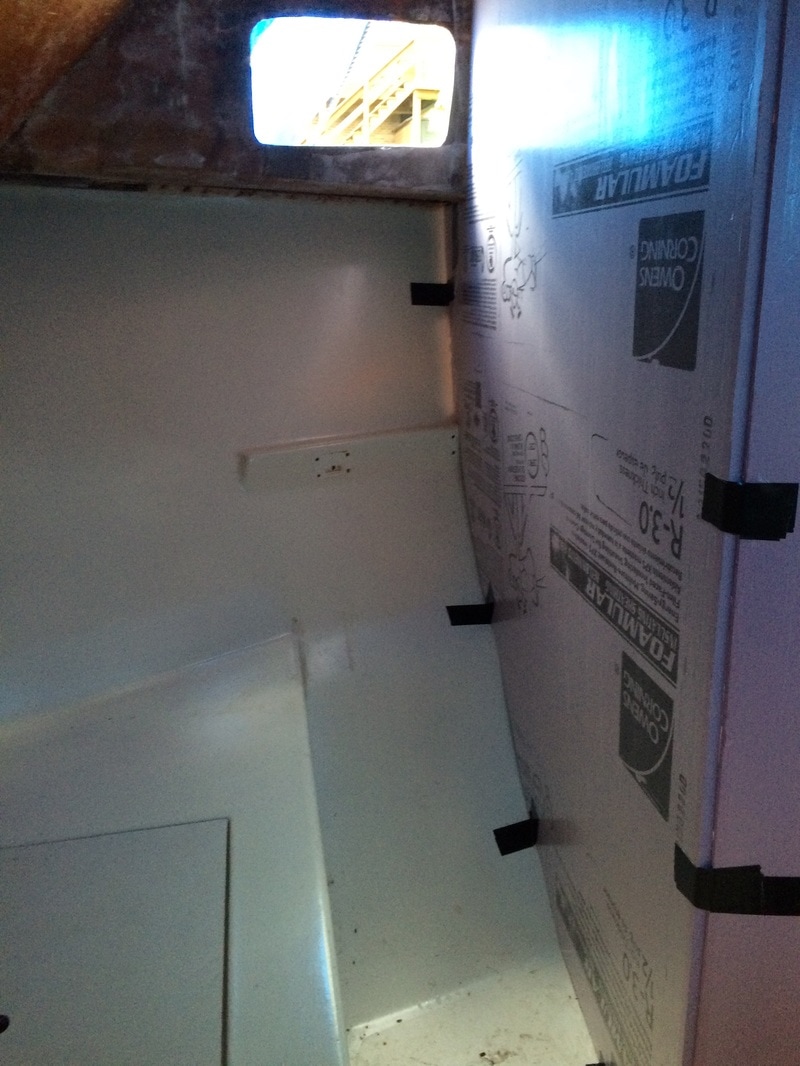
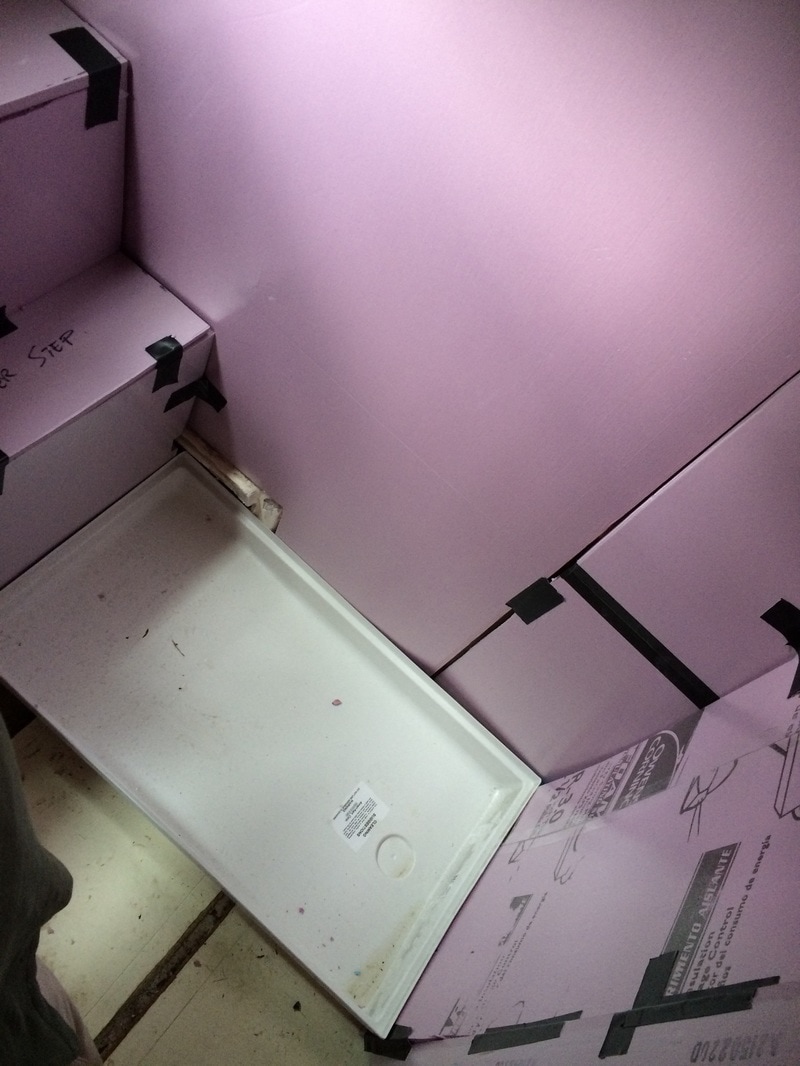
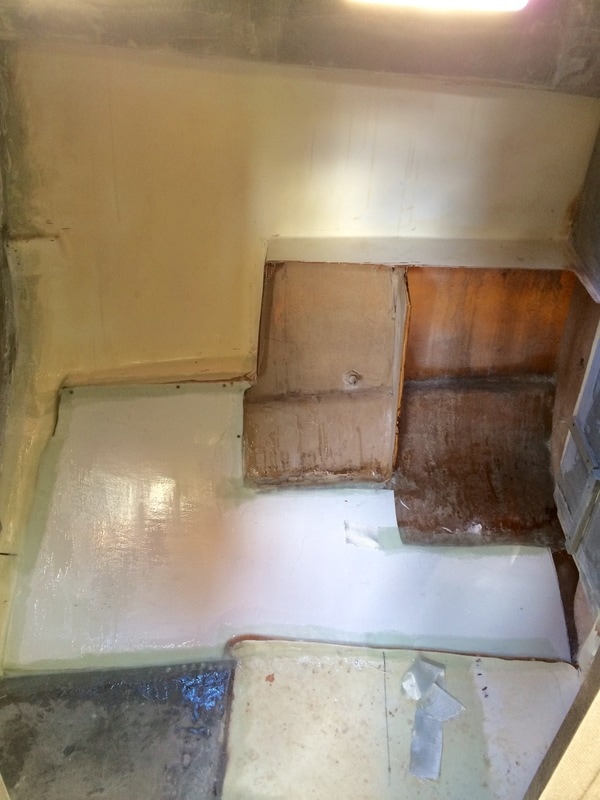
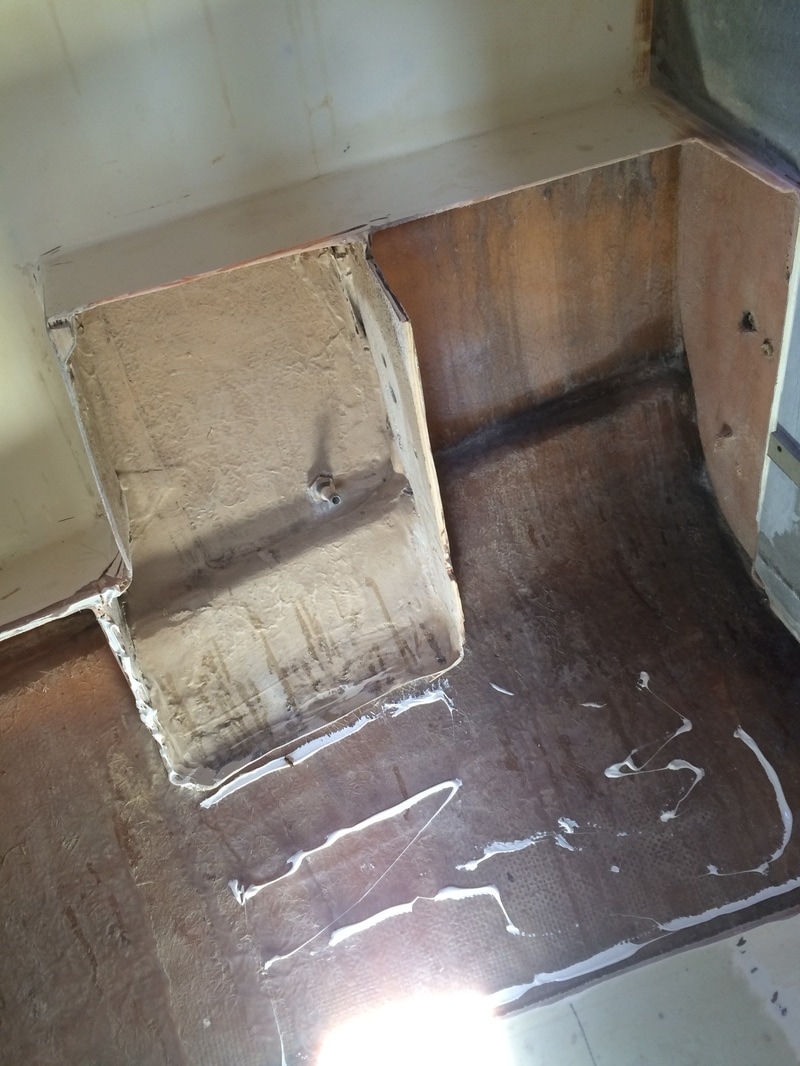
With the portholes done, its finally time for some Head Action. Step one: patch the hole in the floor from where I cut the fwd cabin bench out of the pan liner, and brace the floor with some modified stringers. Spent the day butting patterns and coosa board. I think the floor will firm up nicely. Didn't get to installing the pieces yet, so no photos yet. Then I moved on to a New Improved Mockup to see what the head and bulkheads might look like. I brought the new shower pan to the boat as well as an old marine head I had just to see what things will look like. I'm looking into a sink that will fit along the wall or int he corner. Haven't exactly decides where it will go. Still moving things around, but you can see where this is going. After I get the floor pieces in, I will be working on the bulkhead mockup, and then some cabinet/shelf/counter ideas. I need to get some pink insulation to use as templates/patterns.
Ladies and Gentlemen: Gaze with envy at my new shower pan liner. It just arrived today! Oh yes, its 20.5" x 36". That's right, thirty-six inches of pure shower heaven on an Albin 27 FC. I had to purchase it and have it on hand to begin the floor work and bulkhead patterning that will begin once the snow melts. I can only imagine the orgy of spaciousness and convenience that awaits in my oasis of a head. The dream is alive!
With the portholes done, its finally time for some Head Action. Step one: patch the hole in the floor from where I cut the fwd cabin bench out of the pan liner, and brace the floor with some modified stringers. Spent the day butting patterns and coosa board. I think the floor will firm up nicely. Didn't get to installing the pieces yet, so no photos yet. Then I moved on to a New Improved Mockup to see what the head and bulkheads might look like. I brought the new shower pan to the boat as well as an old marine head I had just to see what things will look like. I'm looking into a sink that will fit along the wall or int he corner. Haven't exactly decides where it will go. Still moving things around, but you can see where this is going. After I get the floor pieces in, I will be working on the bulkhead mockup, and then some cabinet/shelf/counter ideas. I need to get some pink insulation to use as templates/patterns.

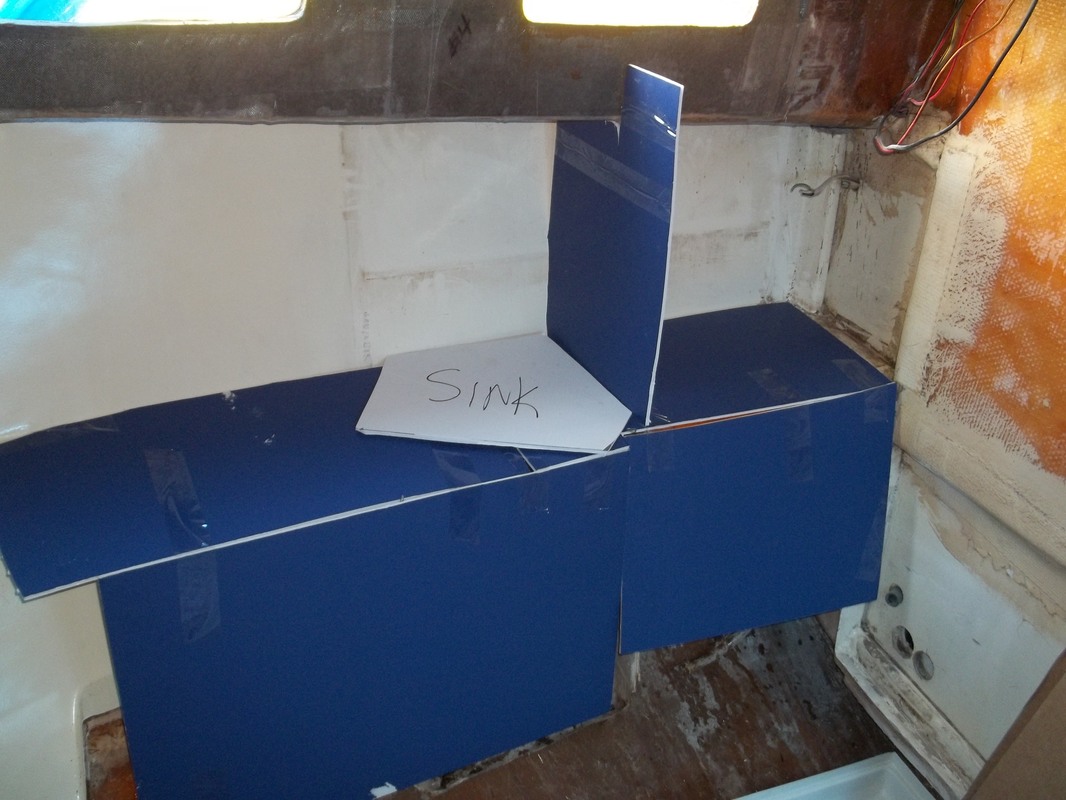
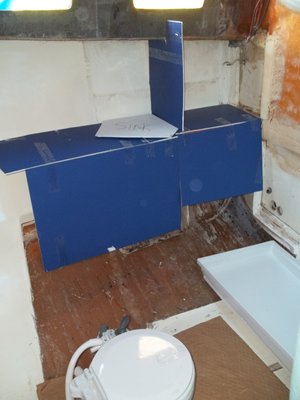

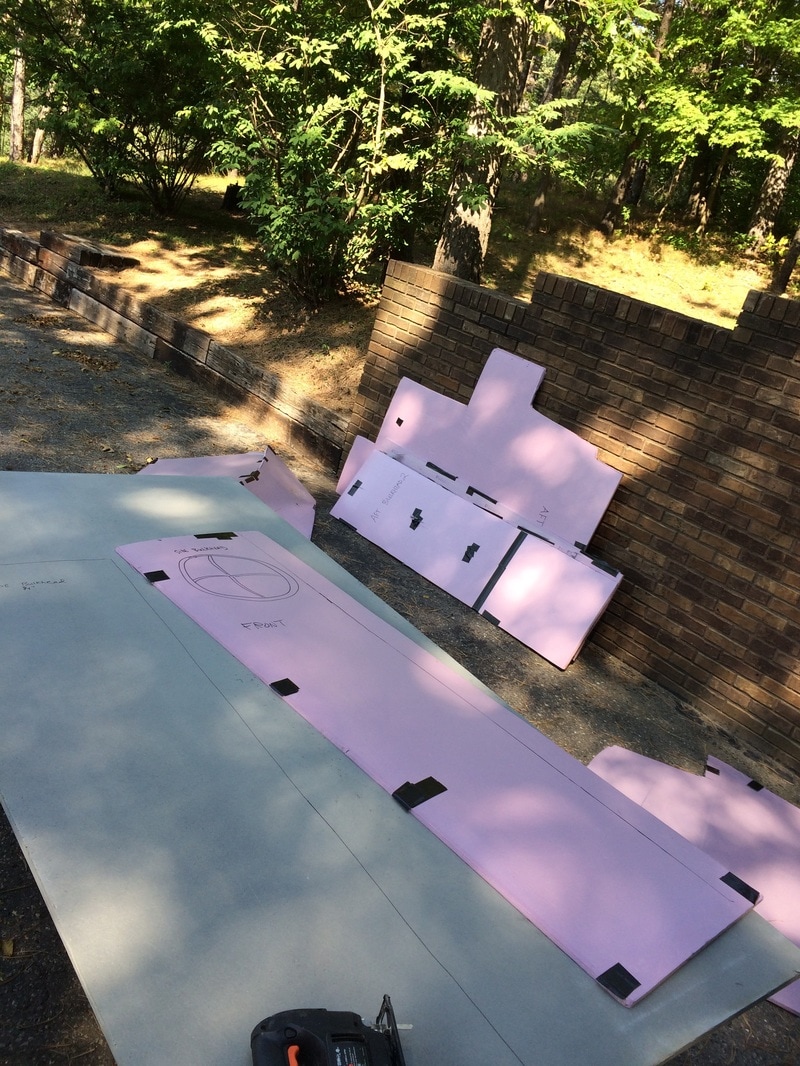
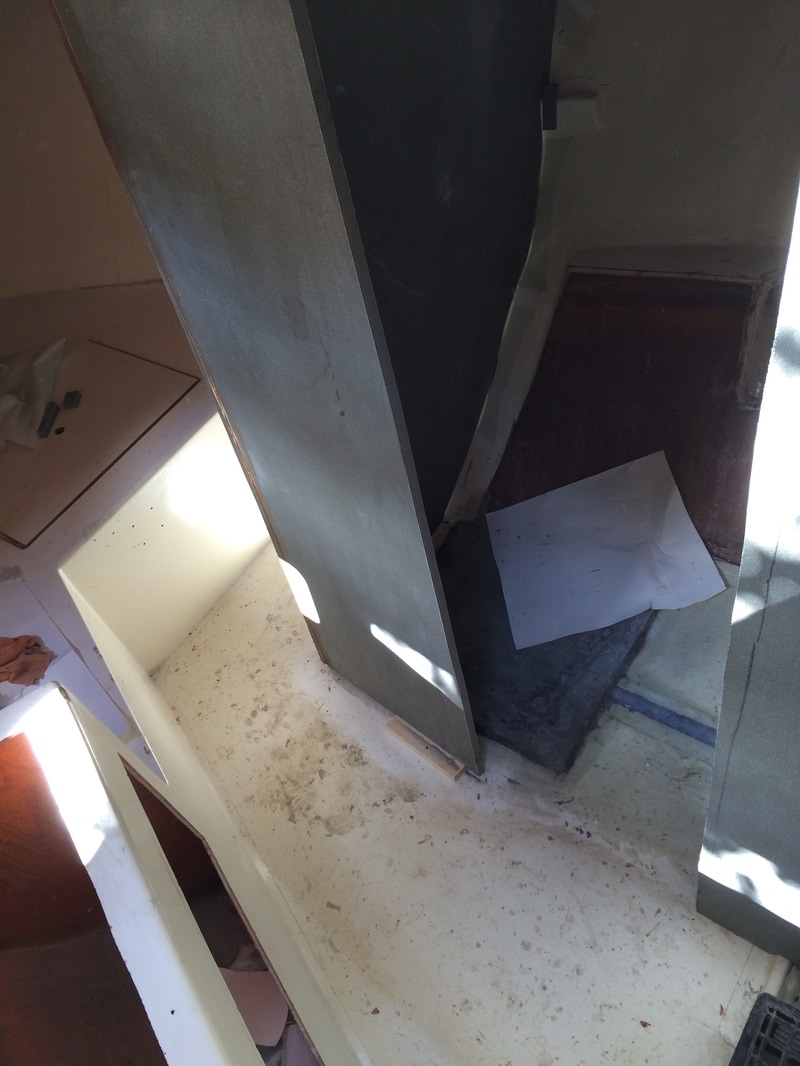
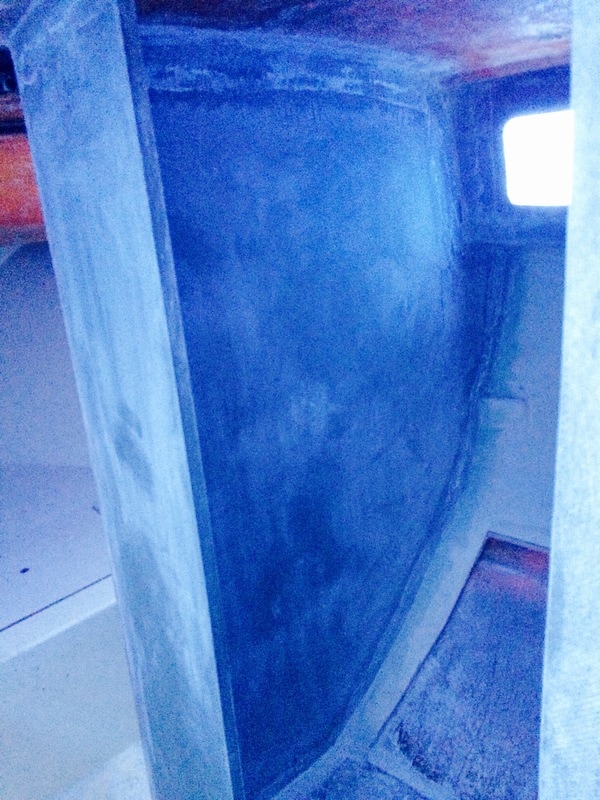
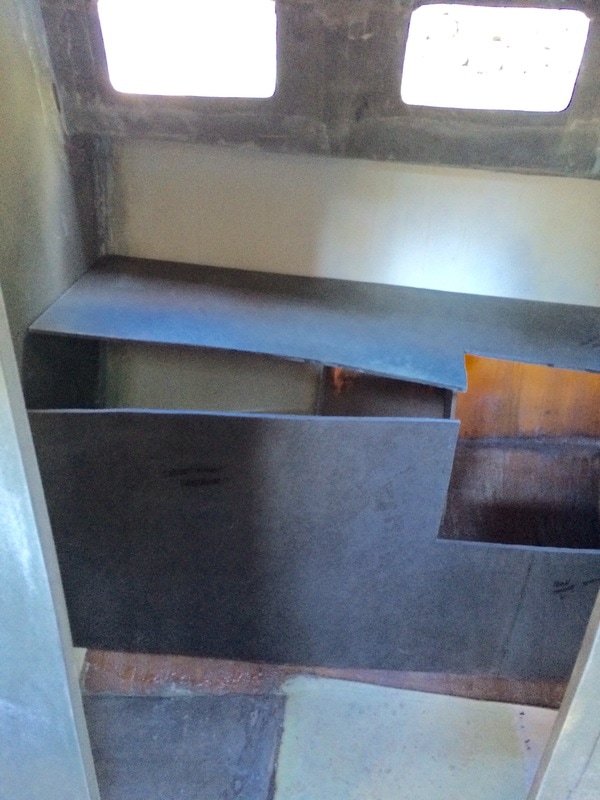
Building bulkhead patterns for the head takes a little bit of time. Most patterns took two tries. The first go around is rough pattern usually derived from an old bulkhead. It doesn't matter if it fits very well. I used cardboard scraps taped to the rough pattern to get more details in corners and along curves. I made my patterns out of 1/2" thick pink foam insulation which runs about $12/sheet. It took about 6 sheets to do all the op attend with plenty left over.The first pattern is then transferred to a 2nd template. The second template should fit as flush as possible against all curves etc. The second pattern can also be adjusted and will be transferred to the coosa board. The new head feels cavernous. Because the toilet faces the shower, there's no more claustrophobia being wedged between the sink and bulkhead in a corner. There's room for a 15" square sink, centered on the counter. The big challenge was configuring the door. I originally planned for a pocket door. But my initial mock up had the door opening at just 17" wide. I opted to push back the forward bulkhead and gained a door opening of 20". By having the door swing open against the shower, no more need for a pocket door.

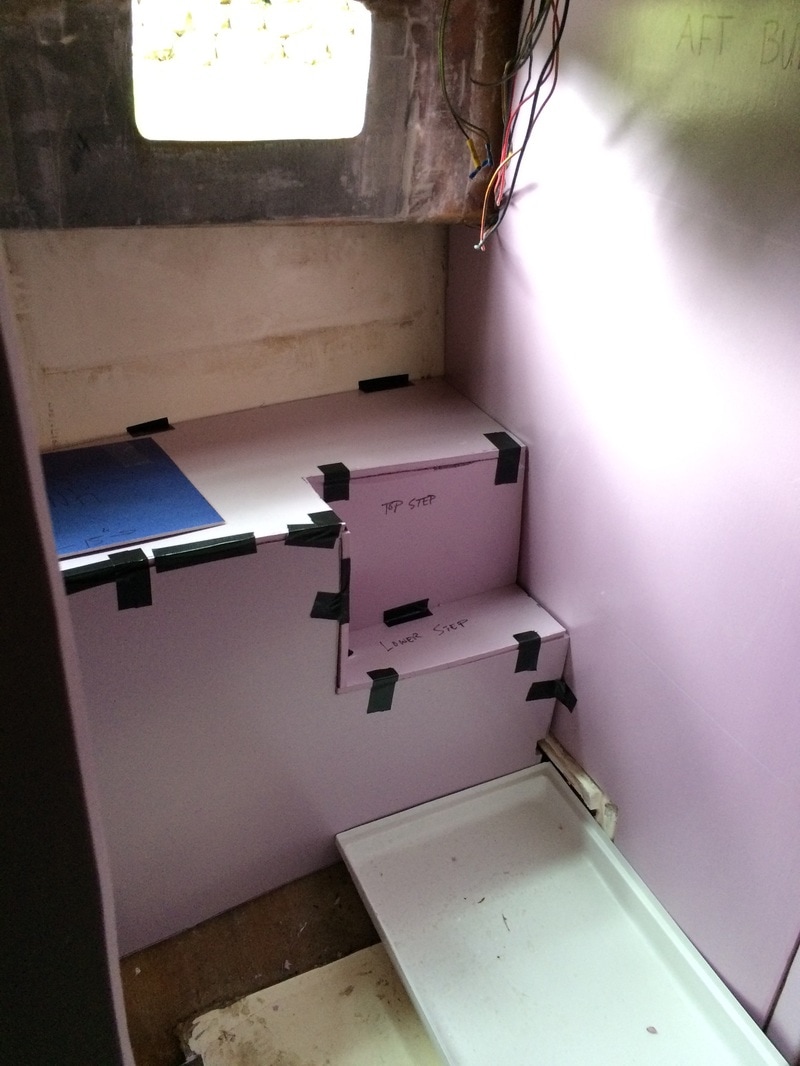


Yes my head is now huge. And its a real head. OMG its sweeeeet. The mock bulkheads neither infringe on the galley area, nor vary much from the original footprint at foot level. At shoulder level, its NOT claustrophobic. May be hard to tell from photos but it looks like it should have been this way. In no way does it hamper the cooking area. Before, the forward cabin was a vberth, a head, a galley, a seatee, and a dining area. Five things it didn't do well for me. Now the forward cabin is a galley, a head, and quarter berth. It could do these 3 things really really well. Third, the door idea, opening fore or aft hinged is not the best use of space, and would require moving or adjusting the steps (actually one step) that is currently there. Its hard to get a 20" swinging door in there. I am now considering some type of pocket door, or sliding door. This will be a great solution, and it can be 20". This also means not all the hanging locker has to go, maybe just 1/2. I glued new floor supports in place. I will tab the coosa board with fiberglass and I have a piece to cover the whole in the floor. Coosa a board stringers, 1/2" thick, were glued in place using 3m 5200, and then tabbed in fiberglass hull. This provides excellent support for pan liner floor on the head cutout side.


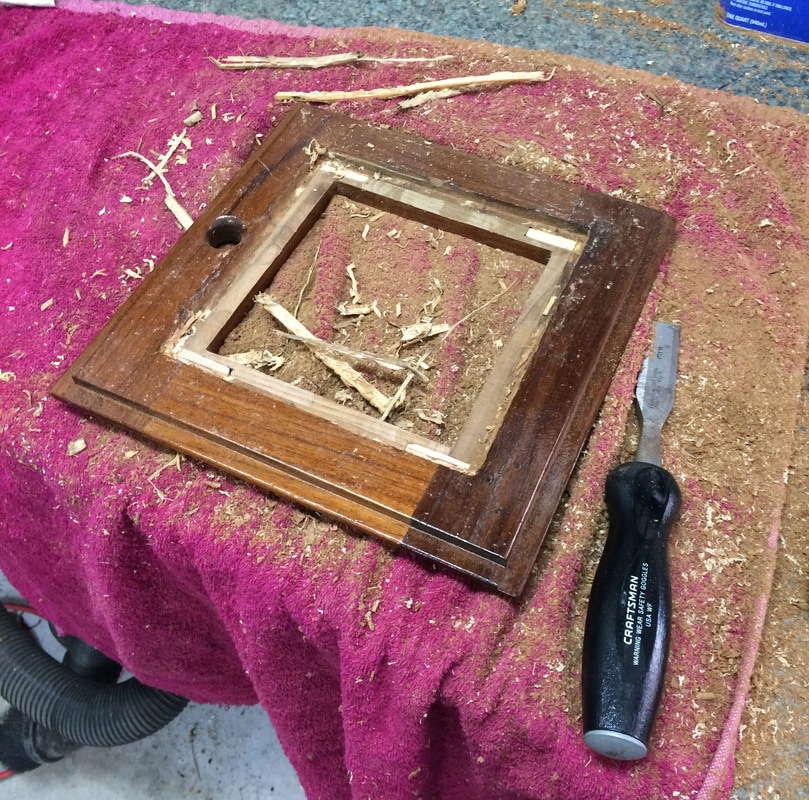
Bathroom Cabinet Work
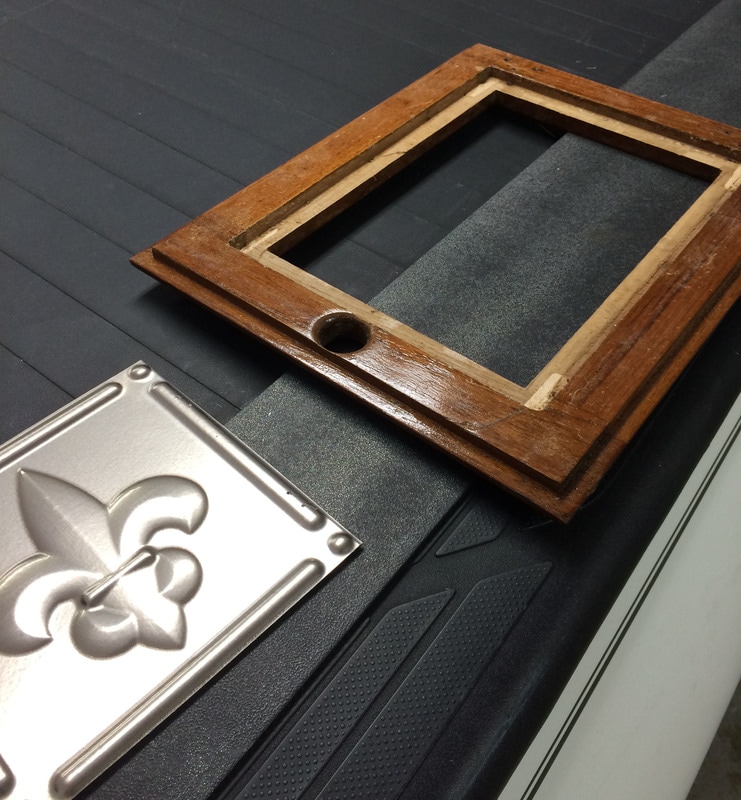
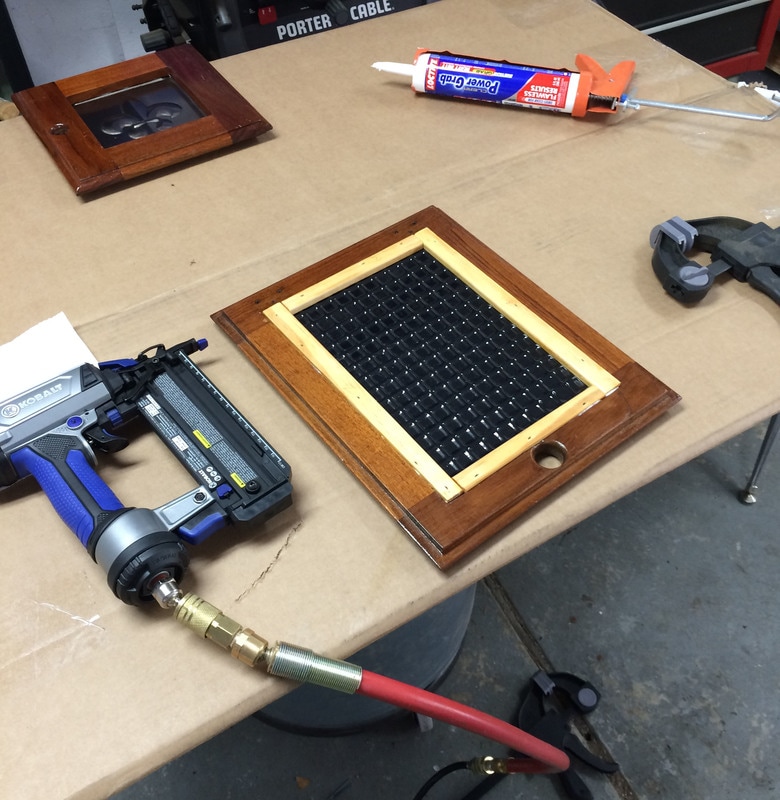
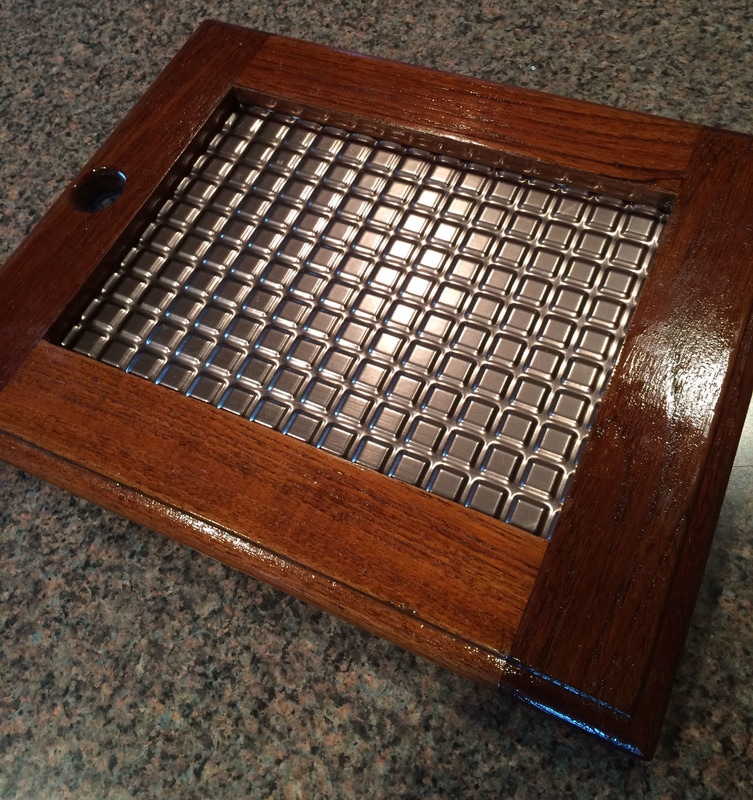
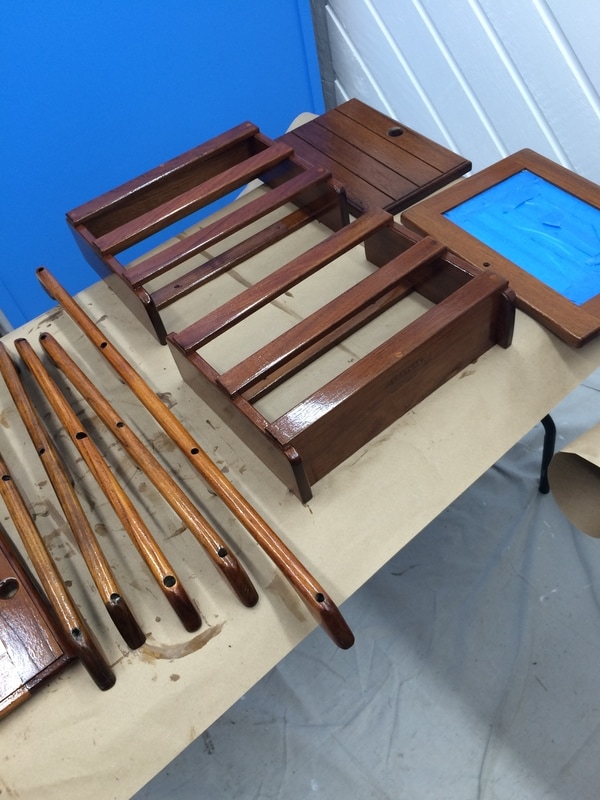
Little side project. Replacing the moldy cane inserts to the cabinet hatches for the galley and anchor locker. I've got a French theme going on, mixed with an industrial work boat look. (Close your eyes and imagine it ). I decided to replace the inserts with a faux metal look. This is a pvc product made by Fasade. Comes in a variety of styles and finishes. I like the brushed nickel. But the aluminum, brushed alum, and galvanized looks are also very real looking. I used this once before as a kitchen backsplash in my houseboat and always got compliments. I plan to use it again in the kitchen, and maybe the entire head for that USS Destroyer look.

Coosa Board I love You
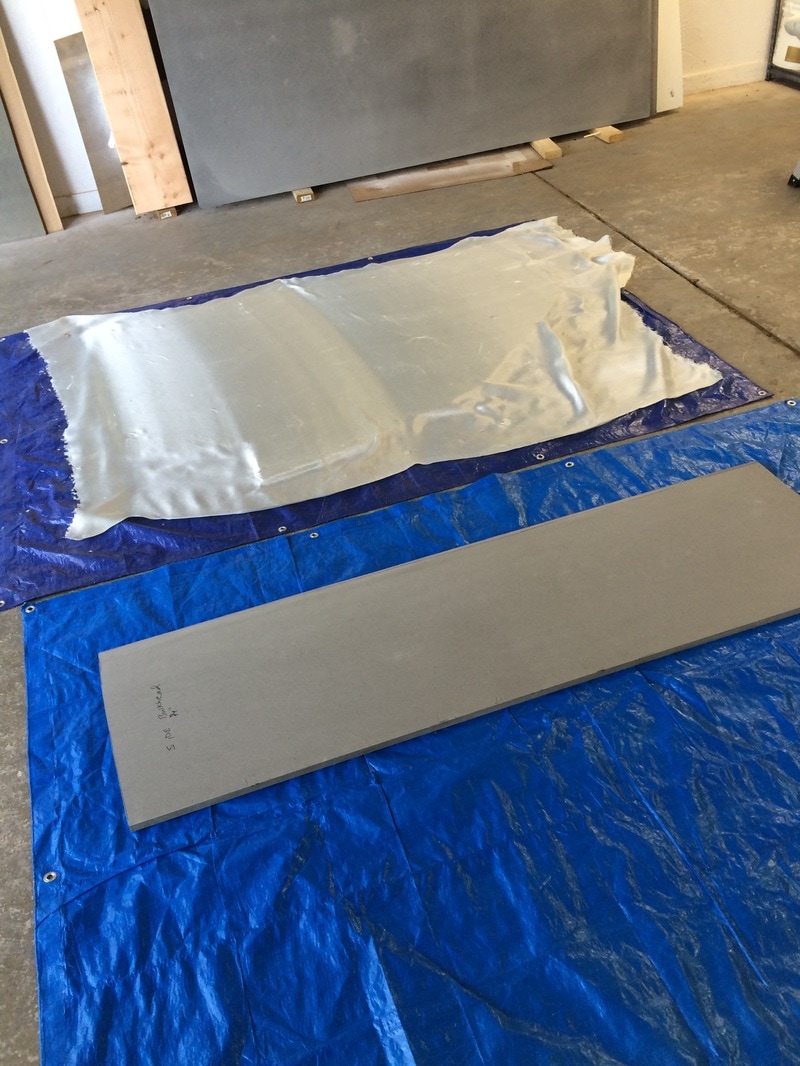
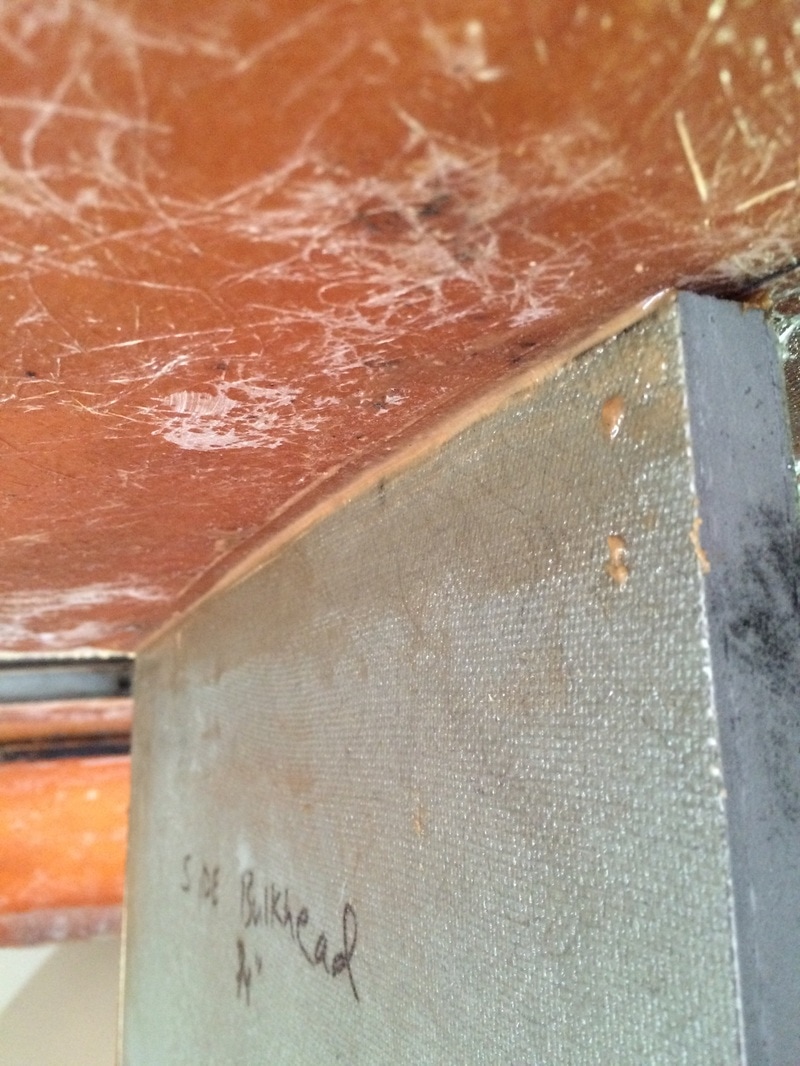
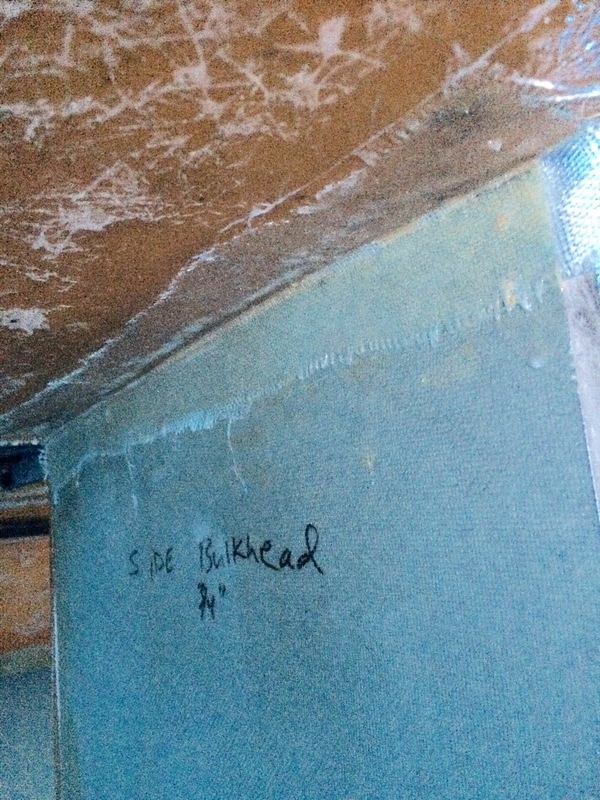
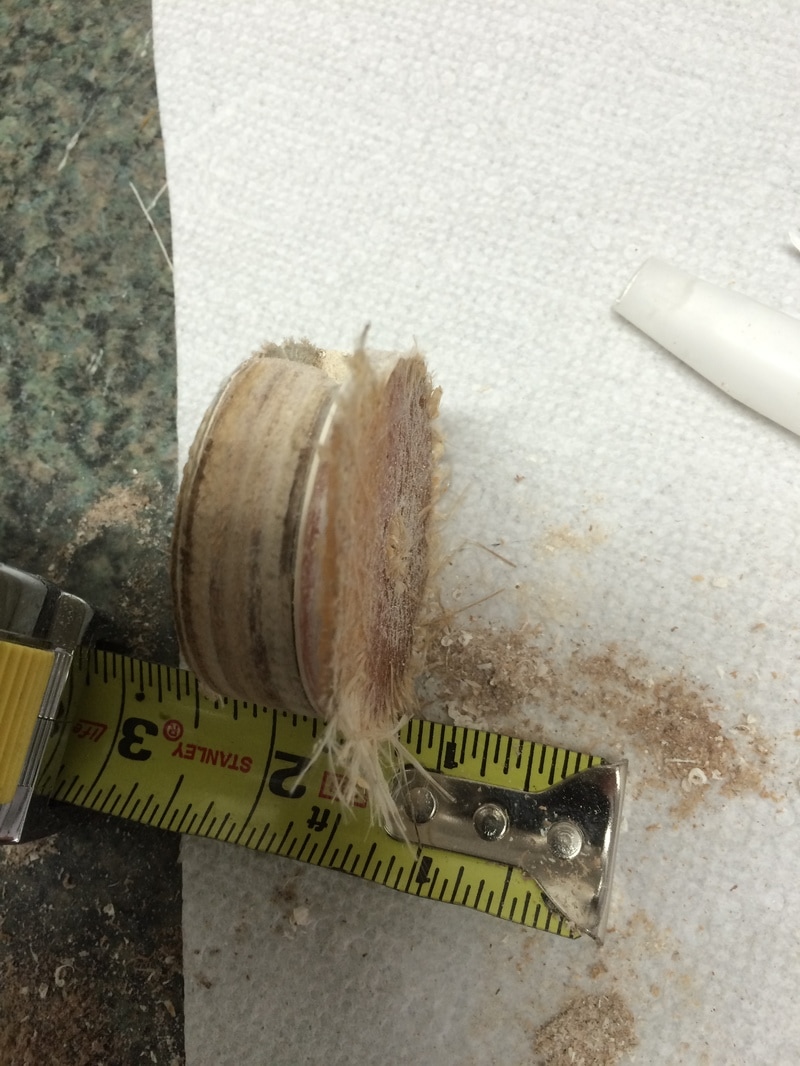
The coosa and board arrive. Two sheets of 3/4" and three sheets of 1/2". The half inch cost is now down to $200/sheet you can't beat it. Pulled out the foam patterns and started cutting. I decided to add a layer of biaxial cloth to one side for stiffness. May do both. Wetted them out on the garage floor and squeegeed them smooth. Coosa board is a breeze to work with. Interesting fact about the forward head bulkhead: the original bulkhead is teak plywood. But it's wider than a 8x4' sheet. It's two pieces joined with dowels to creat one wide bulkhead. Even moving the bulkhead forward about 15" the bulkhead is still wider than a sheet. I added the small corner piece during fiberglassing.
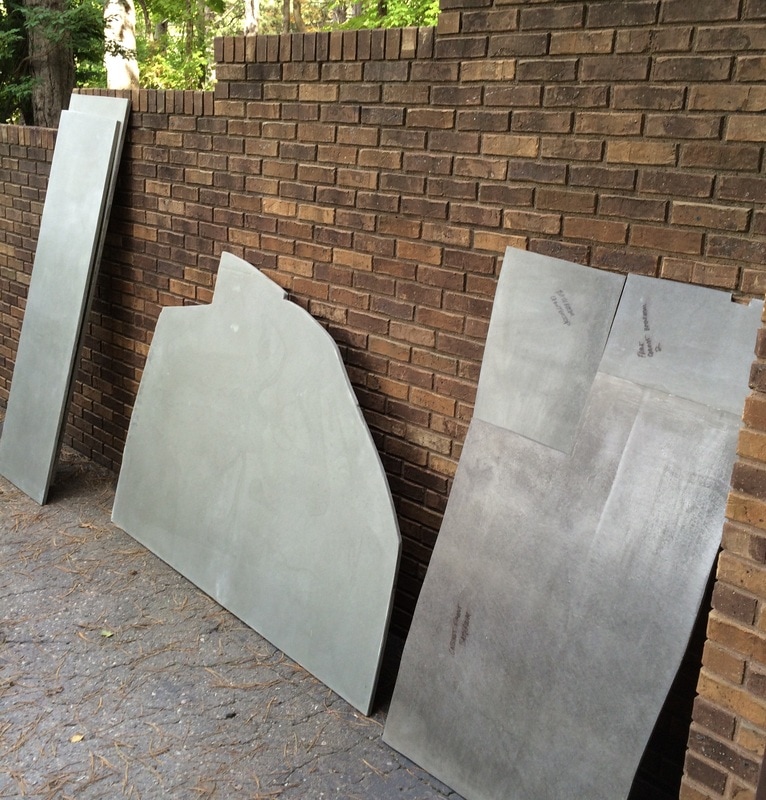
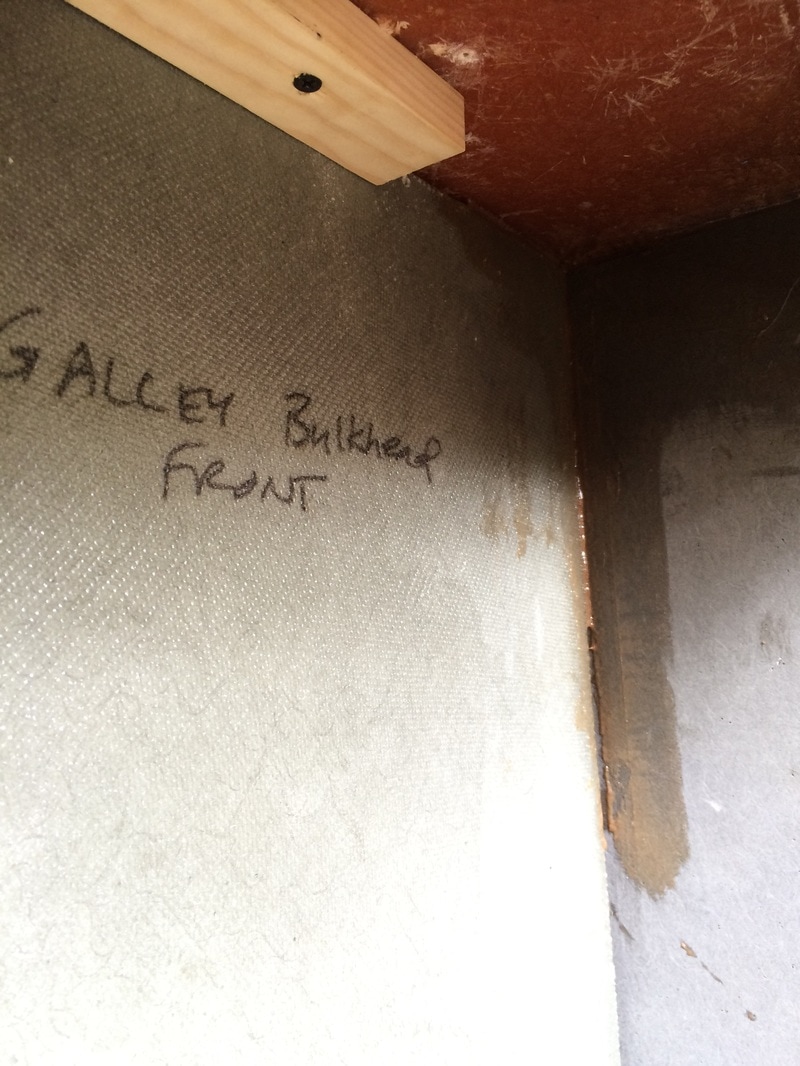
The forward bulkhead replaces the fwd edge of the old dinette bench. The bulkhead mounts very close to the edge of the fed starboard port, which become a fixed port. It angles slightly fed somore room is created to allow the 20" wide swing door. I plan to use 3/4" coosa board for the forward and side bulkhead, which will fall under the proposed mast step. A marine refrigerator will go just around the corner, forward of the head.
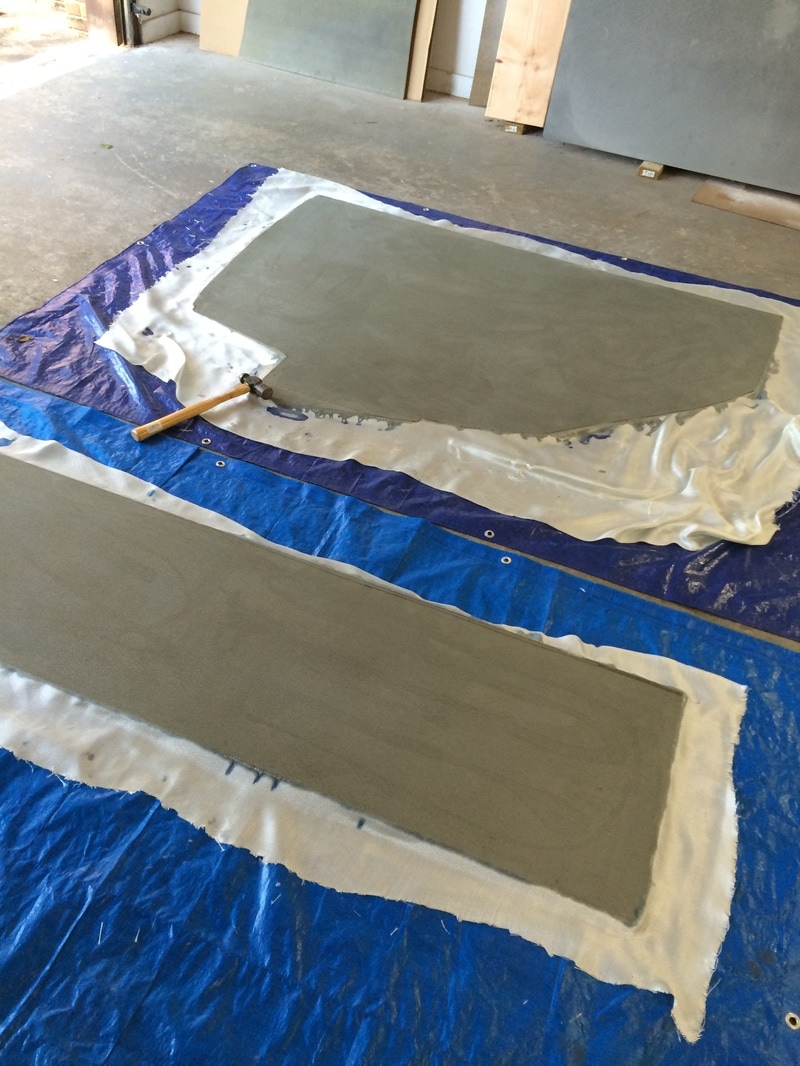
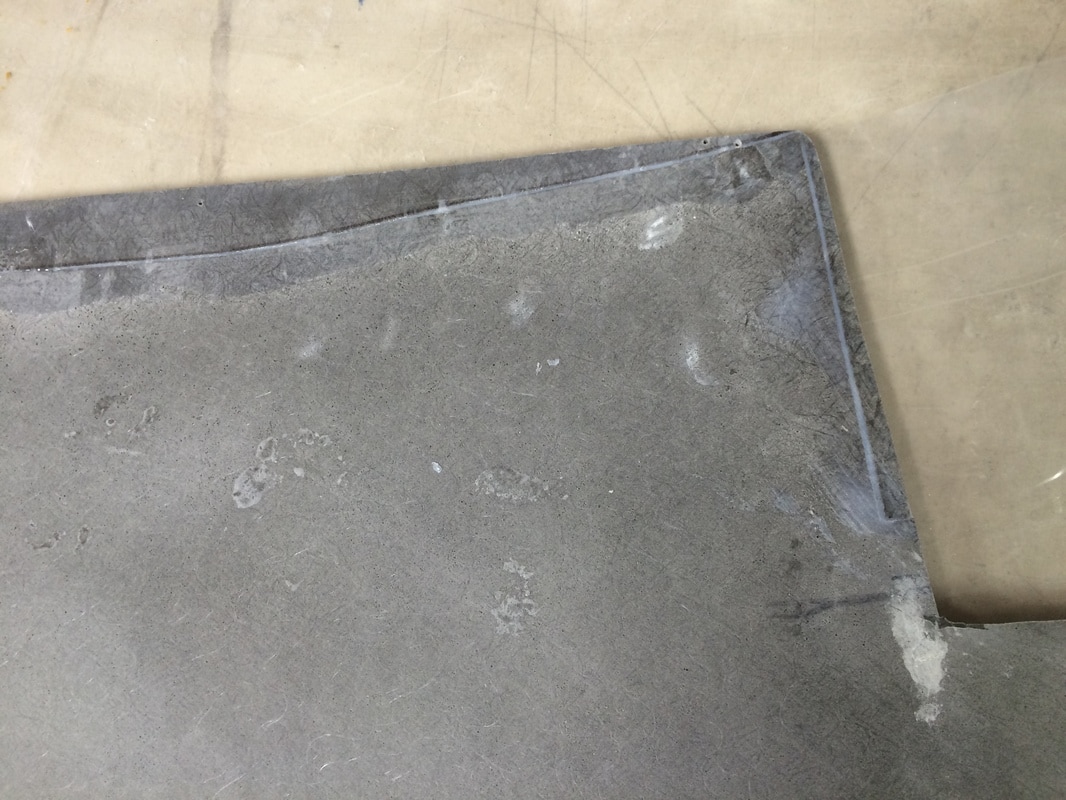
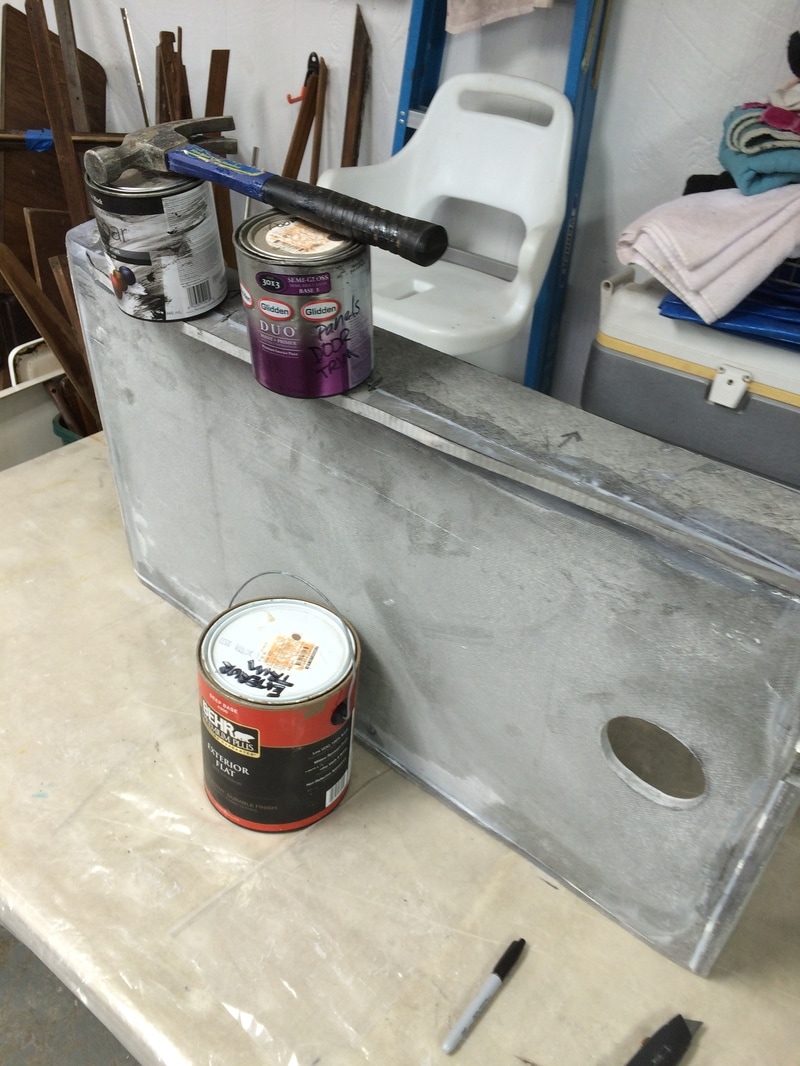
Cutting up a $1000 worth of composites was nerve racking, so I'm constantly worried my patterns were good. One layer of cloth for stiffness. These panels are the corner under the mast step. Wetted out. No need to hot coat. Just squeegee and go. Interesting fact about the forward head bulkhead: the original bulkhead is teak plywood. But it's wider than a 8x4' sheet. It's two pieces joined with dowels to creat one wide bulkhead. Even moving the bulkhead forward about 15" the bulkhead is still wider than a sheet. I added the small corner piece during fiberglassing.The hammer shows the corner piece added to extend the width of the bulkhead which is wider than a 4x8' sheet. Trimmed the fabric with scissors and then an angle grinder with a 30grit flapper wheel to take off the meat hooks. Easy. Fantastic edge and clean lamination. Did an experiment with the bare coosa panels for the bathroom cabinet, countertop, and shower step. Coated the side to be painted with thin coat epoxy resin. Some folks think coosa board absorbs a lot of paint. I don't see how that's possible since it only absorbs 5% moisture by specs. Resin was to fill the small imperfections. It worked excellent. Sanded down nice and I have no doubt it will take paint very nicely.
Cutting up a $1000 worth of composites was nerve racking, so I'm constantly worried my patterns were good. One layer of cloth for stiffness. These panels are the corner under the mast step. Wetted out. No need to hot coat. Just squeegee and go. Interesting fact about the forward head bulkhead: the original bulkhead is teak plywood. But it's wider than a 8x4' sheet. It's two pieces joined with dowels to creat one wide bulkhead. Even moving the bulkhead forward about 15" the bulkhead is still wider than a sheet. I added the small corner piece during fiberglassing.The hammer shows the corner piece added to extend the width of the bulkhead which is wider than a 4x8' sheet. Trimmed the fabric with scissors and then an angle grinder with a 30grit flapper wheel to take off the meat hooks. Easy. Fantastic edge and clean lamination. Did an experiment with the bare coosa panels for the bathroom cabinet, countertop, and shower step. Coated the side to be painted with thin coat epoxy resin. Some folks think coosa board absorbs a lot of paint. I don't see how that's possible since it only absorbs 5% moisture by specs. Resin was to fill the small imperfections. It worked excellent. Sanded down nice and I have no doubt it will take paint very nicely.


Lessons learned: My patterns were not as precise as I would have liked. I wish they had been tighter but the pink foam boards flexed; I ended up with places slightly small. In hindsight I wish I'd made them slightly too big since trimming coosa board is so easy. The little wood blocks are cheater blocks screwed into various places so the bulkheads are aligned and held in place for tabbing. Initial tabbing just to hold everything still while I fillet in all the edges and then start working up layers for full tabbing.
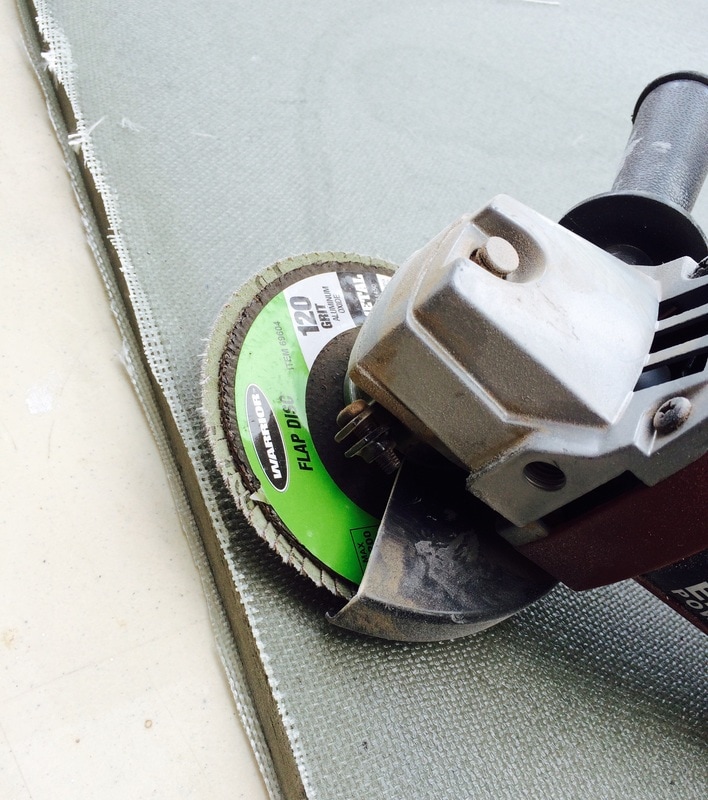
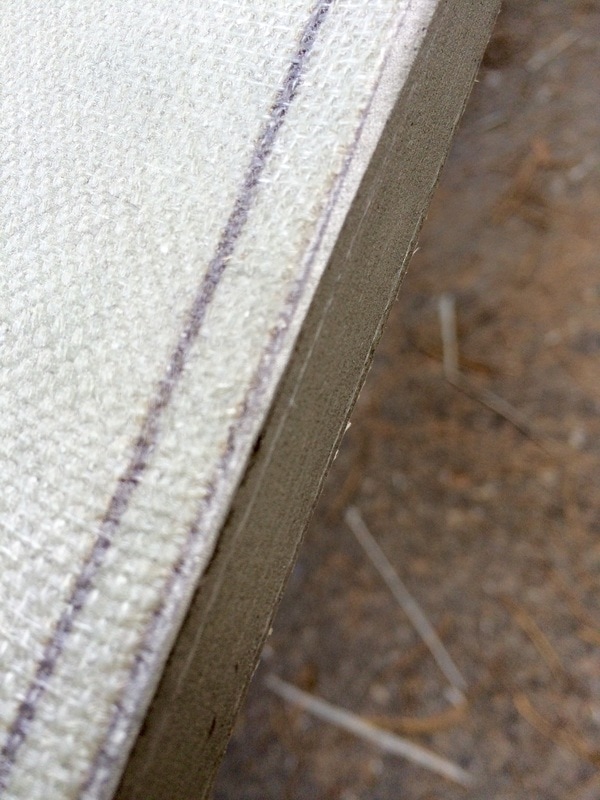
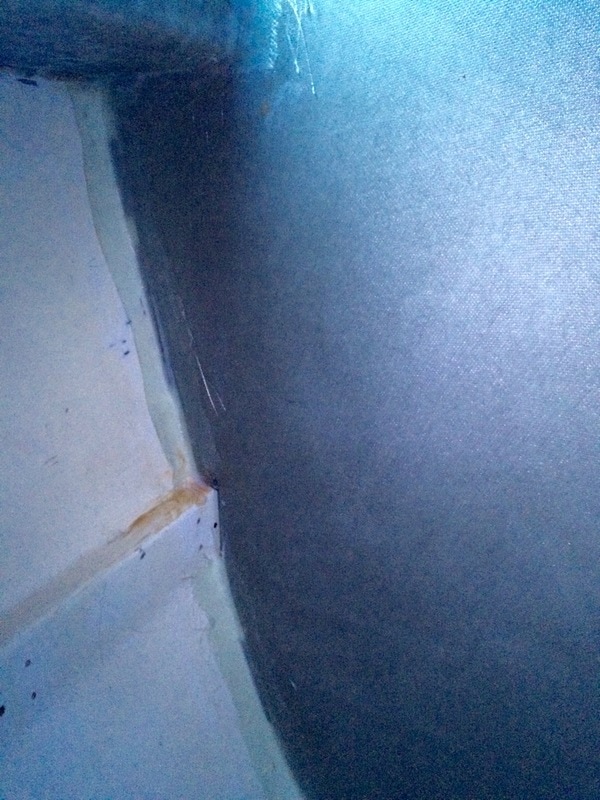
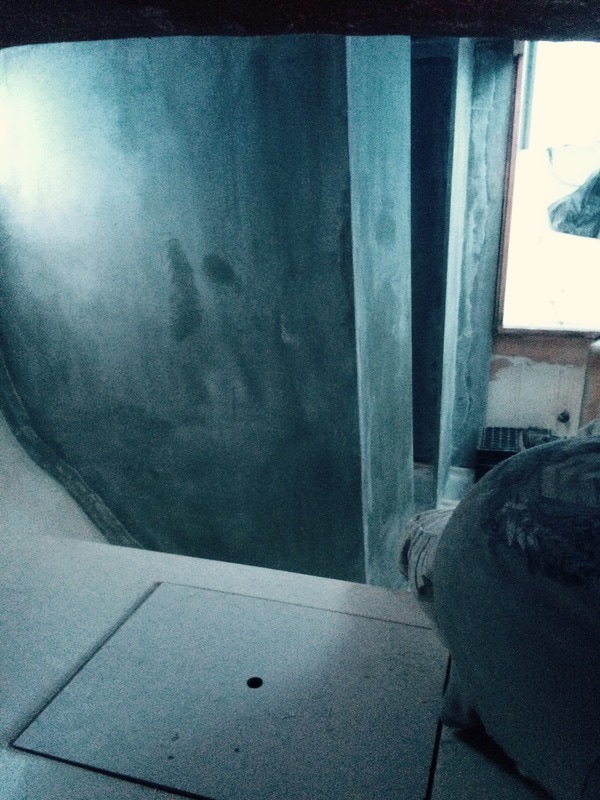
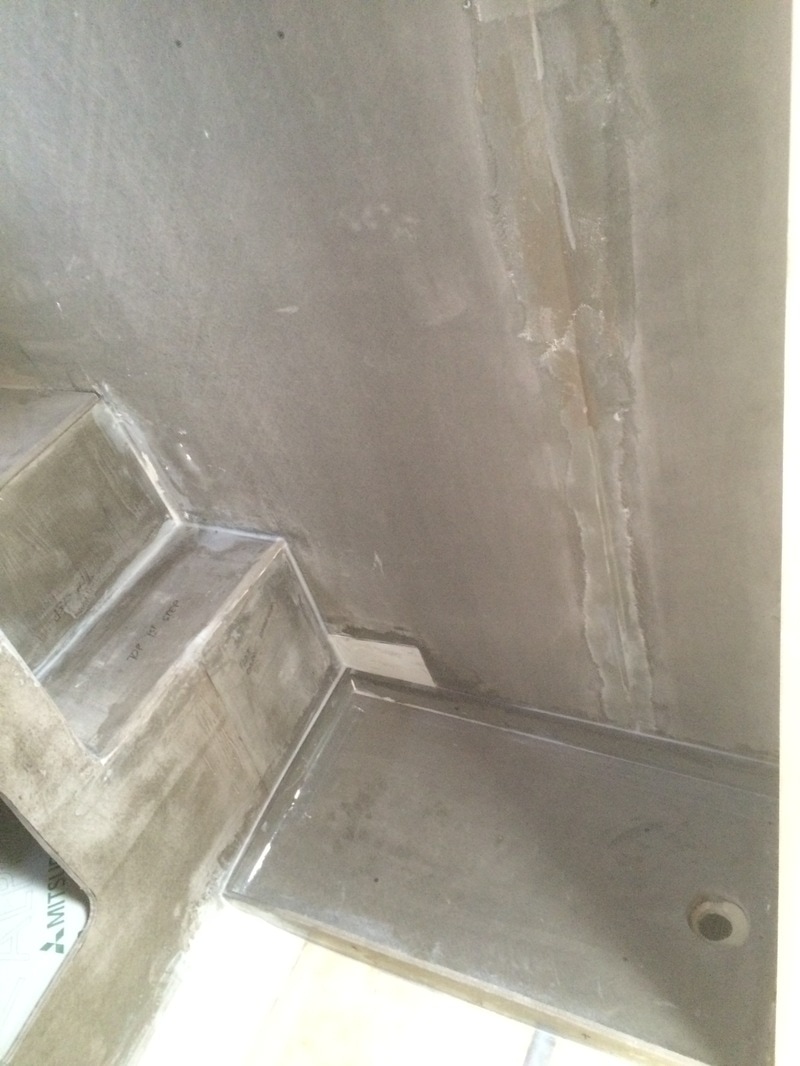
The coosa board can be trimmed to fit perfectly with an angle grinder using a 80 grit flap wheel. It's so fast an easy to shave a bit off here or there. In the spaces my patterns were too big, I got them just right. But the places where the patterns are too small --- well guess I will be filling that in somehow. There's a couple places where my patterns were as much as 1/2-3/4" off especially around the cabin area above the elbow. But you can't tell in these photos. Tip: I made markings on the ceiling and floor and it's a good thing because I had no idea where things went when I started reassembly of bulkheads. Also label everything consistently so you don't but something in backwards. Seem joining the aft bulkhead. This wall will be covered with white FRP panel to create the shower area. No comments on my sloppy fiberglass job. Aft bulkhead tabbed in place. The white around the verticle joint is light coming through a thin layer of glass. Obviously pattern was off. I started trying to fillet in the joints but some parts of the bulkhead kept shifting due to my terrible patterns and being cut slightly small. So I gave up until the initial tabbing hardens and I can remove the cheater blocks and get it right. Corner fwd bulkhead corner: that doorway is wheel chair accessible. Lol. Try that in your stock A27 closet head
The coosa board can be trimmed to fit perfectly with an angle grinder using a 80 grit flap wheel. It's so fast an easy to shave a bit off here or there. In the spaces my patterns were too big, I got them just right. But the places where the patterns are too small --- well guess I will be filling that in somehow. There's a couple places where my patterns were as much as 1/2-3/4" off especially around the cabin area above the elbow. But you can't tell in these photos. Tip: I made markings on the ceiling and floor and it's a good thing because I had no idea where things went when I started reassembly of bulkheads. Also label everything consistently so you don't but something in backwards. Seem joining the aft bulkhead. This wall will be covered with white FRP panel to create the shower area. No comments on my sloppy fiberglass job. Aft bulkhead tabbed in place. The white around the verticle joint is light coming through a thin layer of glass. Obviously pattern was off. I started trying to fillet in the joints but some parts of the bulkhead kept shifting due to my terrible patterns and being cut slightly small. So I gave up until the initial tabbing hardens and I can remove the cheater blocks and get it right. Corner fwd bulkhead corner: that doorway is wheel chair accessible. Lol. Try that in your stock A27 closet head
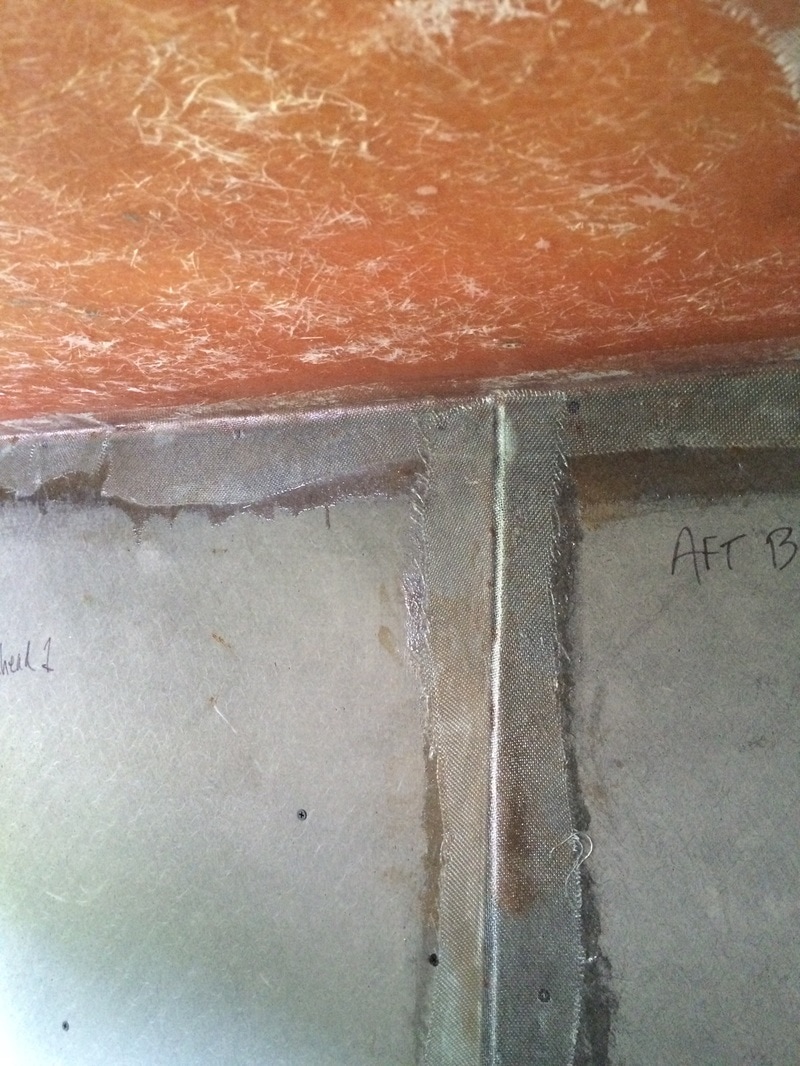
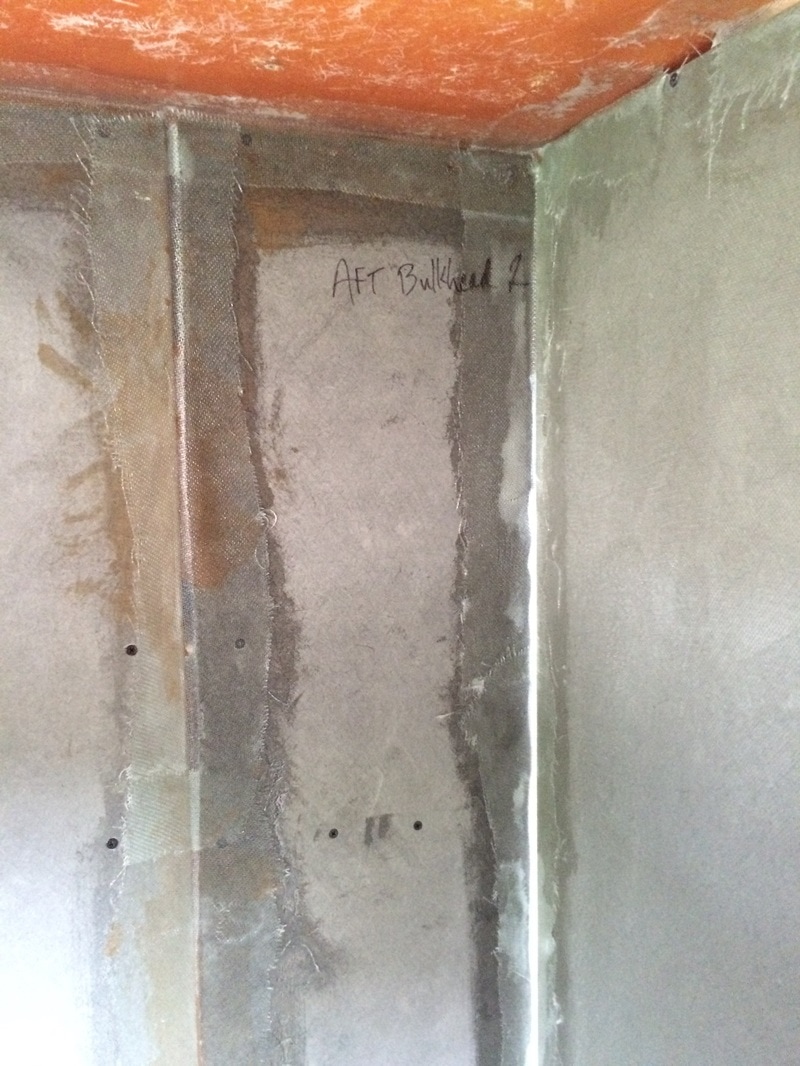


Very happy with the stiffness and rigidity of the coosa board bulkheads. Now that everything is tabbed in, it's tightened up the pan liner and as though the original bulkheads were never removed. Concerns about loosing the stiffness by cutting the original liner in the head are unfounded. My sloppy fiberglass job will be sanded down. I originally figured I'd sand the bulkheads and just paint. But now I'm considering an overlayment of some sort. At the aft bulkhead I will use FRP panels from a big box store $22 for 8x4' sheets. It has a gloss pebble pattern. Tabbing to the hull. It will take some sanding to get the tabbing to blend to the bulkhead.
I'm consider some sort of cosmetic overlayment for the bulkhead. On the forward bulkhead and the outside of the head I'm now thinking of 1/8 Sintra also known as Komatex in conjunction with my PVC wainscoating idea. Sintra is PVC foam board, a fascinating product. It's water proof light weight takes paint and thermo molded if need be. It's commonly used for sign material. Like for sale signs at big box stores. It's basically a rigid plastic. If you've never seen this product imagine 1/8 white poster board but instead of a soft foam core it's a hard plastic core solid. In 1/8" thickness it's a great surface. I recently acquired some samples off craigslist, so I will do some experiments and report its suitability for headliner material.
I'm consider some sort of cosmetic overlayment for the bulkhead. On the forward bulkhead and the outside of the head I'm now thinking of 1/8 Sintra also known as Komatex in conjunction with my PVC wainscoating idea. Sintra is PVC foam board, a fascinating product. It's water proof light weight takes paint and thermo molded if need be. It's commonly used for sign material. Like for sale signs at big box stores. It's basically a rigid plastic. If you've never seen this product imagine 1/8 white poster board but instead of a soft foam core it's a hard plastic core solid. In 1/8" thickness it's a great surface. I recently acquired some samples off craigslist, so I will do some experiments and report its suitability for headliner material.
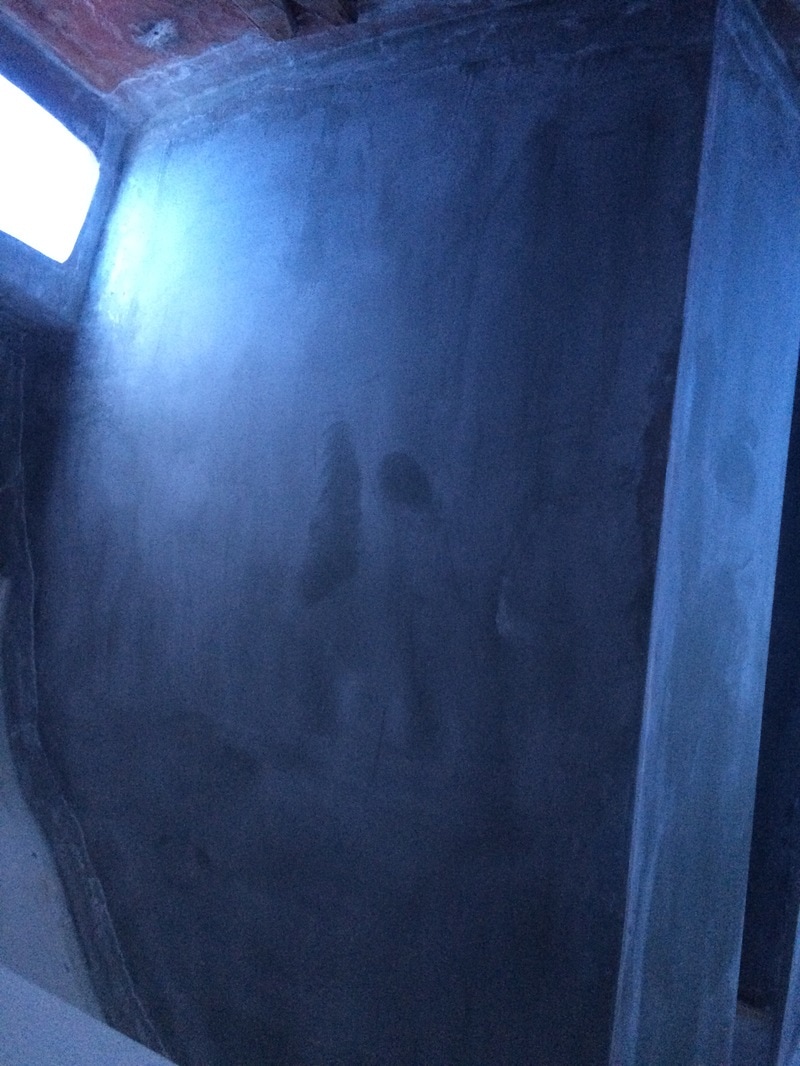


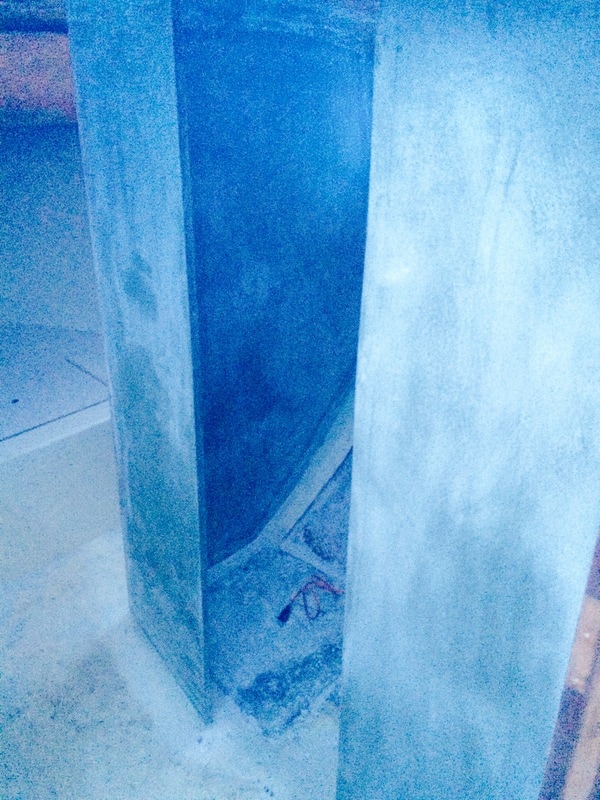

Photos of the finished bulkheads and my prior sanding job. Very pleased with the results and coosa board. Tabbing eventually came out nice. Pleased with how strong it is and man is the forward cabin/head stiff. It got tight when I filled the gaps and glasses the joint. I started with brown fillet filler 405 because I had some left over. But eventually switched to 406 void all silica because it just flowed better and I could buy in bulk.
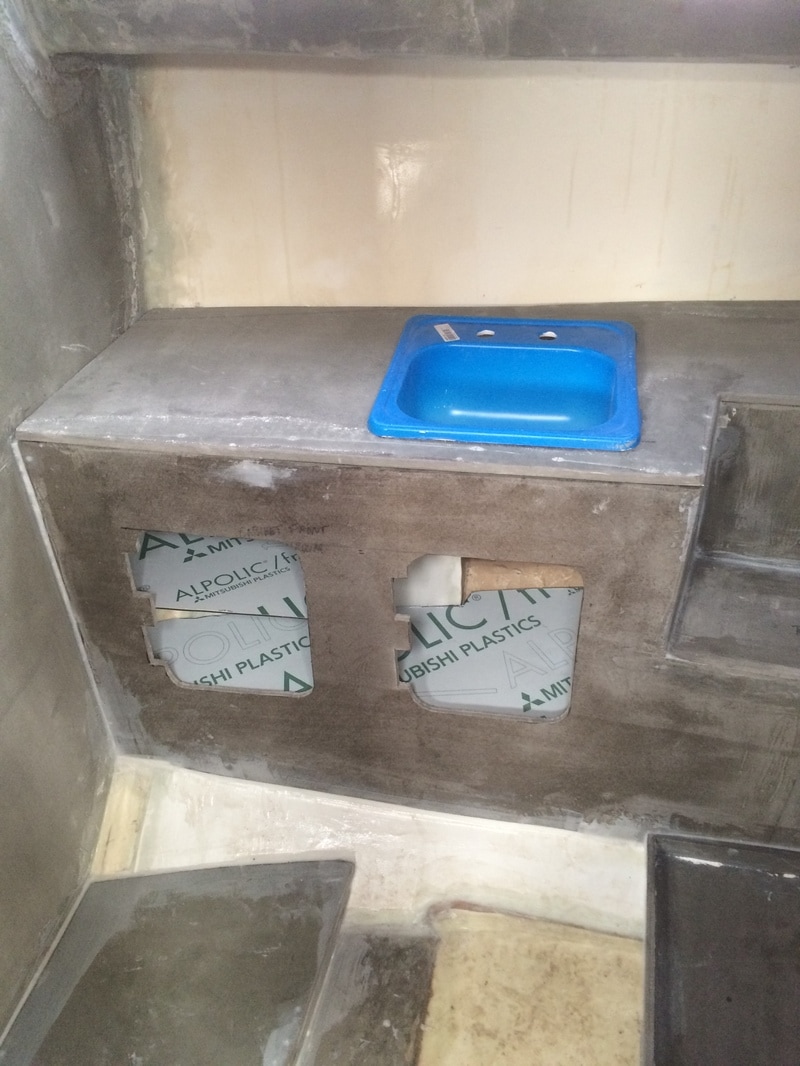
Next I started the install of the bathroom cabinet and countertop. As I was fitting the pieces I realized there will be some nice storage space inside. But because the liner was cut away the interior of whatever lockers I create will be rough fiberglass and essentially the boat hull. So I came up with a way to recreate the liner and span the openings where I cut everything away. I took a piece of FGP panel (like what I will use to line the shower area) and cut it to pattern so the pebble side is down. This leaves a smooth matte surface I can paint so the lockers interiors are very clean. If I had to do it again I would have waited to cut the cabinet panels and adjusted off my original patterns. As slight imperfections and modifications added up there was repeated trimming and adding to the final pieces to get everything to fit. Still needs some sanding and filling of various joints and places to make it seamless but the skeleton of the head is basically done.
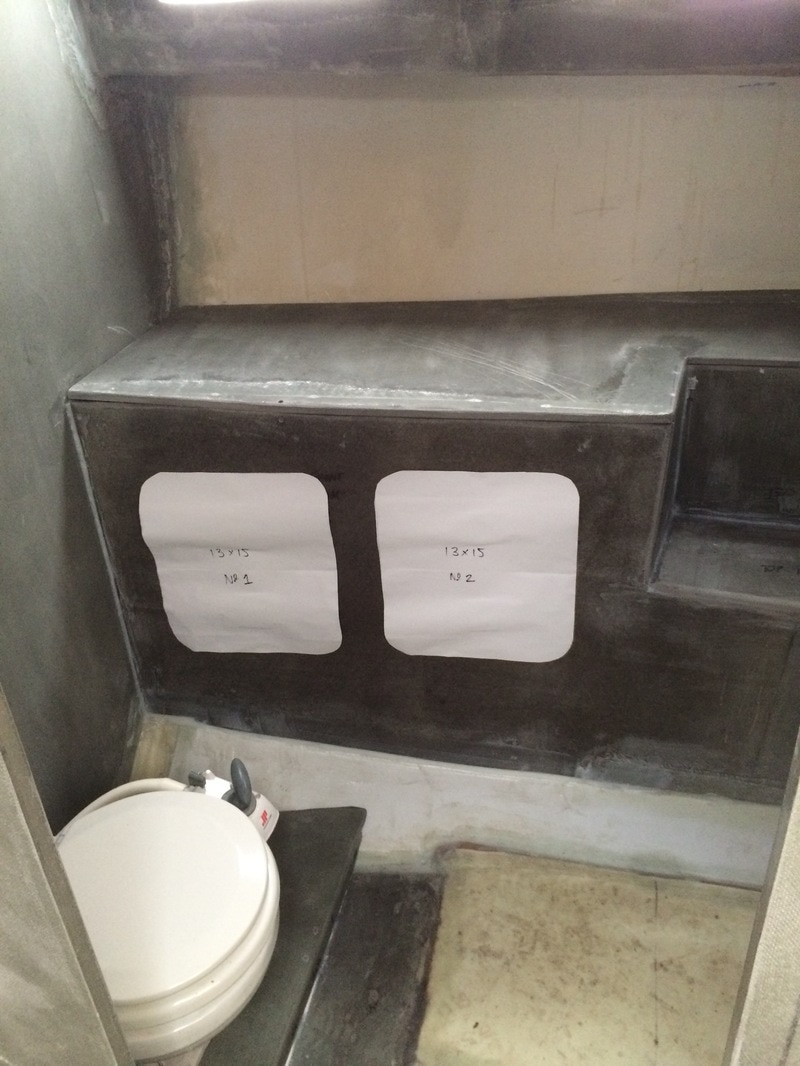
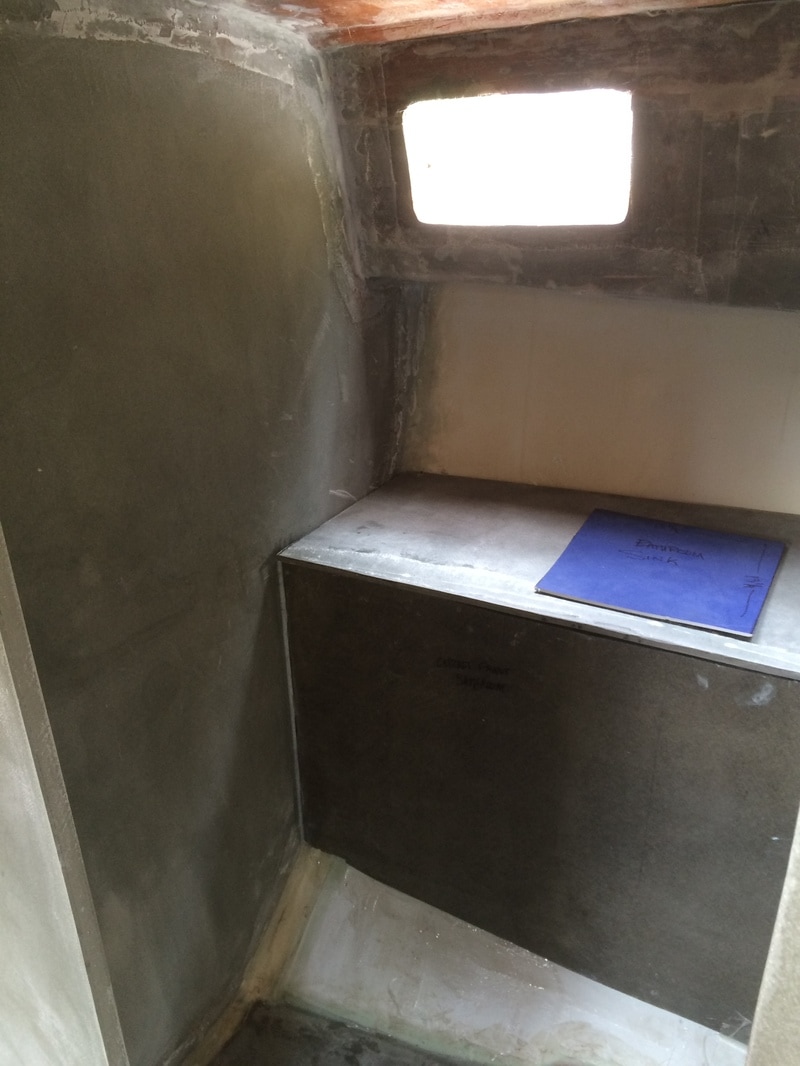
The blue cardboard represents the cutout for the sink. 13 1/4"x 13 1/4". The sink will be 15" square and set into a solid countertop which gets set over the coosa board.The top of the cabinet is still removable so I can paint, $ install some shelves & plumbing inside. The facing of the cabinet will have two plastic white hatches that give access to the insides of the cabinet.
Next I started the install of the bathroom cabinet and countertop. As I was fitting the pieces I realized there will be some nice storage space inside. But because the liner was cut away the interior of whatever lockers I create will be rough fiberglass and essentially the boat hull. So I came up with a way to recreate the liner and span the openings where I cut everything away. I took a piece of FGP panel (like what I will use to line the shower area) and cut it to pattern so the pebble side is down. This leaves a smooth matte surface I can paint so the lockers interiors are very clean. If I had to do it again I would have waited to cut the cabinet panels and adjusted off my original patterns. As slight imperfections and modifications added up there was repeated trimming and adding to the final pieces to get everything to fit. Still needs some sanding and filling of various joints and places to make it seamless but the skeleton of the head is basically done.
The blue cardboard represents the cutout for the sink. 13 1/4"x 13 1/4". The sink will be 15" square and set into a solid countertop which gets set over the coosa board.The top of the cabinet is still removable so I can paint, $ install some shelves & plumbing inside. The facing of the cabinet will have two plastic white hatches that give access to the insides of the cabinet.


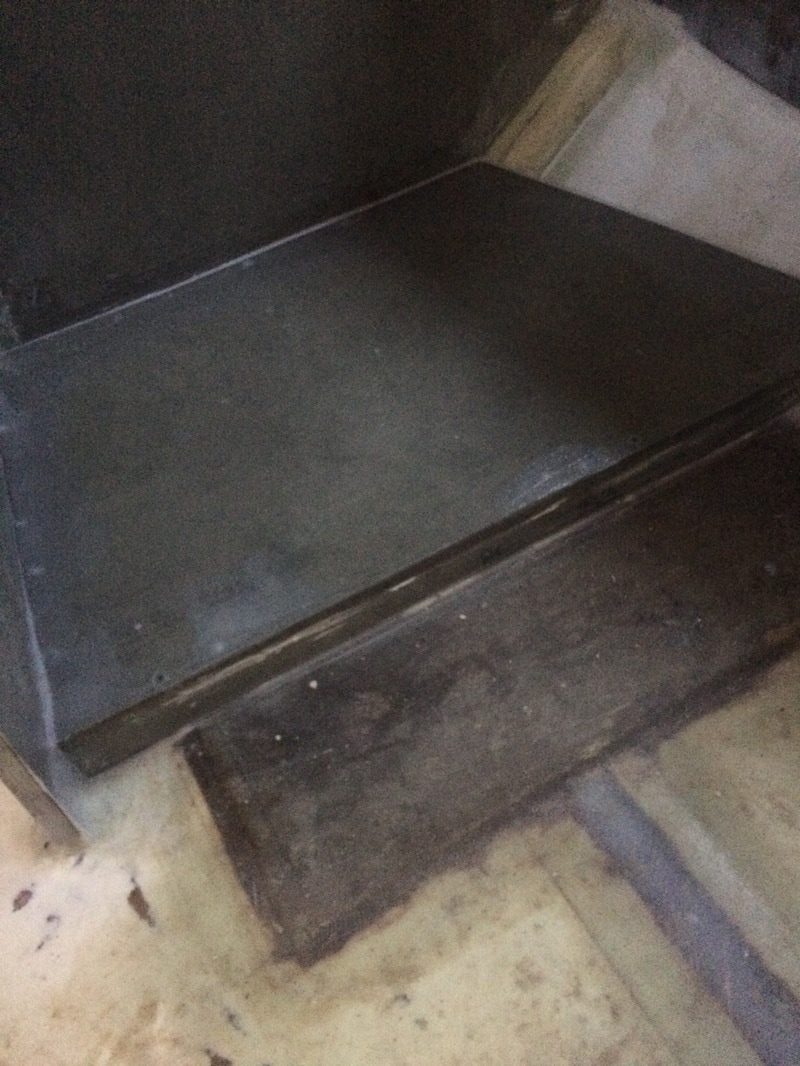
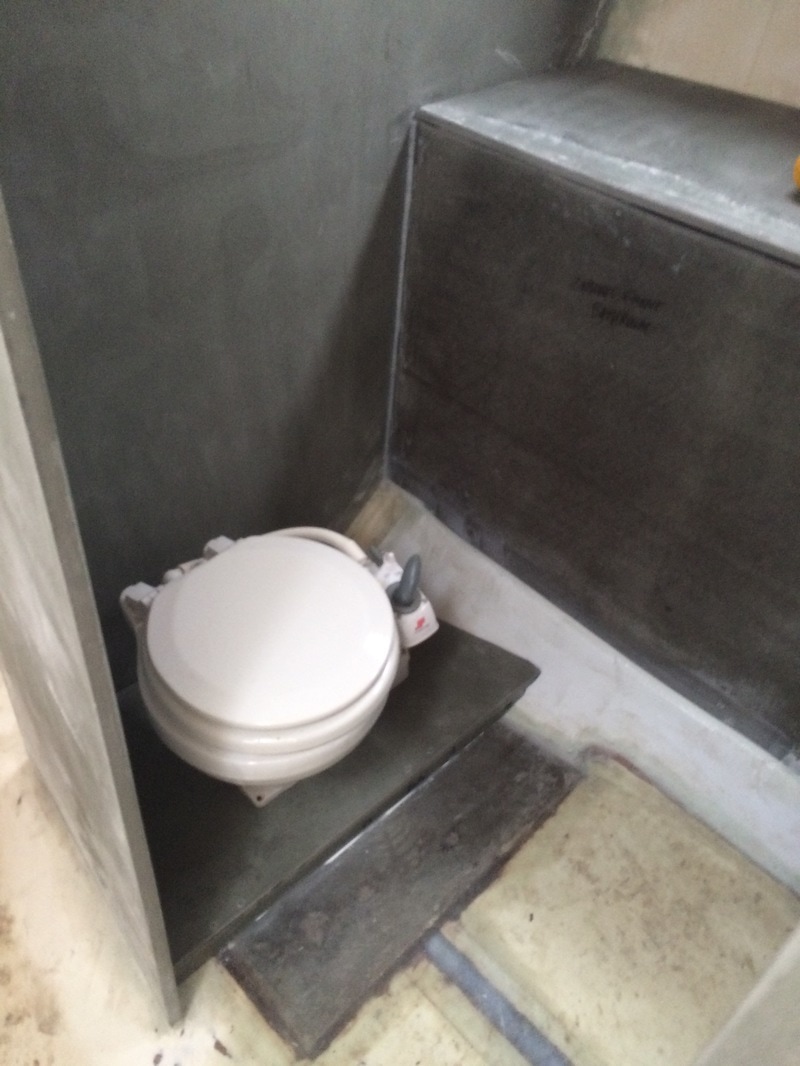

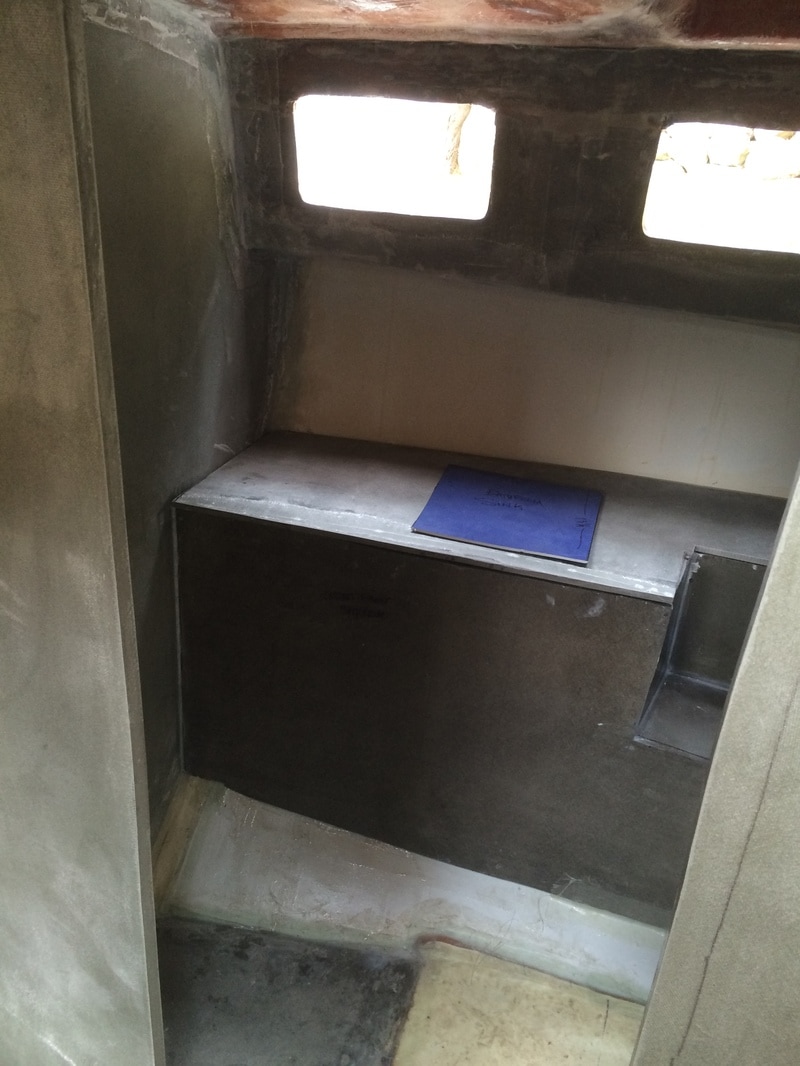
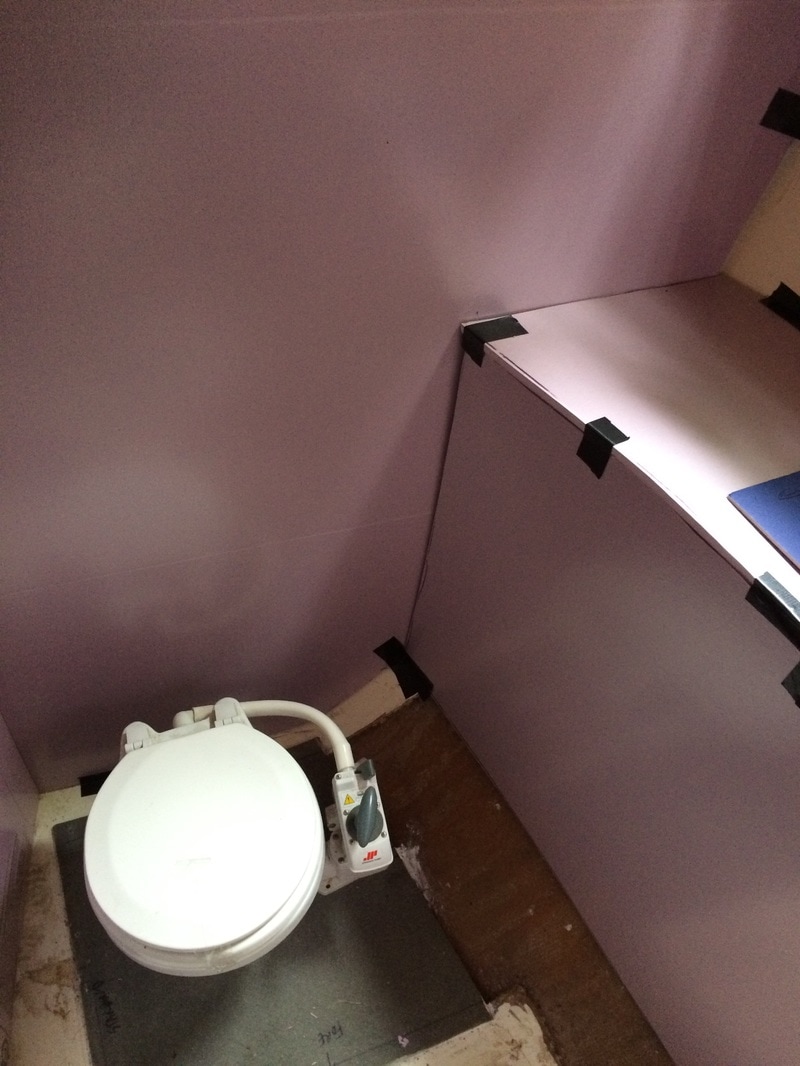
Toilet platform installed. The platform sits 2" off the bathroom floor so the new toilet will come right in at 16-17" seat height. One of the things I always hated was lower toilets in boats where you feel like your squatting. This is my mockup toilet, the manual nearly new manual Johnson that is for sale incidentally if anyone needs a replacement head. The new toilet is a Masterflush electric. There will be a switch on the cabinet bulkhead.


Installing the Shower Pan Subfloor
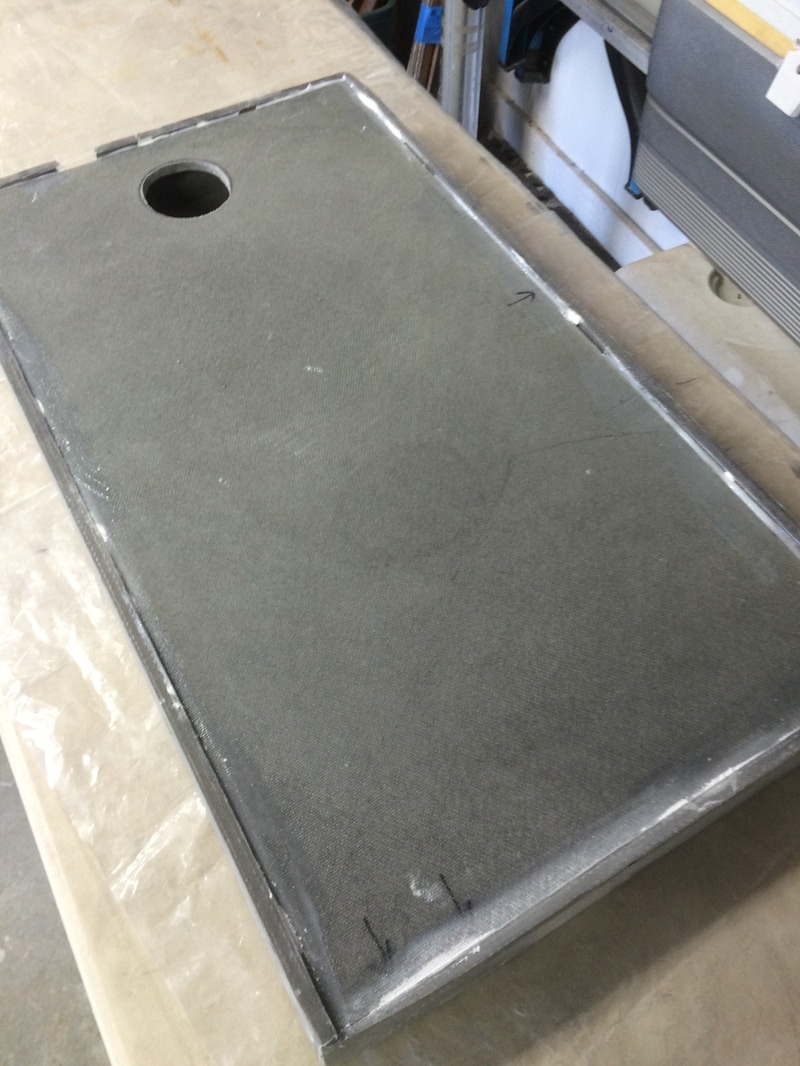
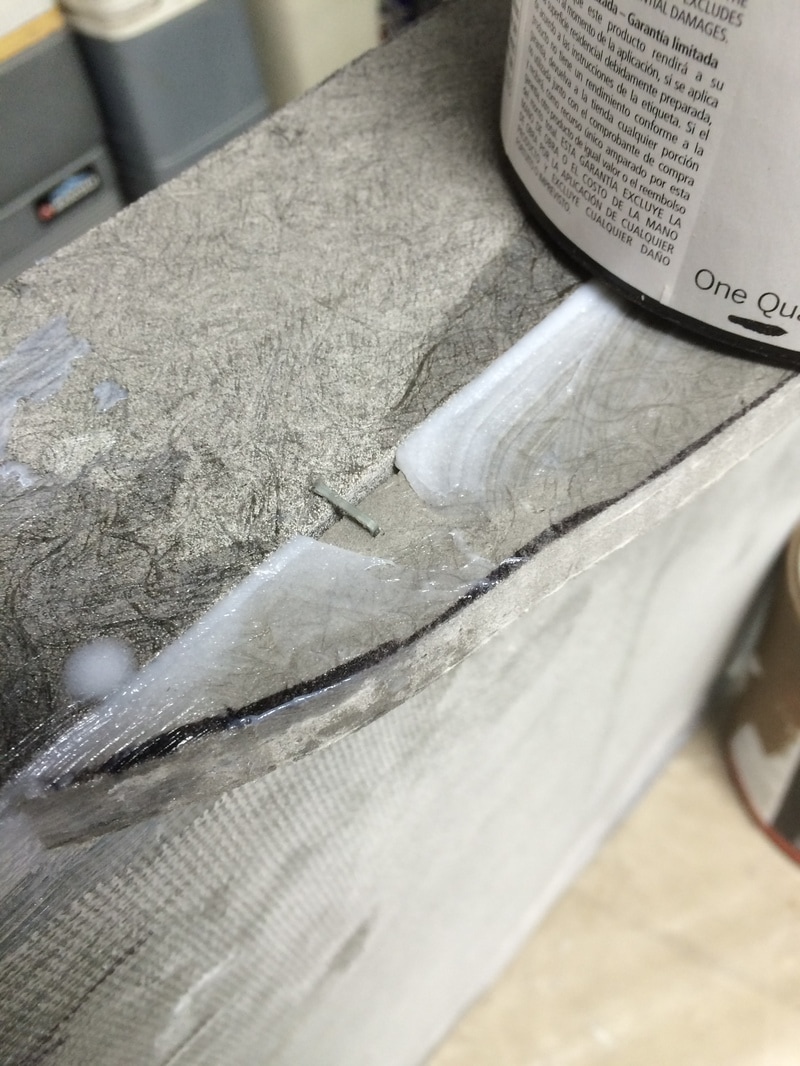
The shower pan is thin plastic; it's an RV shower pan and I couldn't get a cheap fiberglass one that fit my unquie size. So the plastic shower pan has to be supported completely so there's no movement or flexing. I basically created a frame around the pan, by laying the pan upside down and building a coosa frame around it. Once together I was able to grind the frame from the outside to get the pan to sit as flush as possible to the bathroom floor. But even then the hull curves quite a bit so there needs to be supports along the span of the pan and then I had to build up the front facing if the frame. Again the staple and glue technique did not fail. Because the frame is made of 1/2" coosa that's glasses on one side with fabric the supports are just to keep it from flexing. Staple and glass technique to get the front of the shower pan frame to match the curve of the hull as it descends into the bathroom


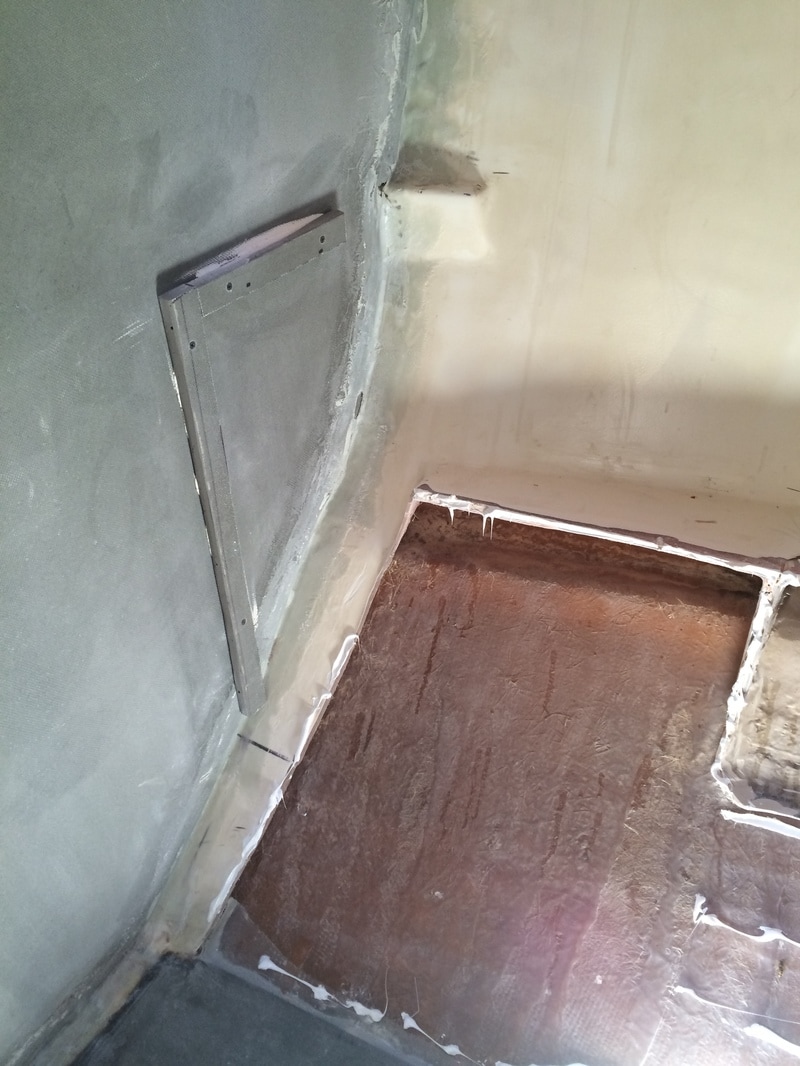
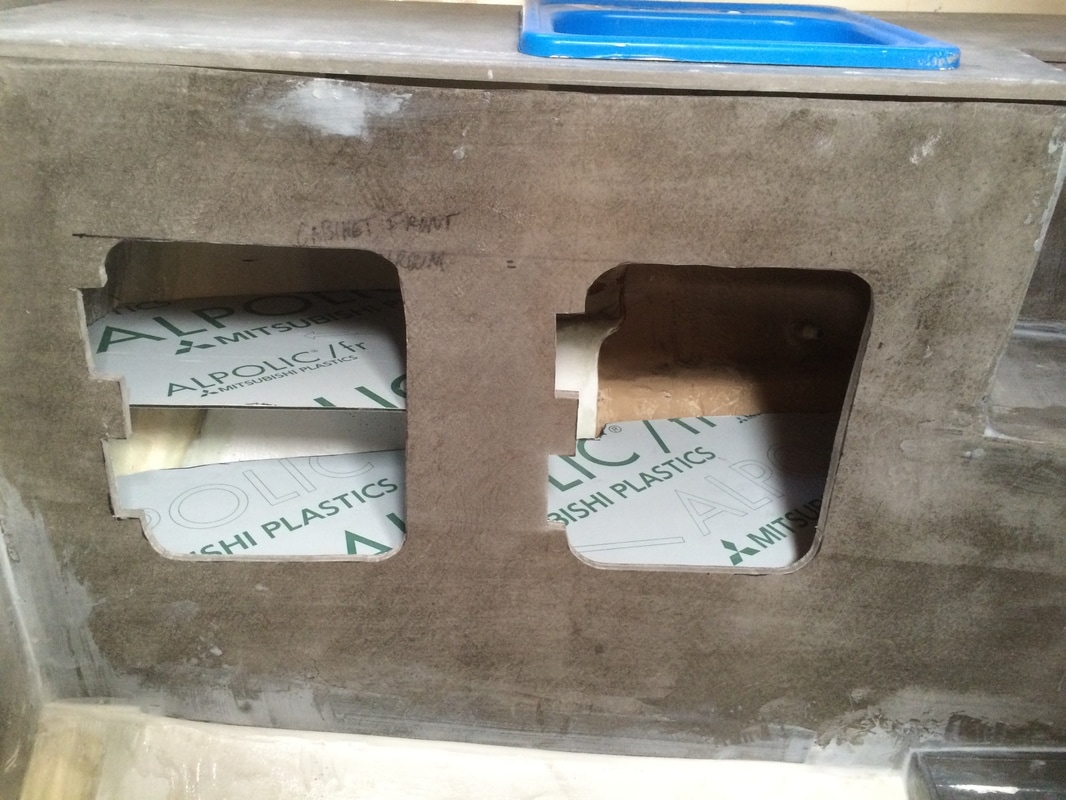
This is the 15" fiberglass sink and cabinet shelves. It's white in color, the blue is a protective film to protect the finish during installation. The cabinet shelving is made of a new product called Apolic FR. It basically aluminum composite panel (ACM) which is used as exterior paneling for commercial properties and modern architecture. Also a common product for custom sign making or demo booths for sales conventions. It's approx 4mm thick. The bottom is powder coated aluminum skin sandwiching a hard rubber plastic core. Very stiff, very light. Has a clear coat on the finish side. I had some scrap material I scored off craigslist and decided to try it out. I've been testing a piece outdoors for the past two months and it's held up very well. I considered using this for a countertop because there's a brushed metal finish that looks like stainless but it turns out my scraps are white with a few metal trim pieces. So I guess I will go with a solid surface countertop and use the Apolic for shelving, instrument panels, etc. Unfortunately I repurposed my medicine cabinet frame to fit the new bathroom. You wouldn't have wanted it anyway since it was damaged on one end. Looks like a grinder mishap. Bad news for you, but good for me since I only needed 15" for my new medicine cabinet. Just need to tie it in with the cabin top

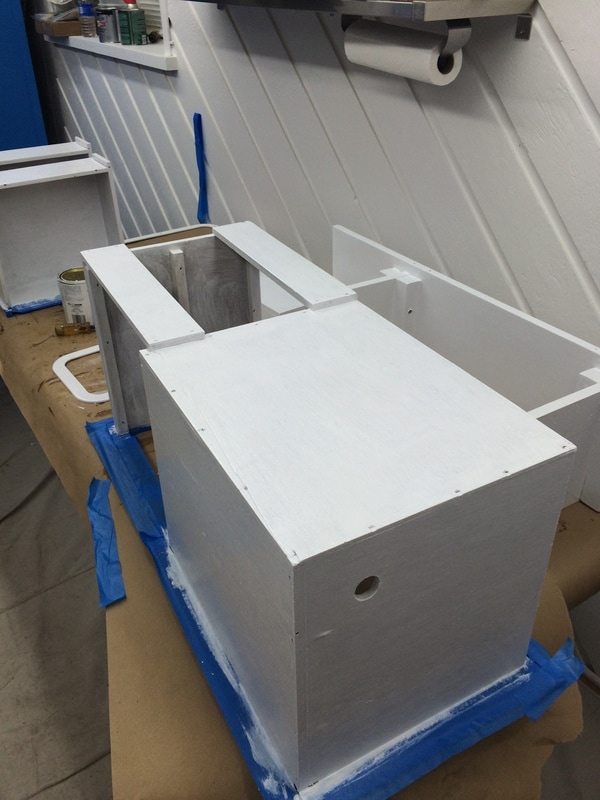
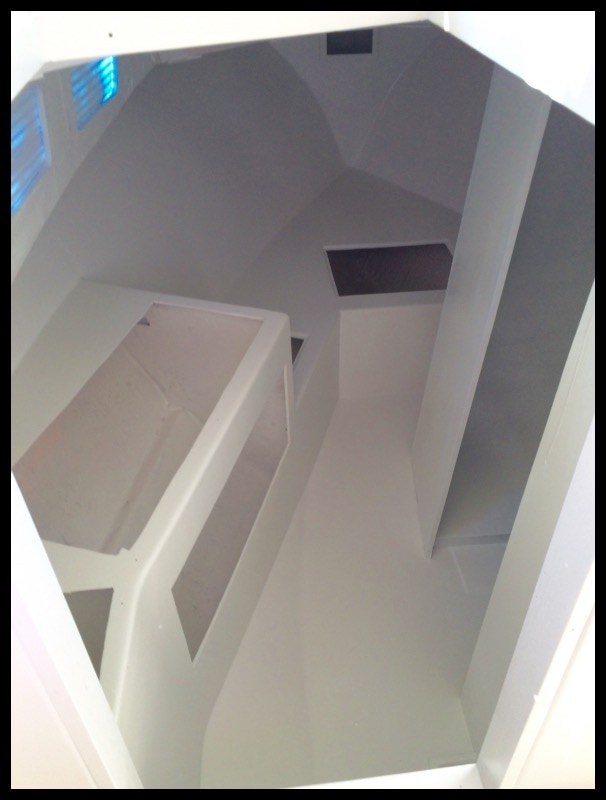
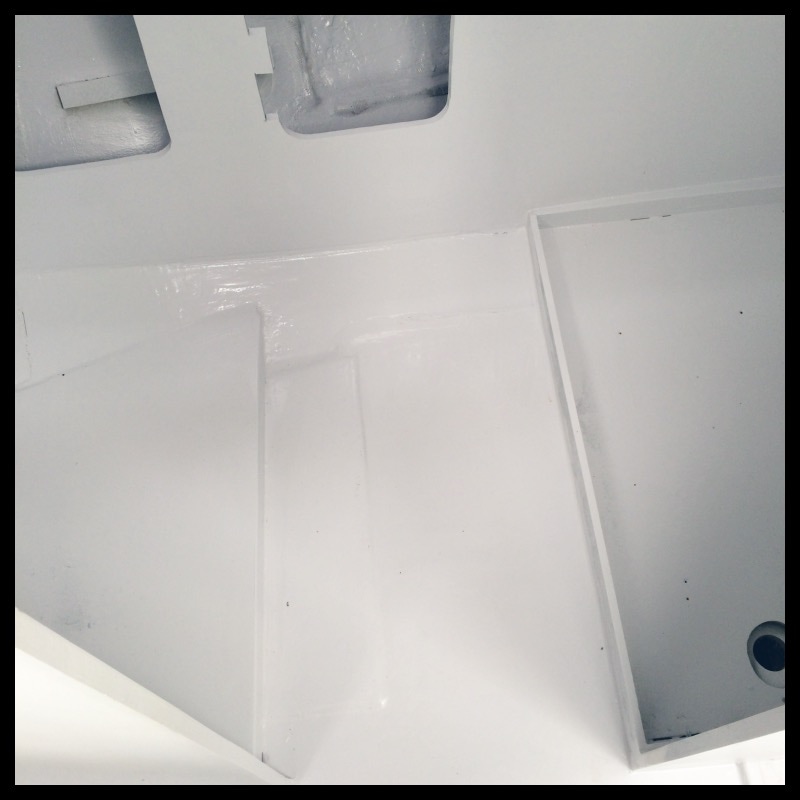
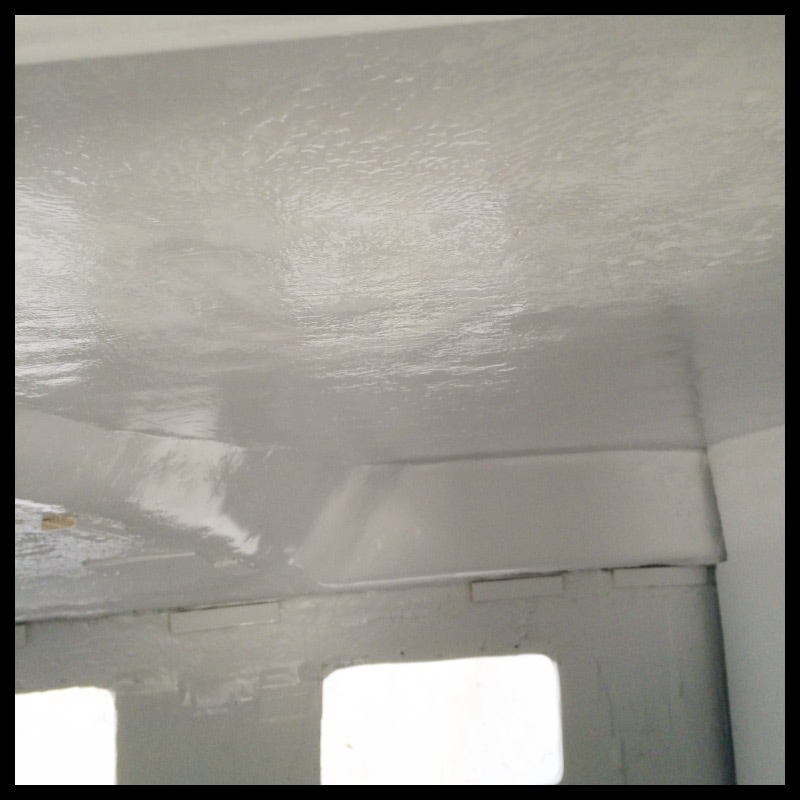
On to paining: it took about 5 gallons of primer to do the entire interior. But I was a little heavy when I started and I wanted a decent white covering. The sprayer puts paint into places you can barely reach with a brush and it does it evenly. You can read about the painting process here: Painting an Albin 27


Headliner and Wall Coverings
Winter 2017: The plan is for wainscoting on just a few vertical surfaces. Perhaps not all, but maybe the fwd facing head bulkhead on both sides. The shower area will have FRP shower panels with pebble pattern. Everything else will have Sinatra pvc panels (ceilings big and all other bulkheads). Because the wainscoting only comes in tongue and groove planks it makes it tough to use on the ceiling where there’s curves etc. I also think that wainscoting texture is great as an “accent” and probably best not to be overdone. The more clean white surface inside the boat the better.
On the upper bulkheads, around the portholes and and ceiling, I'm going to use Sintra panels attached to battens glued to the hull. Sintra is a close cell PVC foam board product. It's also known as Celltec, Komatec. Komatex, etc. Even though its called "foam board" its not a soft foam product, its a rigid pvc product. This product is very similar to vinyl trim molding sold at big box stores, except its more rigid and comes in partial to full size 8'x4' sheets 1/8-1" thick. At 1/16-1/8" thick (approx 2mm) these sheets are flexible, can be thermo molded and trimmed with a knife to fit the complex curves of the boat.
On the upper bulkheads, around the portholes and and ceiling, I'm going to use Sintra panels attached to battens glued to the hull. Sintra is a close cell PVC foam board product. It's also known as Celltec, Komatec. Komatex, etc. Even though its called "foam board" its not a soft foam product, its a rigid pvc product. This product is very similar to vinyl trim molding sold at big box stores, except its more rigid and comes in partial to full size 8'x4' sheets 1/8-1" thick. At 1/16-1/8" thick (approx 2mm) these sheets are flexible, can be thermo molded and trimmed with a knife to fit the complex curves of the boat.
